Workspaces
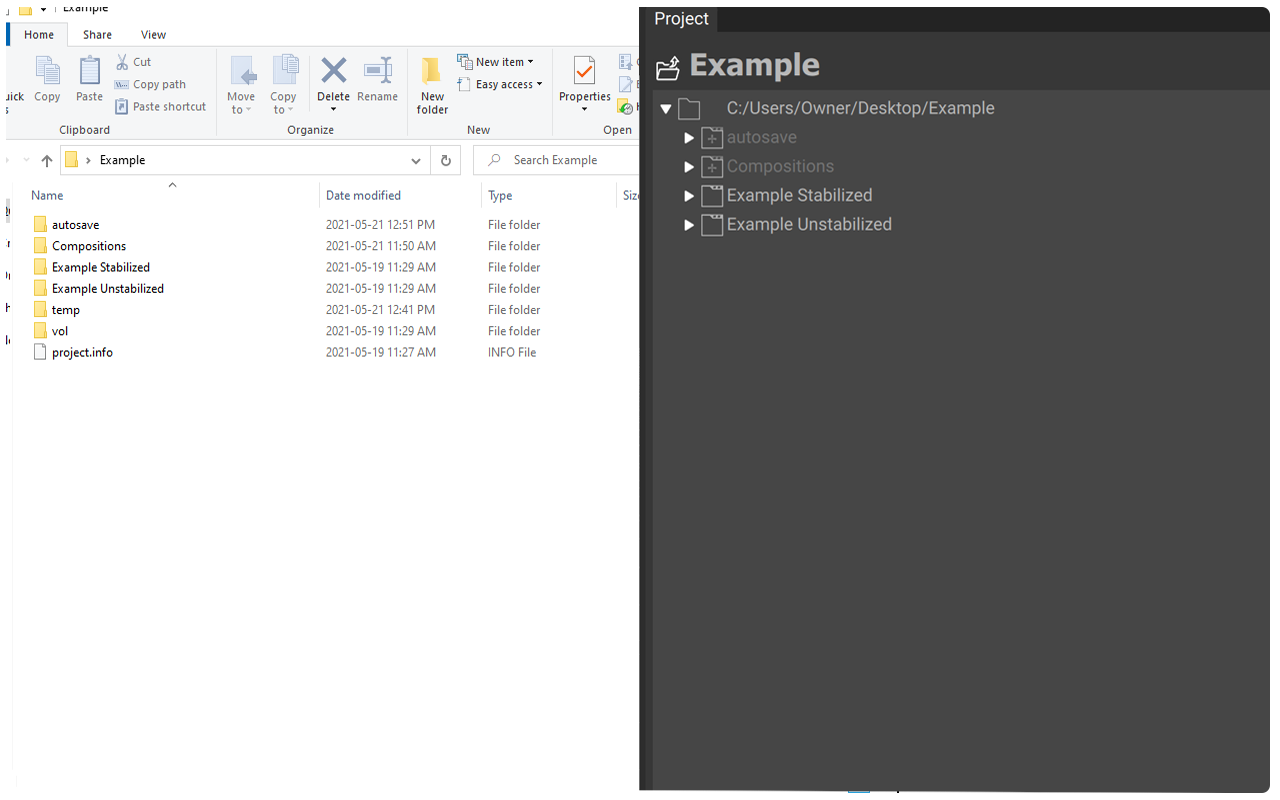
All data used in HoloEdit is contained in Workspaces. A workspace is a folder on your computer where HoloEdit stores clips, compositions, and other data necessary to edit volumetric video. Any files placed in your workspace directory will be automatically detected inside HoloEdit, and supported mesh and texture files can be imported as clips.
Choosing a Workspace
Upon first launching HoloEdit, or any other time by choosing “File > Open Workspace”, you must choose a workspace to use for your work in HoloEdit. Pressing the “Open Workspace” Button will launch the “Select Workspace” file browser. The folder you specify will be used as your workspace.
To switch workspaces, you can use the Open Workspace button in the File menu, and select any non-workspace folder to create a new workspace, or an existing workspace directory to open that workspace. Closing or opening a new workspace will delete any unsaved changes in your current composition. Tracks, intervals, and job-results are stored on the composition, so be sure to save your composition before closing a workspace.
When creating a new workspace, you will be prompted to confirm you are sure you would like to create a workspace. Because all files and subfolders in the specified workspace will be indexed by HoloEdit and have corresponding .meta files created, it is not recommended to use an existing folder (such as “My Documents”) as a HoloEdit workspace.
A single workspace cannot be open in two instances of HoloEdit at once. Selecting a workspace that is already open in a running instance of HoloEdit will cause an error message to appear.
Warning
When creating a workspace ensure that the folder location is not nested within an existing workspace. Creating a workspace within an existing workspace can lead to corrupted compositions and errors while working with HoloEdit.
Projects
Each workspace corresponds to a HoloEdit Project. While workspaces are the directory that lives on your computer and contains your volumetric data, the project is the representation of that data inside of HoloEdit, broken down into asset files, folders, and clips. For more information on working with projects, see the Project Panel section.
.Meta Files
HoloEdit will detect and generate .meta files for any files and folders that you add to the workspace. The files are used internally by HoloEdit to keep track of your files in the project.
Generally, you shouldn’t interact with .meta files, and you should only interact with the workspace directory in the following ways:
To add data: Move or paste that data into the workspace directory, or a subfolder other than /vol, via the file explorer or by dragging and dropping content into the project window
To update files or Clips: Copy and overwrite the related files or folders
To remove a Clip: Delete the clip’s folder and all of its contents via the file explorer or by right clicking on the folder in the Project Panel and selecting delete
Removing individual files within a clip isn’t recommended, but can be achieved by deleting individual files and their corresponding .meta files.
When moving or renaming a file: Move files via the file explorer, rename using the file explorer or by right clicking on the folder in the Project Panel and selecting Rename. Move or rename the .meta file as well
Project Data
In addition to .meta files, during workspace creation the workspace directory is be populated with a /vol directory and a project.info file. These files are automatically generated and maintained by HoloEdit, and opening or editing them may render your workspace unusable.
The /vol directory contains internal assets generated from clips, compositions, jobs, and other processes in HoloEdit. This directory is required for the workspace to function. On some long-lived or complicated workspaces, the /vol folder may grow to a very large file size. To clean up unused /vol data or extract a small portion of a Workspace without extra files, use the Manage Workspace tool.
.Clip Files
When a user creates a Clip, a .clip file is automatically generated within the clip directory. Users should take care not to move or delete a .clip file except when deleting the entire clip directory.
The Manage Workspace Tool
The Manage Workspace tool included in the Tools menu can be used to clear excess data from a workspace or to create a new, small workspace from one or more compositions and their dependencies.
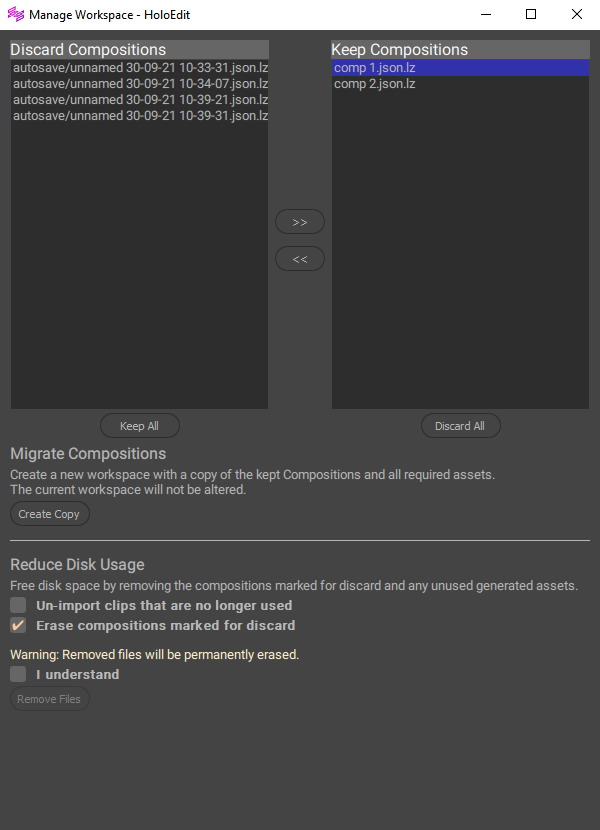
The Manage Workspace window is made up of three sections:
Discard/Keep Compositions: The two large boxes at the top of the window
Migrate Compositions: Information and options relating to migrating compositions
Reduce Disk Usage settings: Options for configuring the Remove Files operation.
The Discard/Keep Compositions lists
The Discard Compositions and Keep Compositions lists contain all indexed compositions in your current workspace, including autosaves. Compositions on either list can be selected by left clicking, and you can make multiple selections via shift + click to select a range, ctrl + click to add to selection, or clicking and dragging to select a range.
With one or more compositions selected in either list, you can press the >> and << buttons to move the selection between the two categories. You can press the “Keep All” or “Discard All” buttons to move every composition regardless of selection type.
The compositions listed in “Keep Compositions” and their source files will be preserved without alteration when Migrating or Removing Files. The compositions listed in Discard Compositions along with any source files and clips not referenced in the Keep Compositions will be excluded from migration, or eligible for deletion with the Remove Files button.
Migrating Compositions
You can use the Create Copy button to create a new workspace containing only the compositions included in the “Keep” list and those compositions’ dependencies.
After pressing the Create Copy button, HoloEdit will open up a Select Destination Workspace file browser where you can choose a new empty folder for your target workspace. After selecting a folder, HoloEdit will create a new workspace at that destination based on the selected compositions.
If the target folder contains files with the same names as any files from the compositions in the Keep column, HoloEdit will prompt you to confirm overwriting those files.
After the operation is complete, a small success window will appear with a summary.
Configuring Reduce Disk Usage options
Two options are provided for the Remove Files command.
Un-import clips that are no longer used: With this option enabled, any clips not included in the Keep Compositions will be un-imported. This does not delete the source files from your workspace, and these clips can be re-imported at any time. However, un-importing can save a significant amount of space by removing internal files generated during the Create Clip process.
Erase compositions marked for discard: Delete all compositions in the Discard Compositions list.
Removing Files
To access the Remove Files button, you must check the I Understand checkbox to confirm that you understand files will be permanently erased. The “Remove Files” button initiates the removal process using your specified settings. A window will appear to display the progress.
After the operation is complete, a small success window will appear with a summary.
Index Repair Tool
This feature can be used to help repair a workspace with corrupted or missing index files. The Index Repair Tool can be used if there is an issue related to opening a HoloEdit composition causing HoloEdit to crash or hang.
Use this feature if an error message indicating issues with your index occurs and you find yourself unable to open a workspace. Close any active workspaces (using File > Close Workspace), with no active workspaces open go to Tools>Manage Workspace. At the bottom of the Manage Workspace window click “Select Workspace to Repair”. Using the File Explorer window navigate to the folder containing your workspace and click “select Folder” to will begin the Index recovery process.