Exporting AVV Files
AVV files require several stages to be run prior to being exported. You will also need to set your texture percentages to ensure you are capturing all of the important detail while keeping the file size as small as possible. This guide is aiming to clarify how best to configure these setting for an optimal AVV file. Let’s first take a look at how an AVV file is decoded to better understand how to set our export settings.
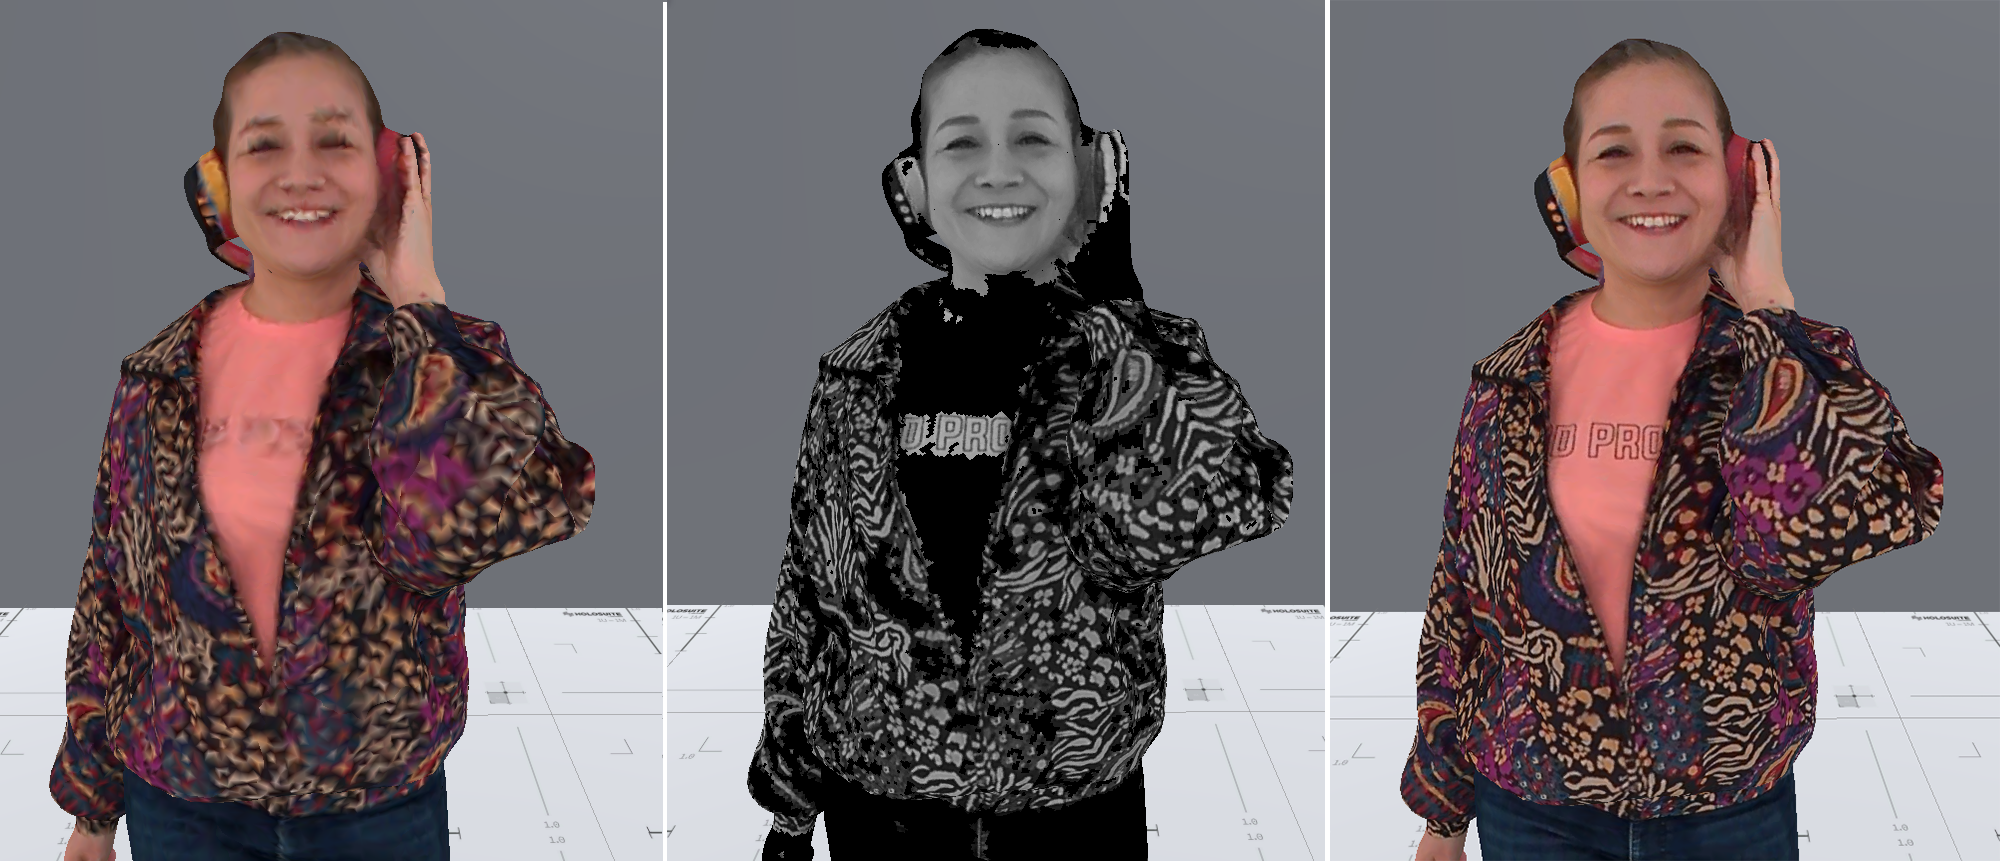
Luminance textures and vertex colors
AVV files store the color and details of the textures separately. The details are stored as a black and white luma texture, while the colors are stored as vertex colors on the mesh. Looking at the images below, the image on the left shows the vertex colors, the middle image shows the luma texture, and the image on the right shows them both composited together.
Vertex density as color density
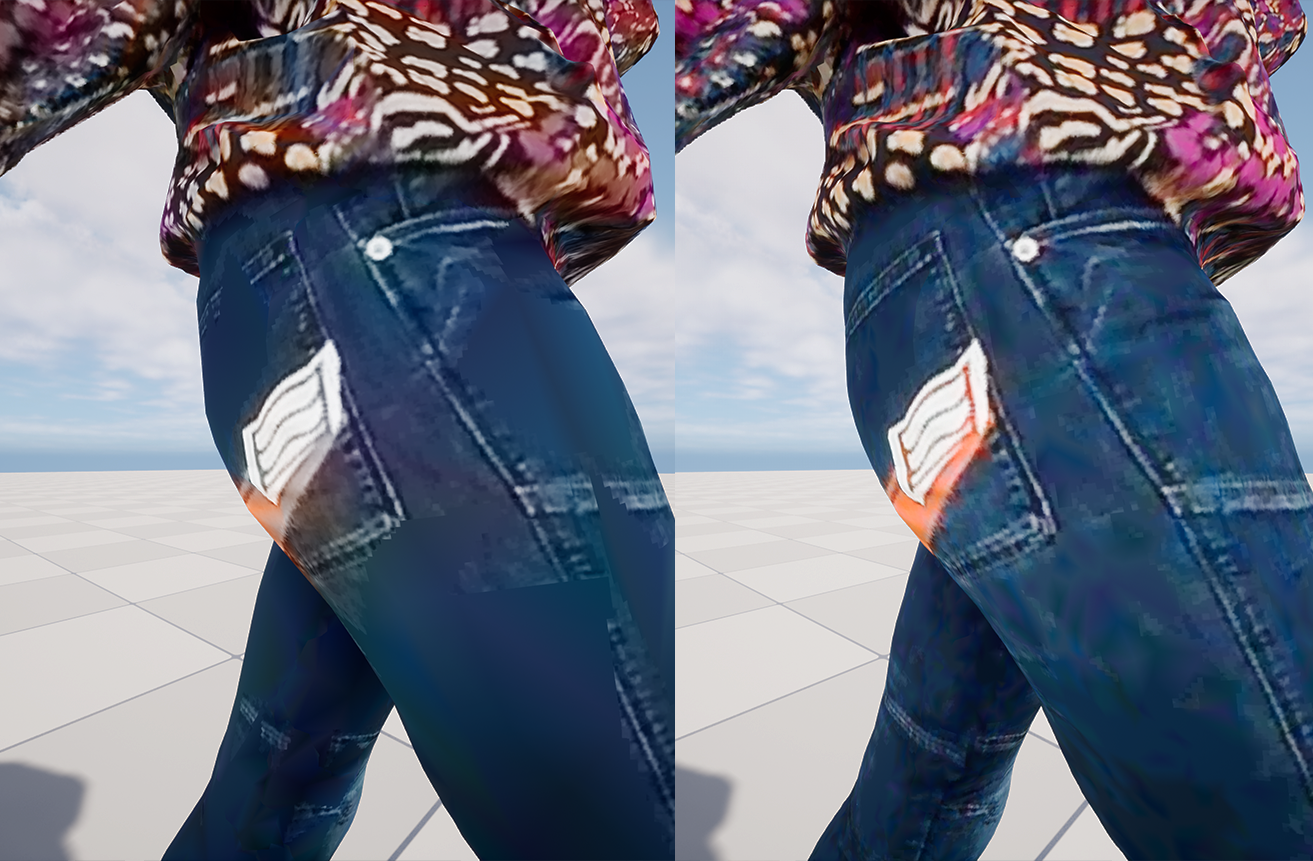
Because the colors are stored as metadata on the vertices themselves, this means the density of the mesh also controls the density of the color. Taking a look at the examples below, the image on the right shows an AVV exported at it 60K verts. Due to the mesh density there is little color bleeding. The image on the left was decimated down to 15K verts. Because the color for each vert is interpolated across the faces of the mesh, the reduction of verts has caused this color to smear across the mesh. This is particularly noticeable in areas with stark boundaries and contrasting colors such as the orange patch on her pants.
Preserving color resolution while decimating
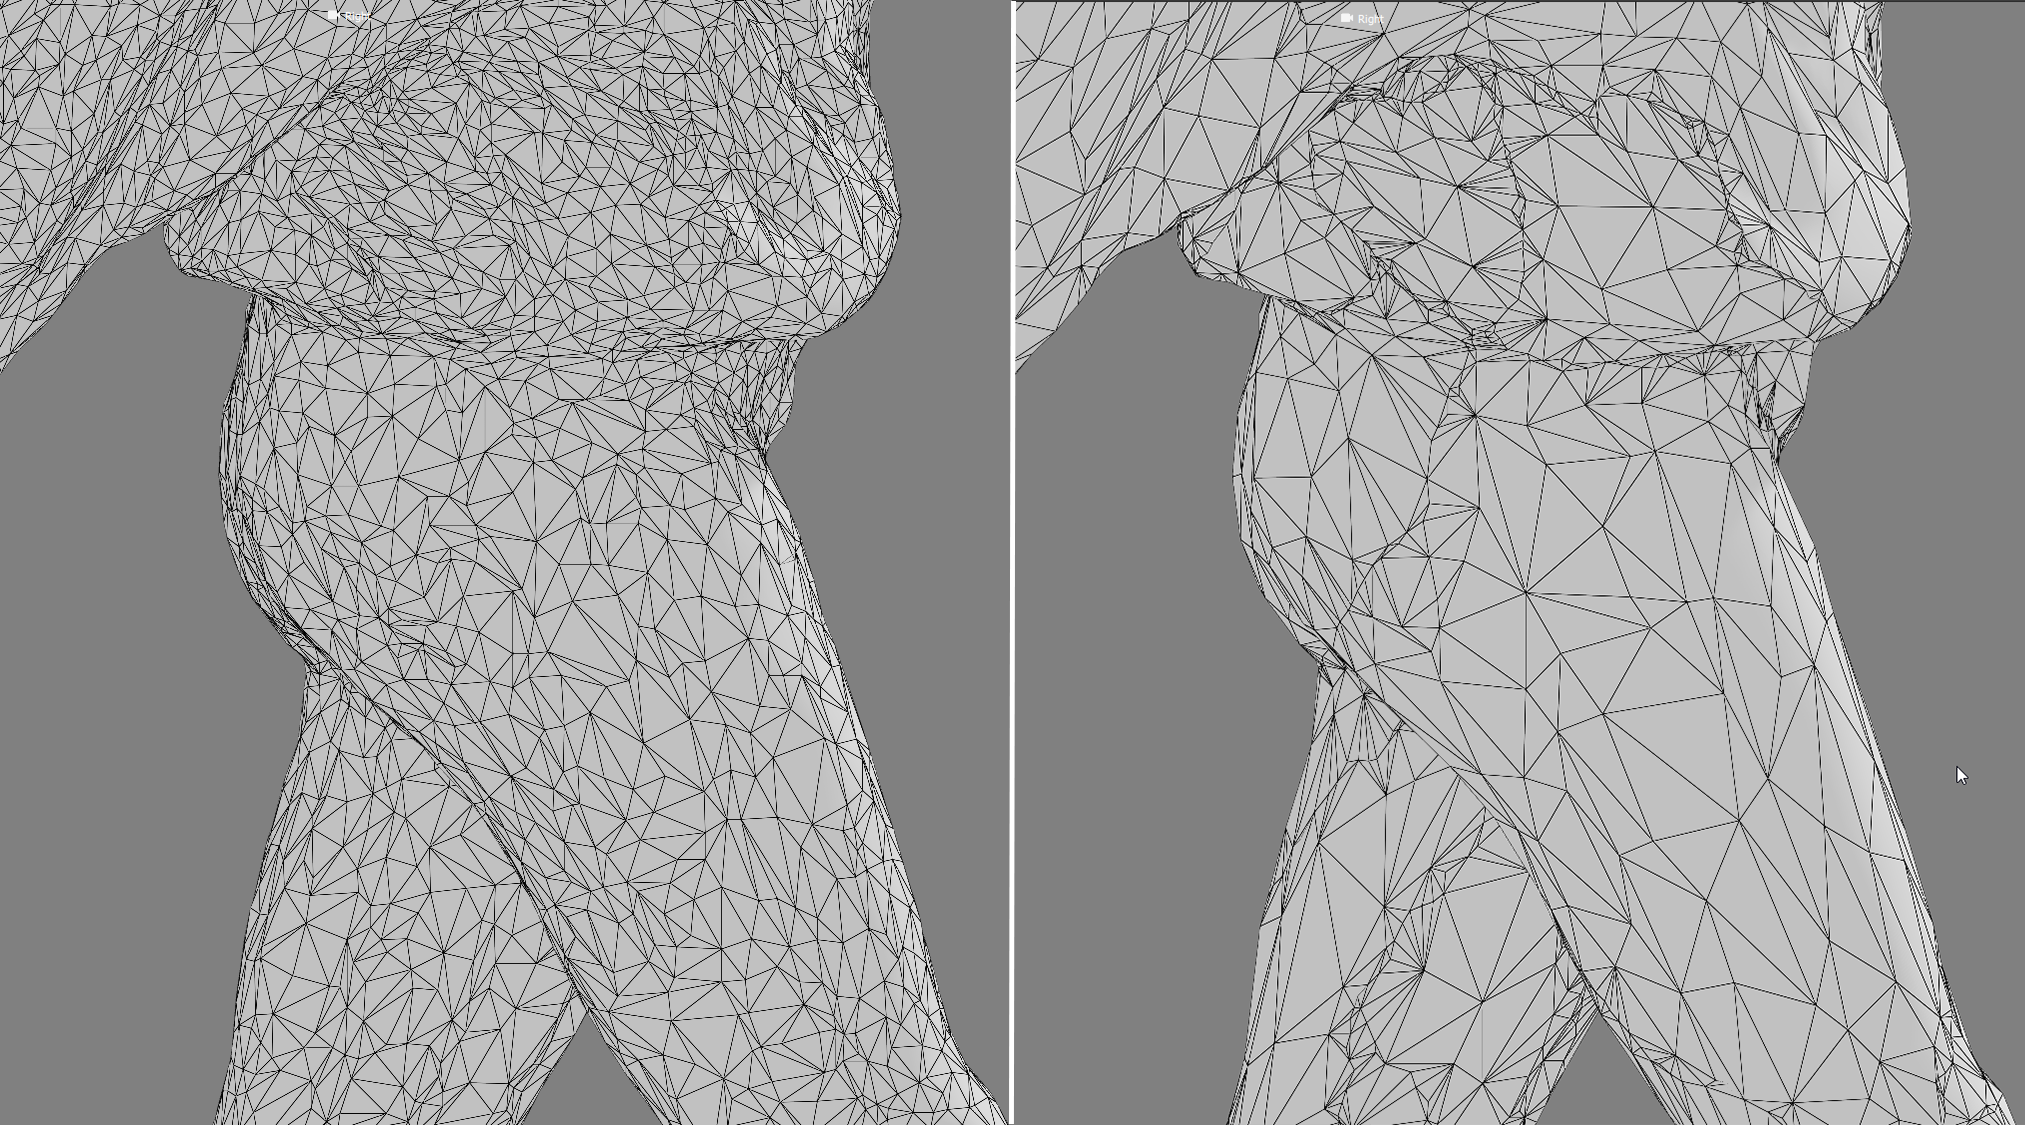
If you need to heavily decimate in order to get your AVV file as small as possible there is something you can do to preserve color resolution and prevent color smearing. This is disabling the preserve UVs options in the Clean Mesh stages decimation options. Preserve UVs prevents the decimation of faces that boarder UV islands. The downside of this is that the rest of the faces in the mesh need to decimate further to reach the target vertex count you set for the decimation. In the images below both meshes have the same vert count. The image on the right shows the mesh decimated with the preserve UVs option left on. As a result of that, much of the mesh density is clustered around the UV seams. On the left is the same mesh decimated with the preserve UVs option turned off. As you can see the mesh density is much more evenly distributed.
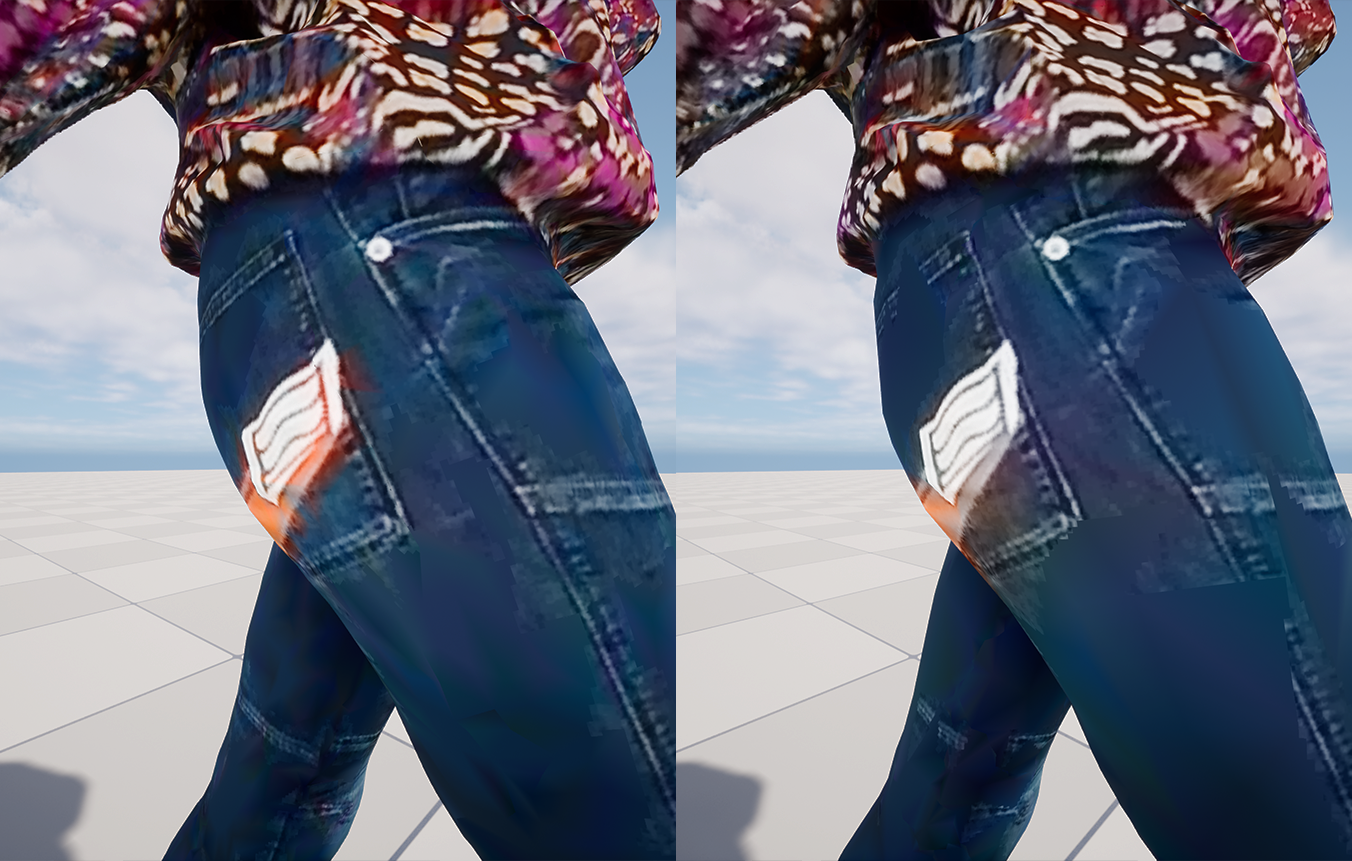
Below we can see the same two meshes exported as AVV files. Because the vertex placement in AVV files is directly tied to the color distribution, the mesh on the left with preserve UVs turned off has reduced color smearing. Note that if preserve UVs is turned off, you will need to run the Generate UVs and Transfer Texture stages following the clean stage.
Understanding texture percentages
The texture percentages set in the export settings for AVV files represents the percentage of faces in the mesh that will have textures stored at that resolution. For example if your multi resolution setting are set to:
Full Resolution %: 10
Half Resolution %: 20
Quarter Resolution %: 30
This will cause the texture for the 10% of the faces that have the highest detail, to be stored at the full resolution of the output texture (The texture at the end of your processing stages). The next 20% of the most detailed faces will have their textures stored at half the resolution of the output texture. The following 30% of the most detailed faces will have their textures stored at a quarter of the resolution of the output texture. The remaining 40% that was not assigned will be stored only as vertex colors. Due to the demanding nature of high resolution textures, the more of your texture you can store as half, quarter, or just vertex color the smaller your AVV files will be, and the more performant they will playback in engine.
Determining detail density
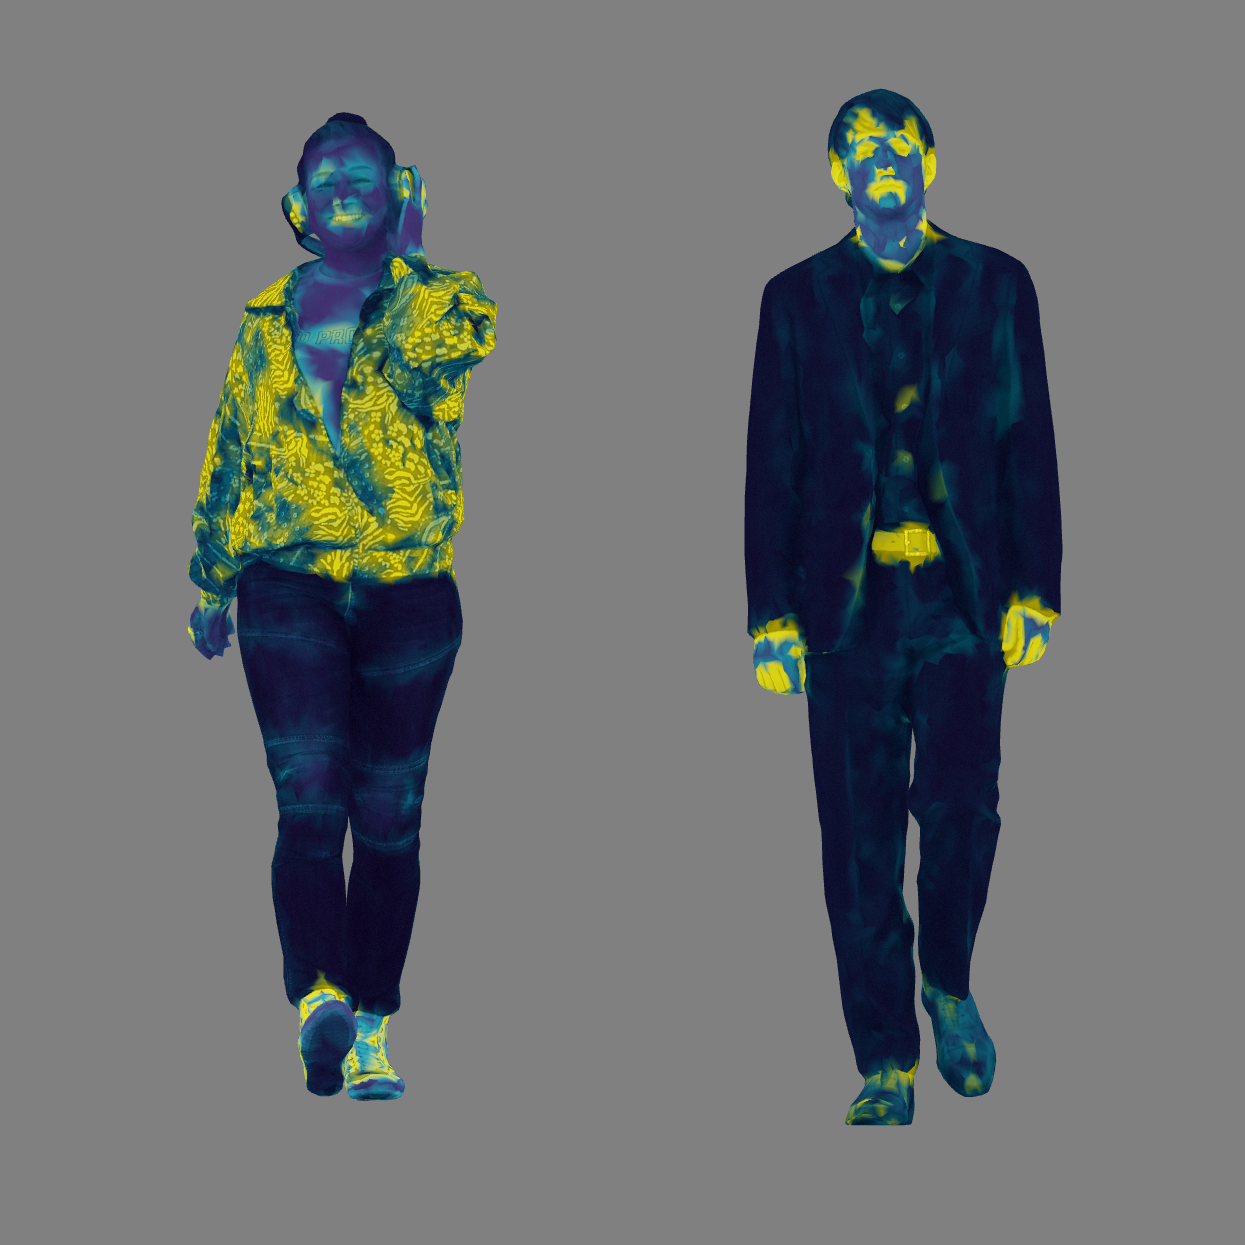
The Analyze Texture stage in HoloEdit analyzes the texture to determine the detail density. You can view the results of this stage by clicking the mesh metadata tool at the top left hand of the viewport. This button is only visible when a stage containing mesh metadata is selected in the composition. This will display the data as vertex colors ranging from dark blue (Very low detail) to Yellow (Very high detail).

The density of the detail in your clip can vary a lot, and will require different texture percentages to correctly capture the detail. For example, looking at the images below Christelle (Left) has an intricate pattern on her jacket and will require high texture percent values to capture that detail. Maxime’s texture (Right) on the other hand, is very uniform and is mostly color with little detail. This lets you set his texture percentages quite low and still keep him high fidelity.
Let’s take a look at a few examples of different texture percentages to get an idea of how they affect these two clips differently.
Note
Texture percentages are abbreviated as 5 10 20. This would correspond to 5% full resolution, 10% half resolution, and 20% quarter resolution.
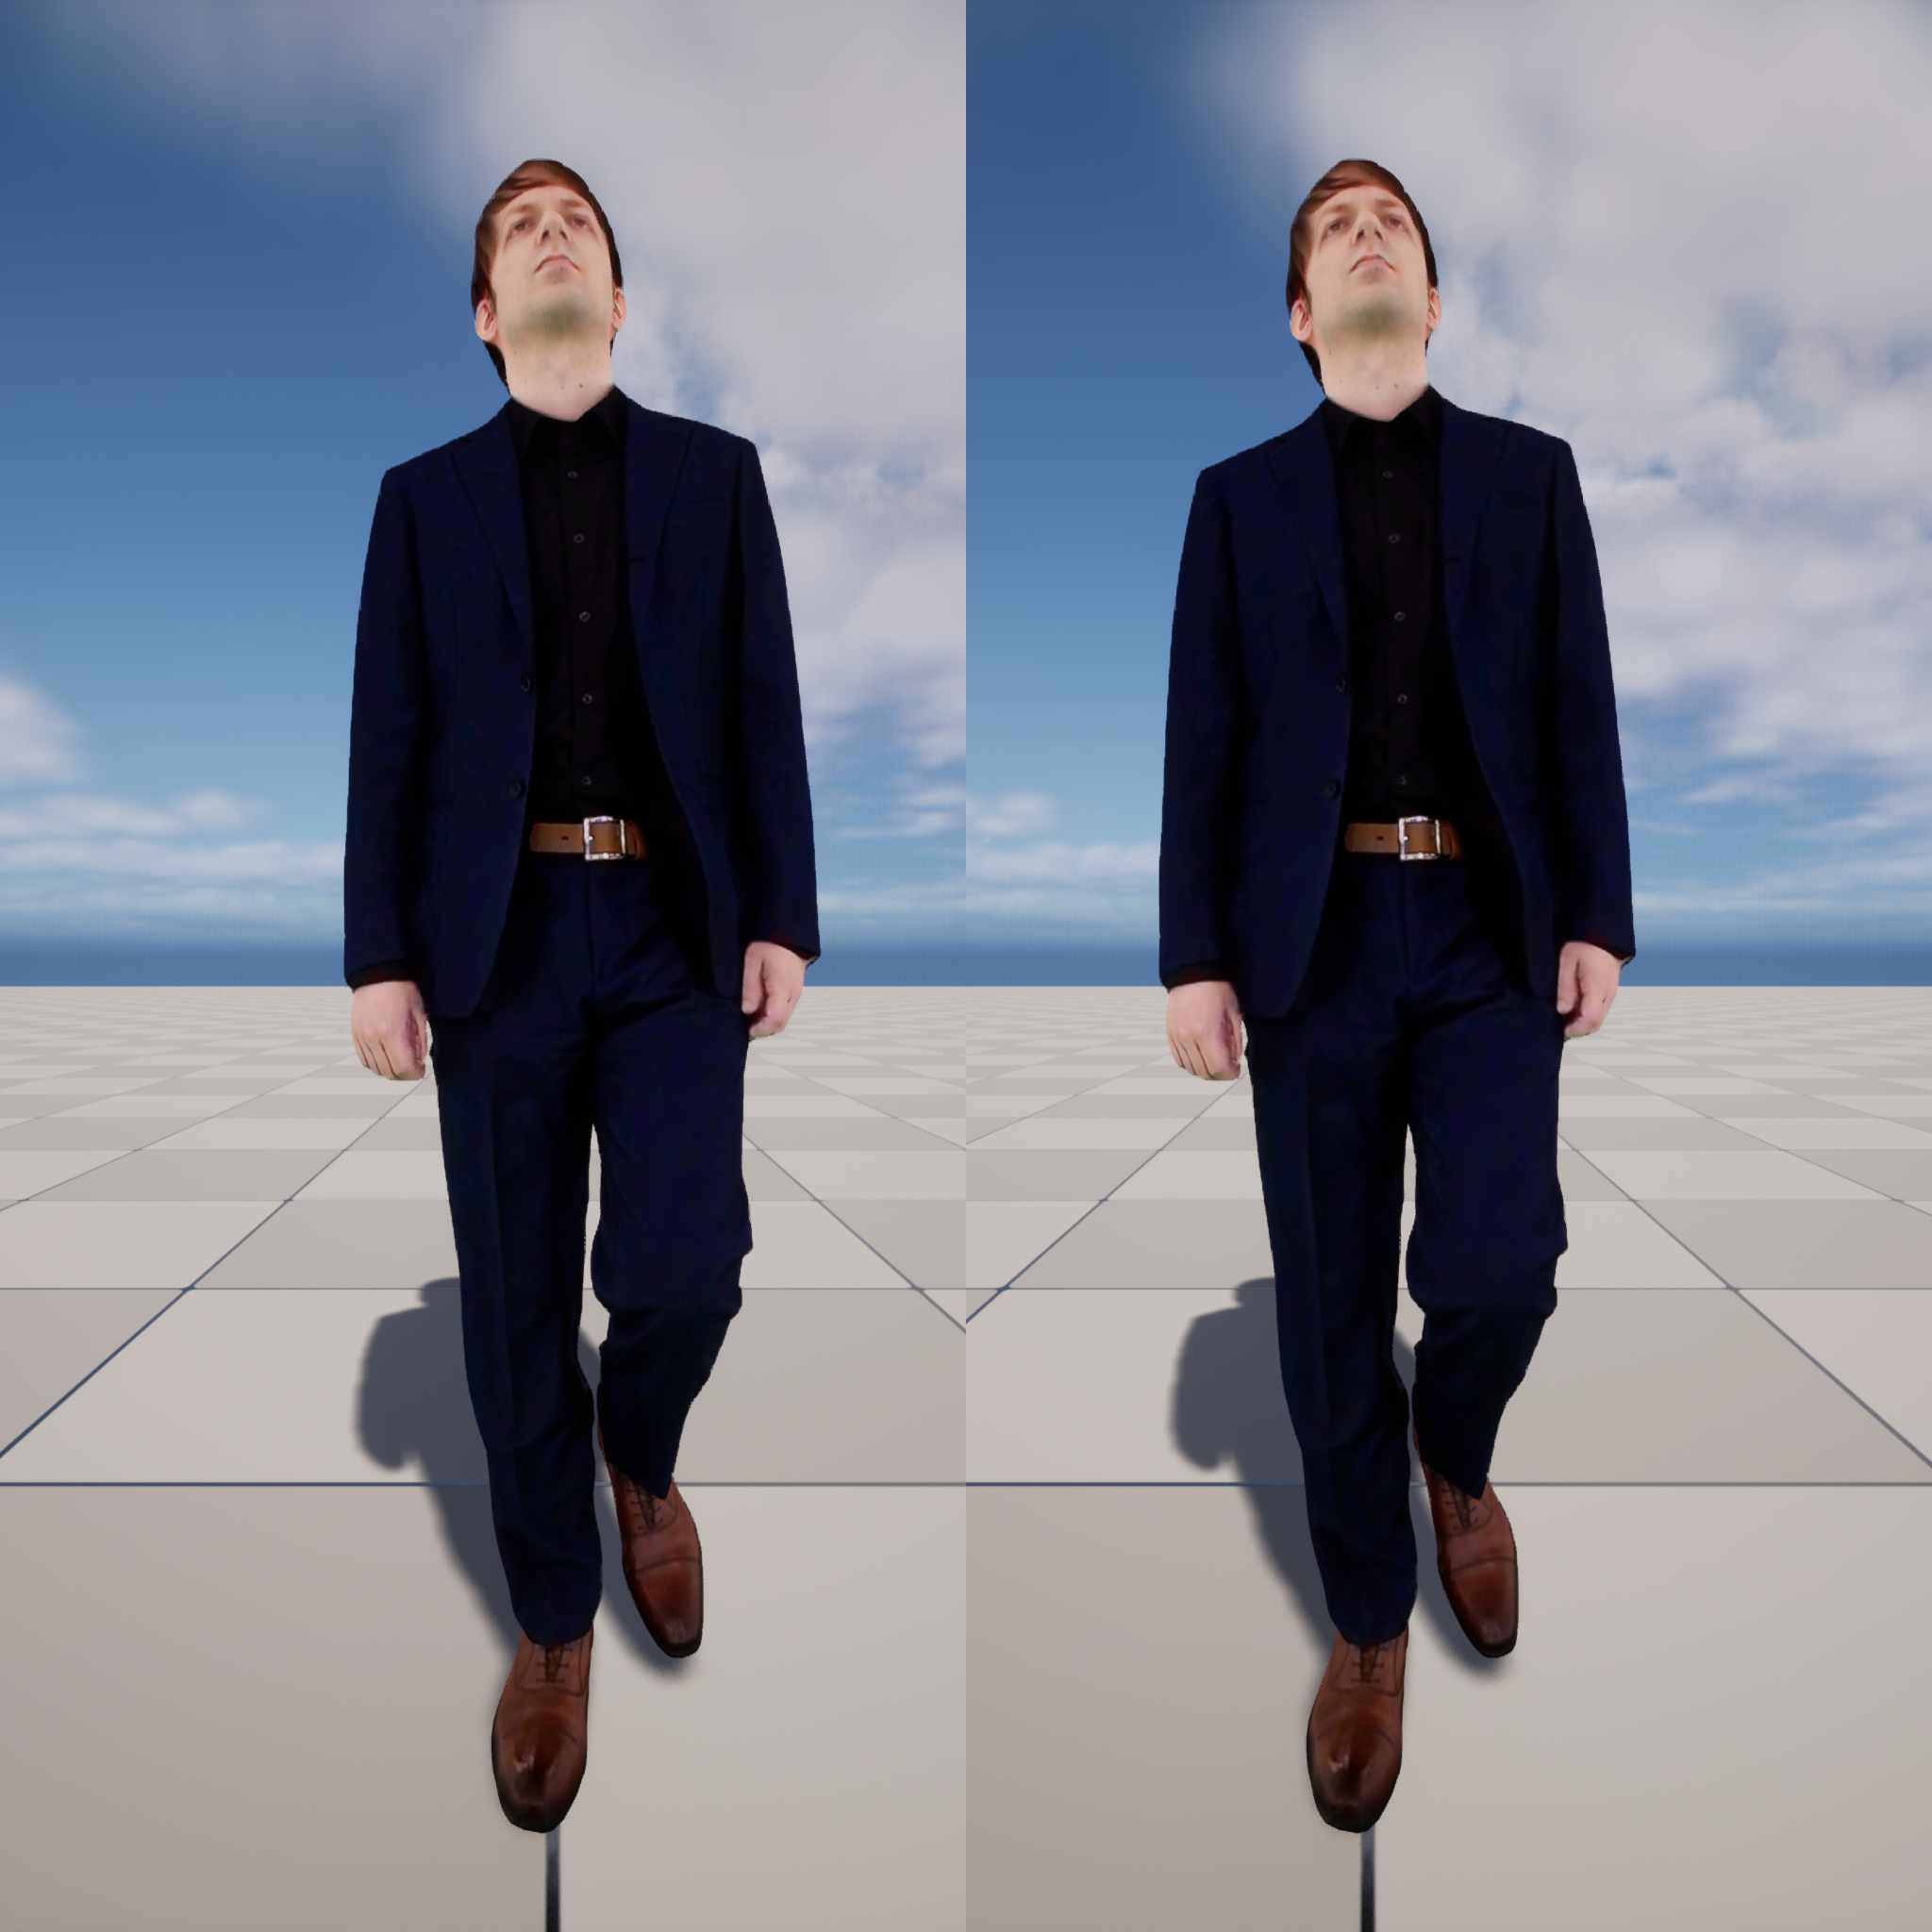
This example shows an export of Maxime using 5 10 20 next to Maxime exported at 100% full resolution texture. One of these AVV files is 94MB (100% full resolution) and the other is 18MB. Can you tell which is which? The image on the left is 5 10 20 and the right is 100% full res. This is a great example of a clip that can benefit from very low texture percentage values. As much of his texture can be stored as vertex colors without much loss in fidelity.
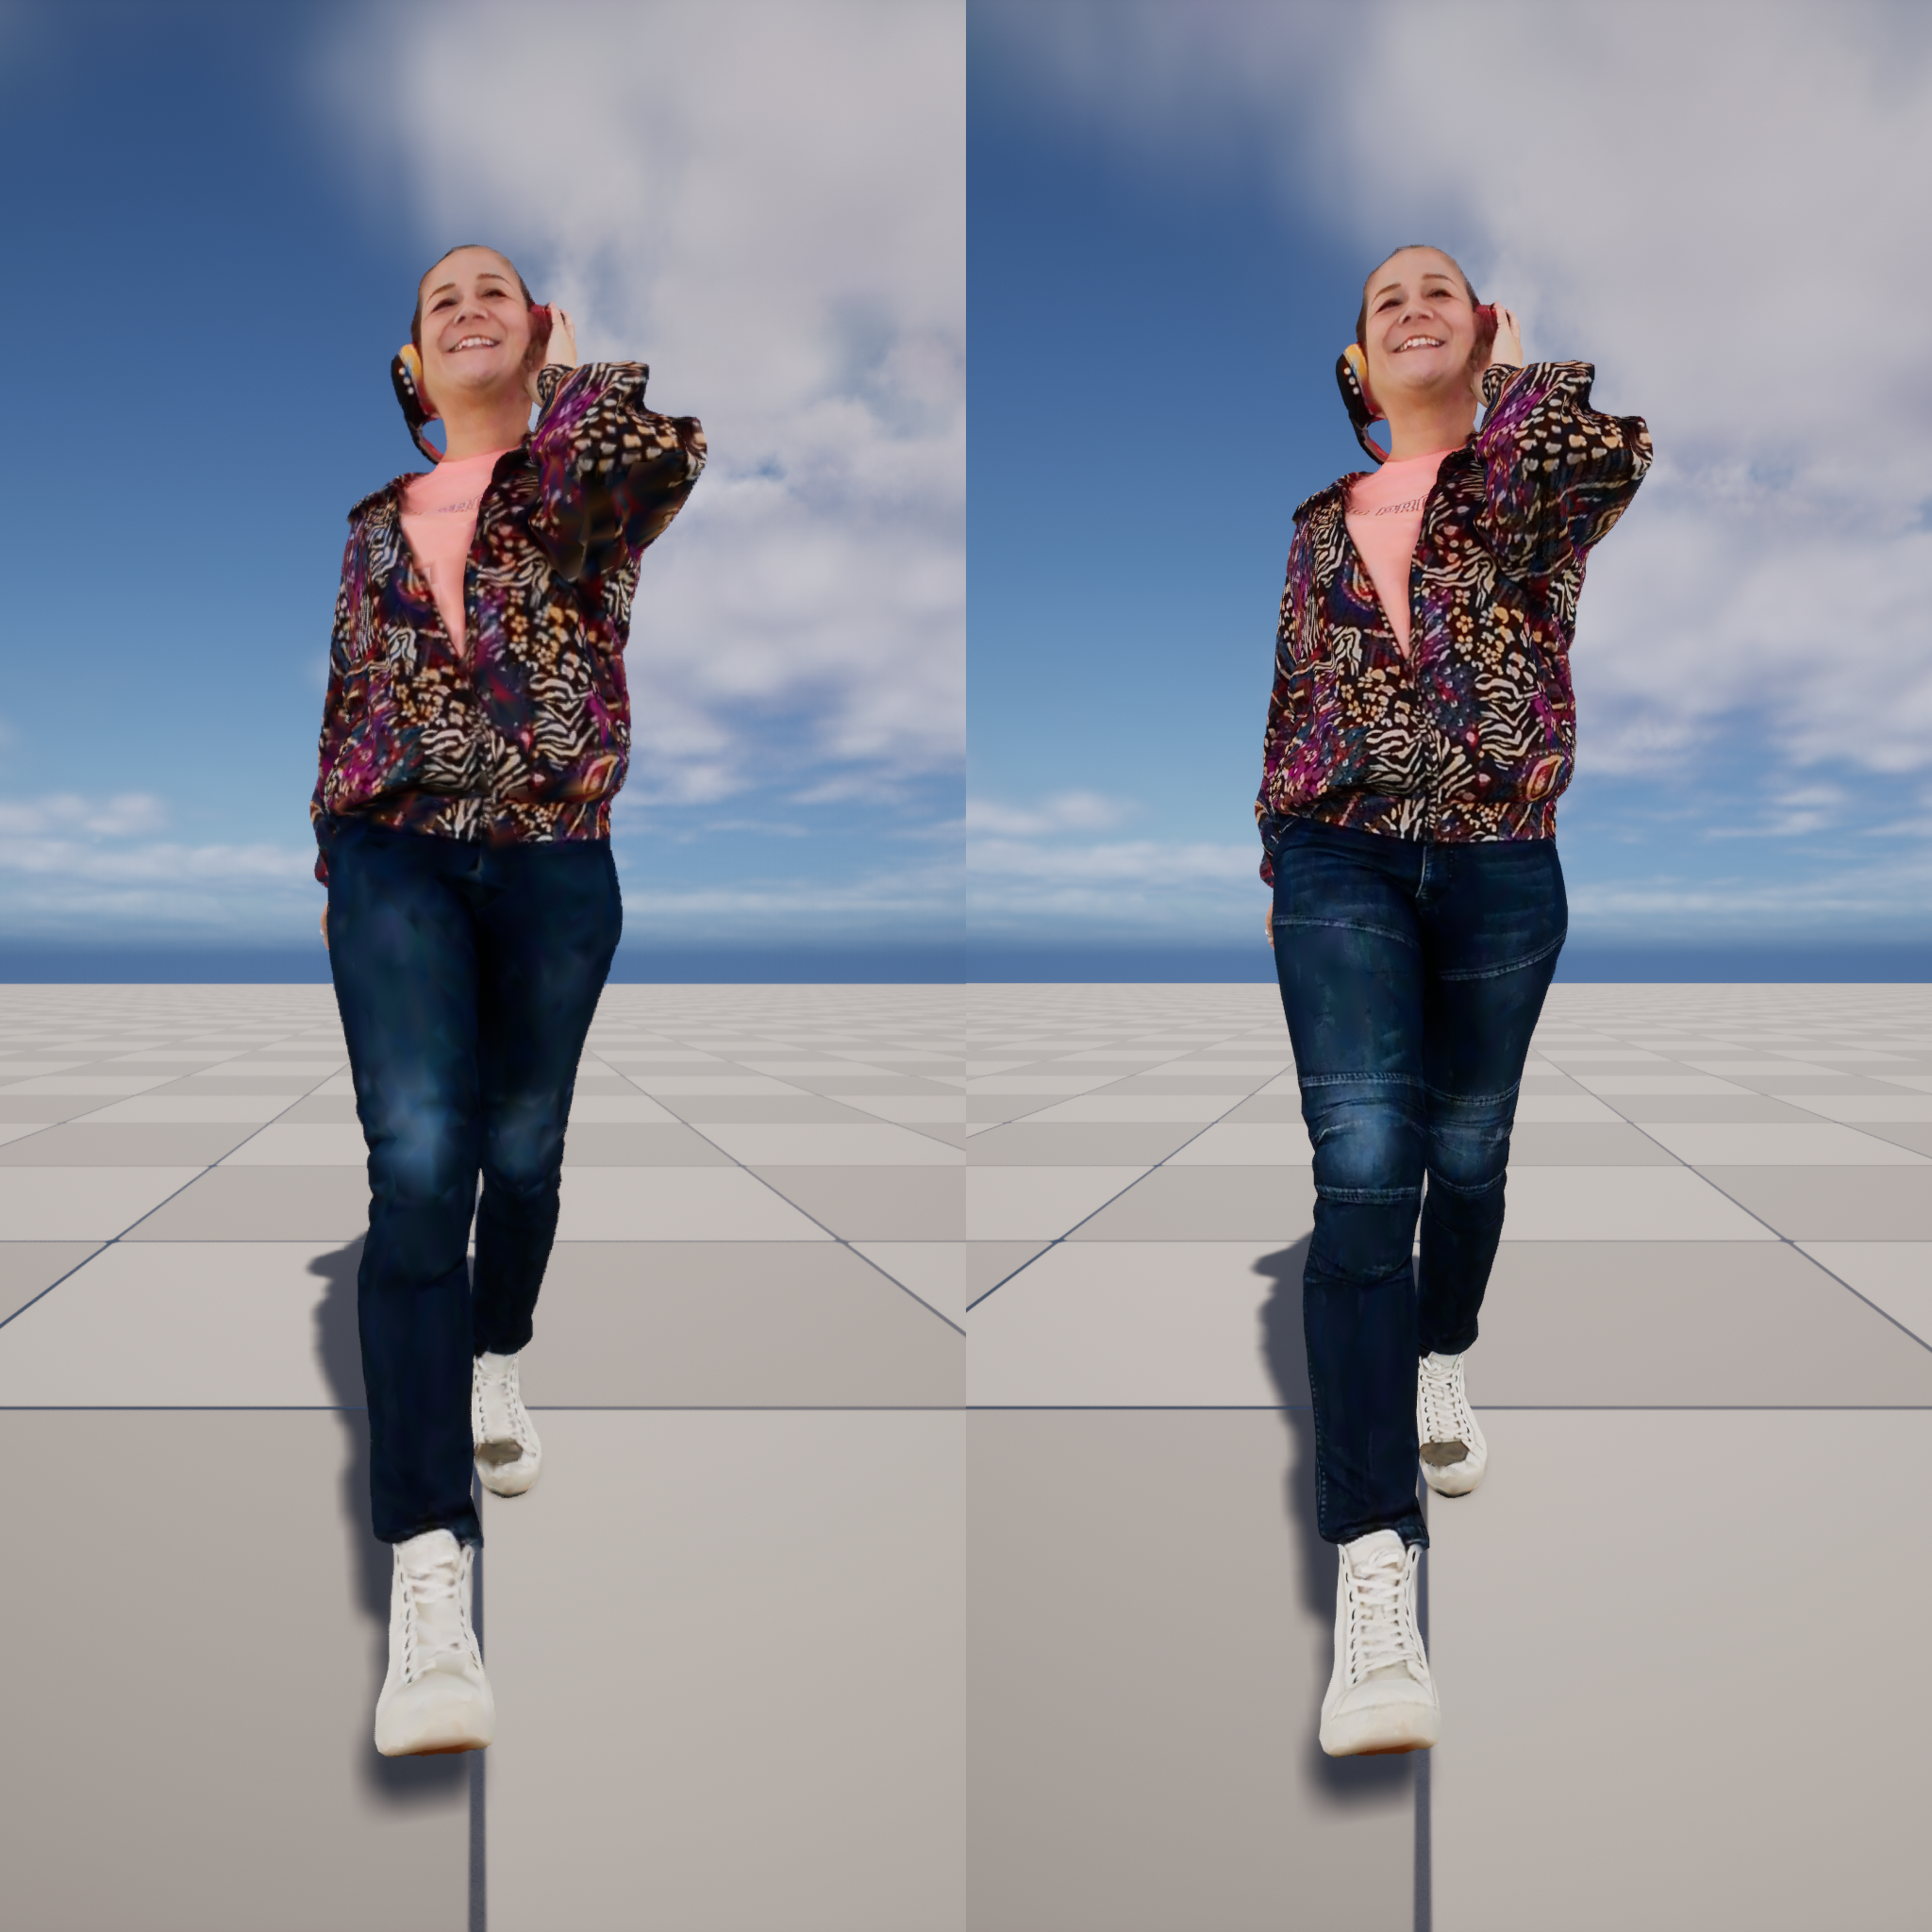
Let’s take a look at Christelle on the other hand. Taking a look at the image below it should be obvious which is 5 10 20 (Left) and which is 100% full resolution (Right). Because there is so much detail in her jacket there is not enough full, half, and quarter texture space assigned to capture it all. This leaves her pants to be stored as vertex colors losing their detail.
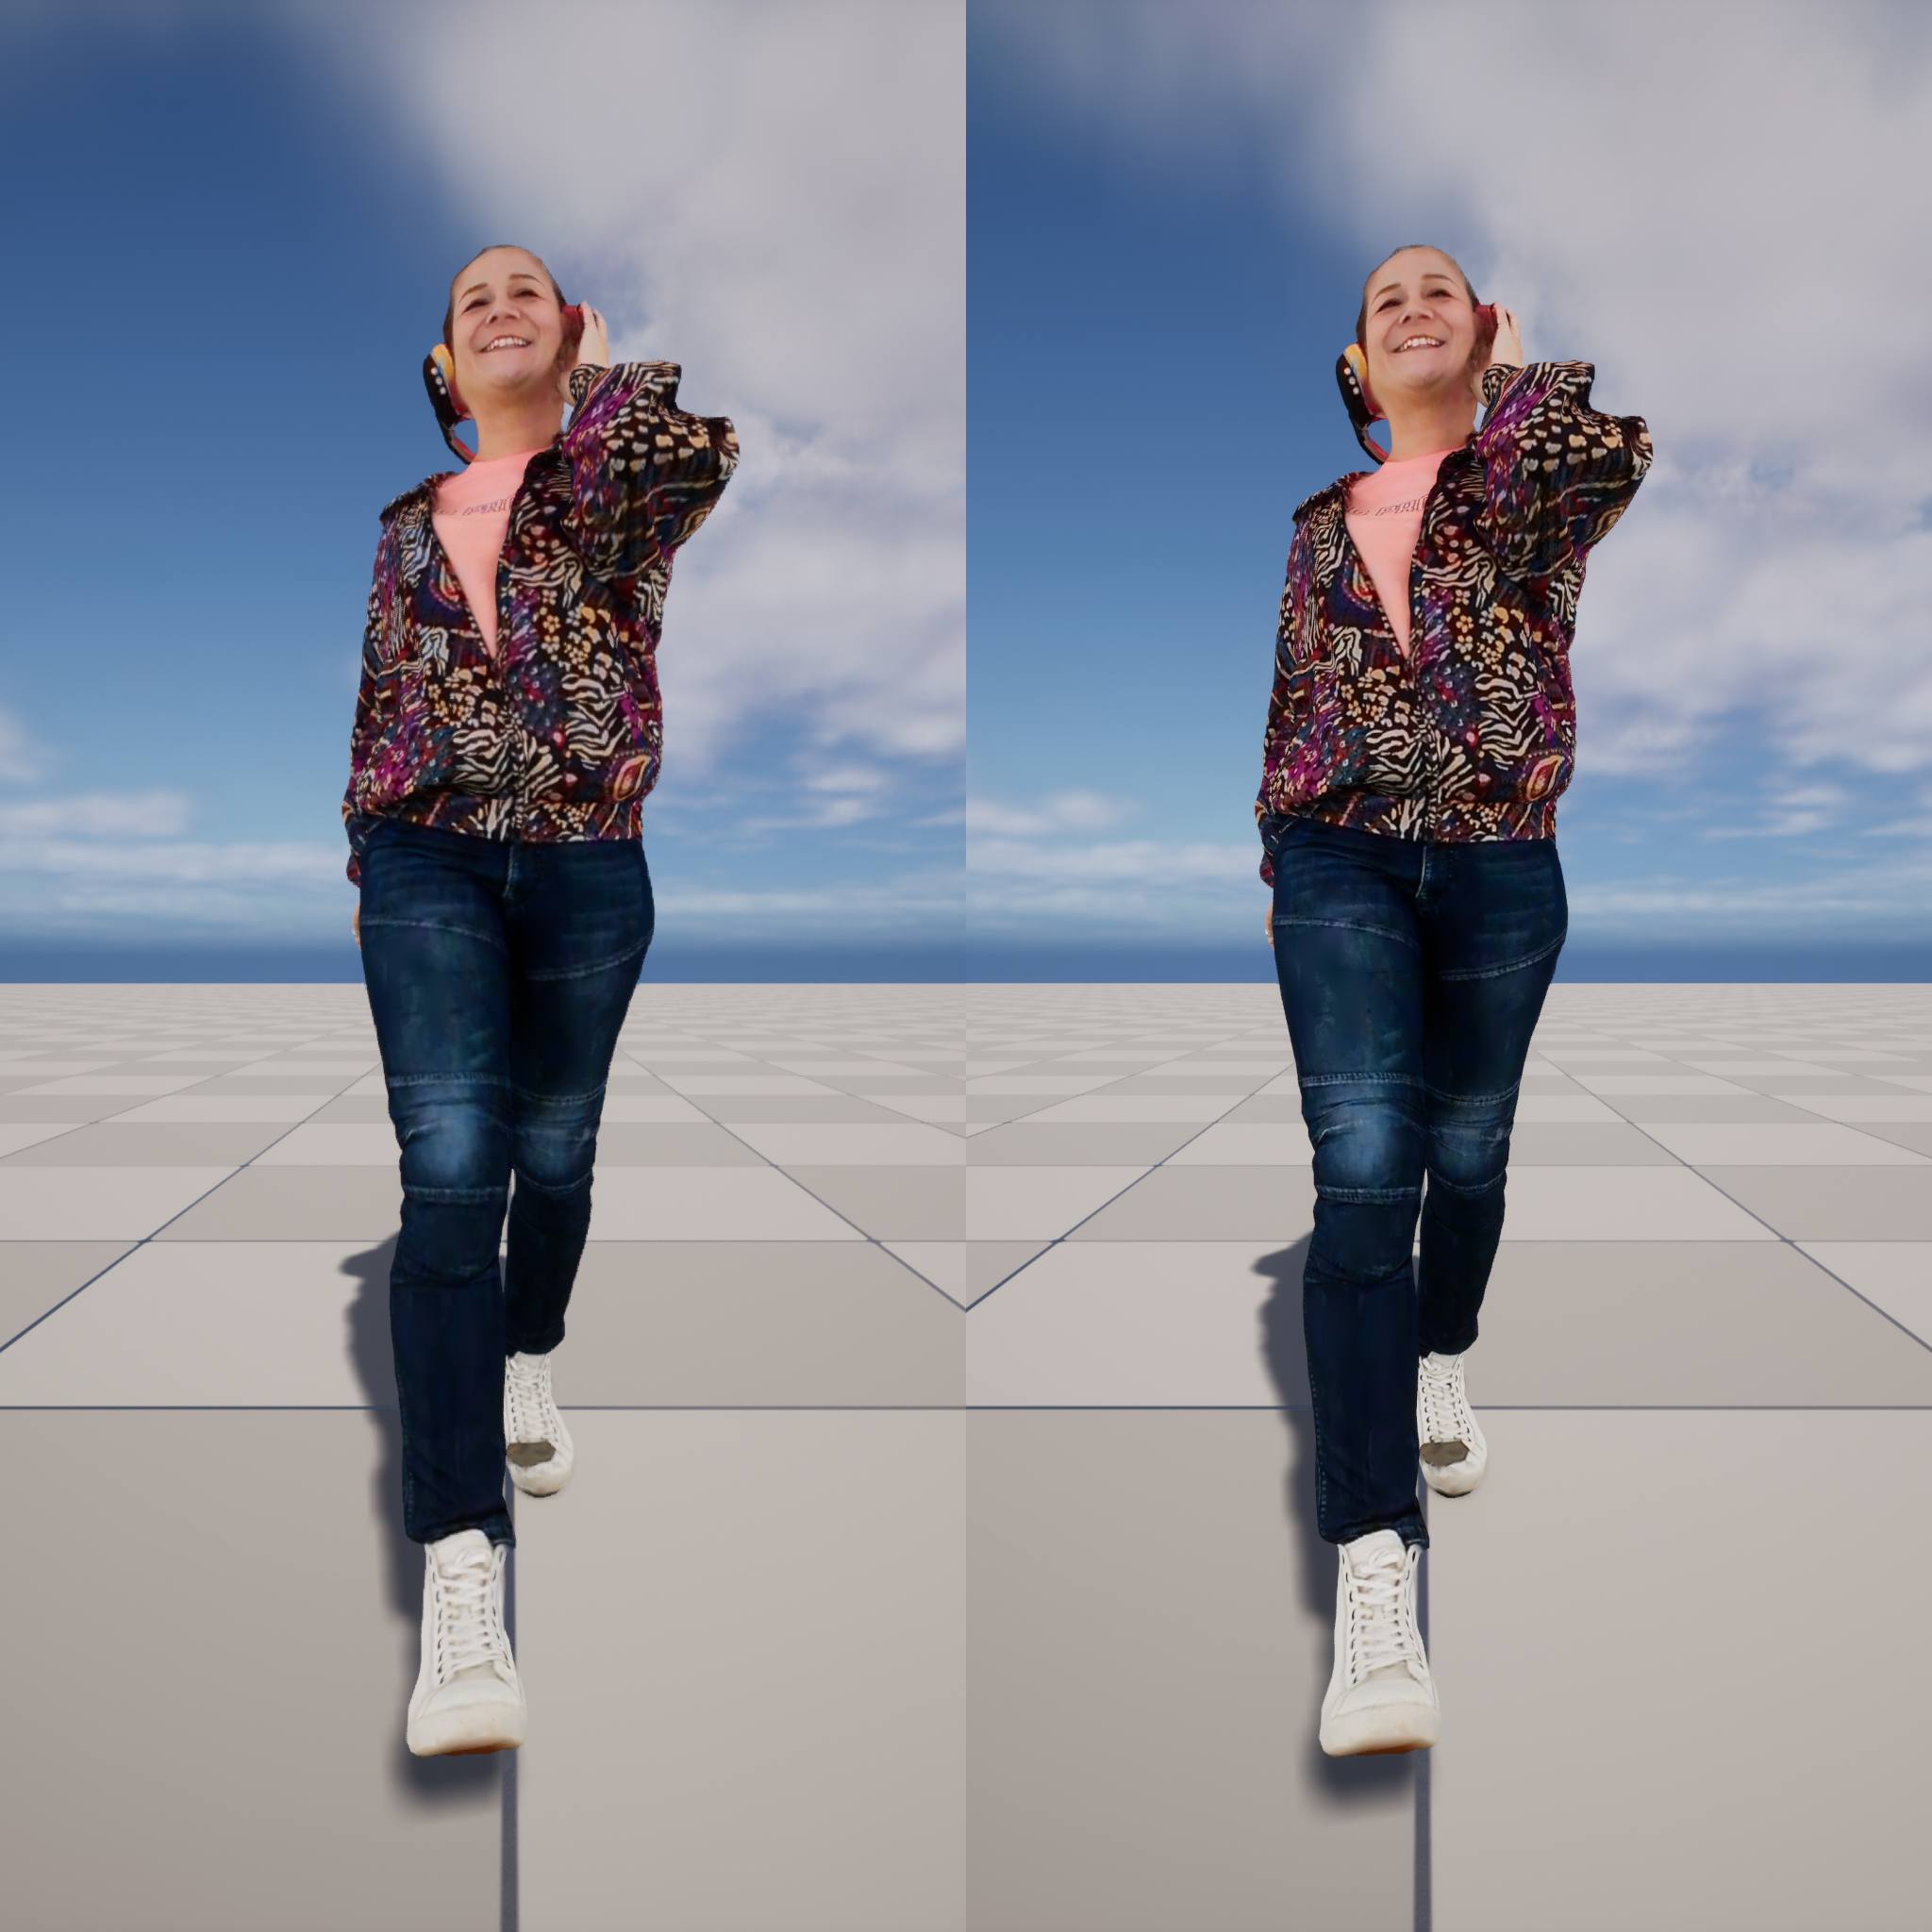
In fact, she is so detail dense that we need to set the texture detail as high as 10 40 50 (Left) before her textural fidelity starts approaching the 100% full resolution output (Right). This demonstrates the need to determine the texture density for a clip before setting your export texture percentages for that clip.
Face Detection
One thing to note about the above samples is that the face has the same quality regardless of the texture percentage values. This is because the Detect Face stage was run before the final export. The export process will take that data into account and ensure the face gets 100% full res texture regardless of how much detail it has. Note that as the face detection data is stored on the mesh, stages that alter the mesh will destroy the face detection. Because of this it is important to run Detect Face near the end of your processing stack, usually just after the Compress Mesh Segments stage.