Presets
Overview
Presets allow you to load and save sets of stages and stage settings to quickly set-up your composition to process a particular data set, or for a particular export type. There are three types of presets: track presets, stage presets, and interval presets.
Track Presets
Track presets can save and load a stack of stages configured for a particular workflow. Track presets can be found to the right of a track name in the Track View section of the Composition Panel. They can also be found in the Inspector Panel when a track is selected in the Track View.
Stage Presets
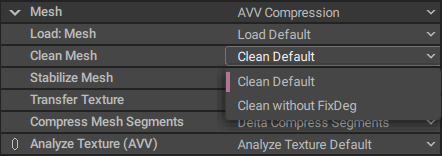
Stage presets can save and load the parameters for a stage to correctly process a particular dataset. Stage presets can be found to the right of a stage name in the Track View section of the Composition Panel. They can also be found in the Inspector Panel when a stage is selected in the Track View.

Interval Preset
Interval presets can save and load stage presets to a single interval. Interval presets can be found in the Inspector Panel when an interval is selected in the Timeline.

Adding and Editing your Presets
Loading Preset
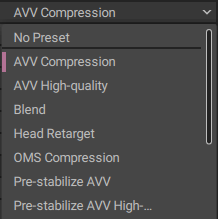
In the preset menu, clicking a preset will load that preset to the current track, stage, or interval. This will overwrite your current settings for that track/stage/interval. HoloEdit will attempt to fill in Source Stage parameters with the appropriate stages, where possible. For example, if you are loading a Transfer Texture stage preset with the Source Stage set, it will look for a Load Asset to apply to that field. If there is not an appropriate stage to fill the field, these parameters must be set manually.
Save Preset
If you have made changes to a preset and want to save them, open the preset menu and click the save button. If the save button is grayed out this means you are using a built-in preset and cannot save over it. In that case you will need to save it as a new preset.

Save as New Preset
If you want to save changes to a built-in preset or want to save a copy of one of your own custom presets, you will want to use the Save as New Preset option in the preset menu. This creates a new preset with the current changes you have made to that preset.


Working with Track Presets
When determining which preset will work best for you there are a few things to consider:
What is the source capture for your data?
Sparse camera captures with a limited number of camera inputs often require a different processing pipeline than data captured from a commercial capture stage. Pre-stabilized data and unstabilized data also require different processing pipelines. Finally, what is your desired file export type? While many of our workflows are supported with the standard ‘Compression’ pipeline, AVV and Blend workflows both require specific stages, and stage order to generate you clips.
What is your goal for your compressed data?
Use the standard “Compression” workflows if your main priority is compressing your clips to be performant on any device. Use the “Compress HD” when generating content for virtual production or projects where having as much retention of the source’s visual quality is the main goal. Your mesh density and texture size will affect both processing times and the size of your final clip, as well as your final export settings.
Are there any additional post-processing steps you need for your project?
Consider if your clips will be blended into each other. Will you need to generate a looping clip or will you require a skeleton for object tracking, head-retargeting or re-animation?
The system presets were built to streamline many of the core workflows, and are built to be broadly usable for most cases. Please keep in mind these were built as a jumping off point to help you find the best processing paths for your data, explore editing and saving your own presets as you find what works best for your project’s needs.
There are four main processing separations: blending and looping, basic clip compression that can be used for a number of workflows, compression targeting an AVV export, and retargeting workflows for when skeletons are required. More info on the default system track presets can be found here: