Mesh Capture Tool
Overview
The Mesh Capture Tool is a Unity extension that can recapture meshes. The Mesh Capture Tool captures mesh and texture sequences using OBJ or PLY mesh formats and PNG or JPEG texture formats.
The main use for the Mesh Capture Tool is adding subtractive volumes to remove unwanted geometry from a volumetric capture. Subtractive volumes are objects that will remove all vertices they overlap from the capture. Subtractive volumes can be used for removing props and consistent noise from a clip.
Note
The Mesh Capture Tool is also able to support other workflows such as converting 4ds files into OBJ meshes. These workflows have been removed from the docs as they are now supported directly in HoloEdit.
Important
The Mesh Capture Tool supports Unity version 2021.3(LTS). Ensure your Unity layout has both the Scene and Game windows visible when working with the Mesh Capture tool.
Subtraction Workflow
Data Import and Set Up
First you will need to navigate to your HoloSuite install directory, typically found at ‘C:\Program Files (x86)\HoloSuite\HoloEdit (Version Number)\Tools’. Move the Mesh Capture Tool project to your preferred location out of the programs file directory. You can open the Mesh Capture Tool by opening Unity Hub, and clicking Open. Select the ‘MeshCaptureTool’ folder in it’s new location and click Add project.
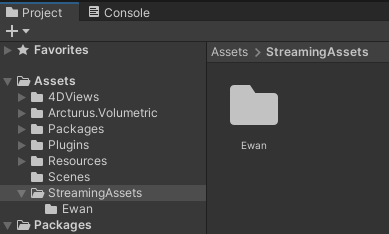
Before starting the capture process create a new folder in StreamingAssets and copy all of your source data into it. The data should be in the root of this folder, and not in a sub folder. If you do not have a StreamingAssets folder, create one within the Assets folder. Name the new folder appropriately so that you can easily identify it later.
CaptureFromMeshes Scene
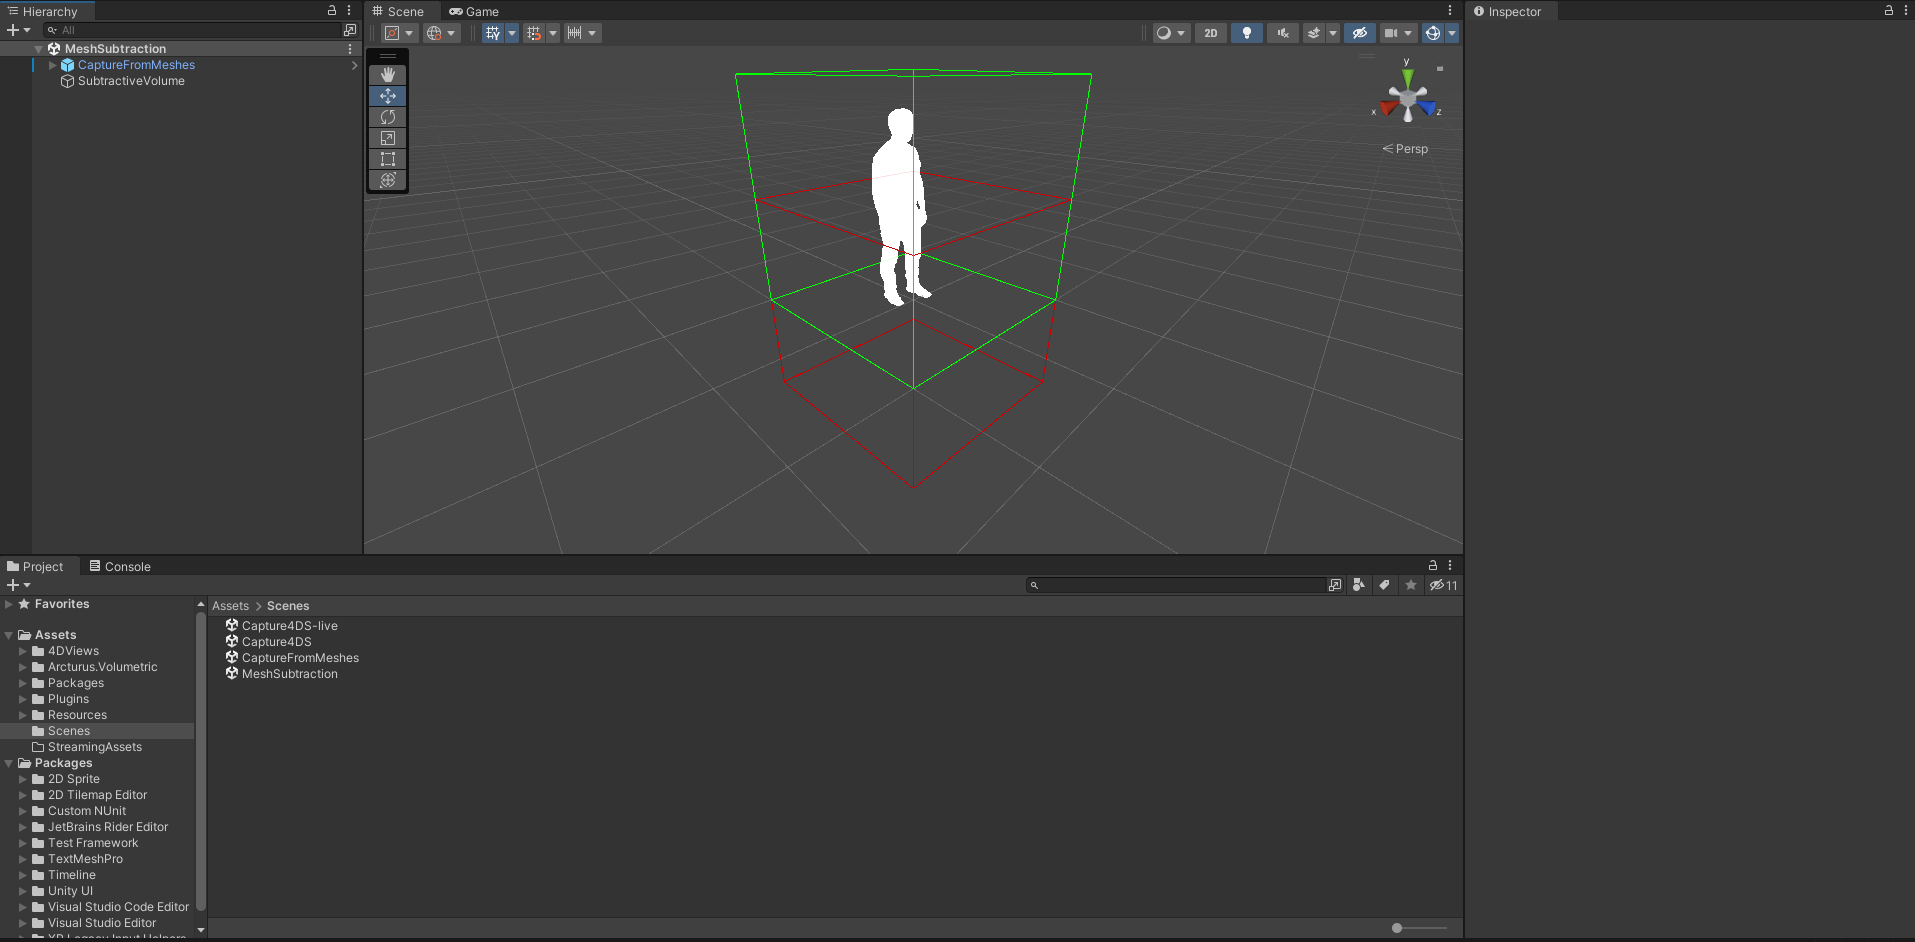
The Scenes subfolder (Assets > Scenes) includes ready-made scenes to extract mesh and texture information that can be used with HoloEdit. For the subtraction workflow you will want to load the MeshSubtraction scene.
The MeshesSubtraction scene contains the following GameObjects:
A CaptureFromMeshes object
A MeshPlayer object parented to CaptureFromMeshes
A CaptureMesh object parented to CaptureFromMeshes
A SubtractiveVolume object
Each object has specific fields to configure to properly capture mesh and texture data from an asset.
The CaptureFromMeshes GameObject holds Playable Director and Animator components. To edit the included animation, open the Unity Timeline with the CaptureFromMeshes object selected. The Timeline panel can be found under Windows > Sequencing > Timeline.
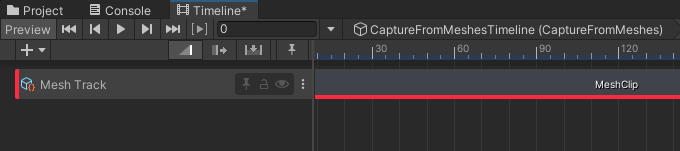
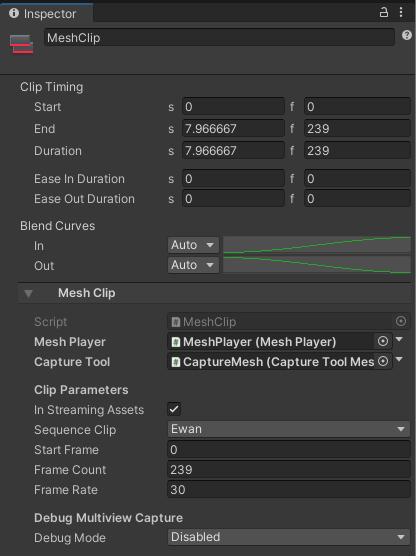
An existing Mesh Track will be present. By clicking on the shaded MeshClip bar, you will see the Inspector window update with Clip Timing and Mesh Clip components to configure. Here, you will need to:
Set the Duration (frames) to one less than the total number of OBJs (i.e. 199 if 200 OBJs),
Verify that the Mesh Player and Capture Tool boxes are populated with the MeshPlayer and CaptureMesh game objects, respectively,
Ensure the In Streaming Assets option is enabled,
Select the appropriate Sequence Clip from the drop-down. This will be the name of the folder containing your data you create in StreamingAssets.
Set the Start Frame and Frame Count to match the values in Clip Timing,
Set the Frame Rate to 30
Note
Currently the only supported framerate is 30 frames per second.
With the MeshPlayer object selected, perform the following:
Ensure that the X-axis scale is negative. By default this is -1, but that may be different if your mesh is being scaled as part of this capture process
Verify that the Mesh Player (Script)’s Capture Tool field is set to CaptureMesh (CaptureToolMesh)
Set the Frame Rate to 30
You should be able to confirm that your clip is visible in the Scene Window. If it isn’t visible, hitting the ‘F’ key will frame the object. This may reveal the meshes are much larger than expected. If this is the case, change the scale of the MeshPlayer until it fits in the CaptureMesh box. Values between 0.01 and 0.001 are a good starting point for typical .OBJ files. Note that the CaptureMesh box will only be displayed if the Capture Mode is set to Multi View Environment.
Finally, configure the CaptureMesh object.
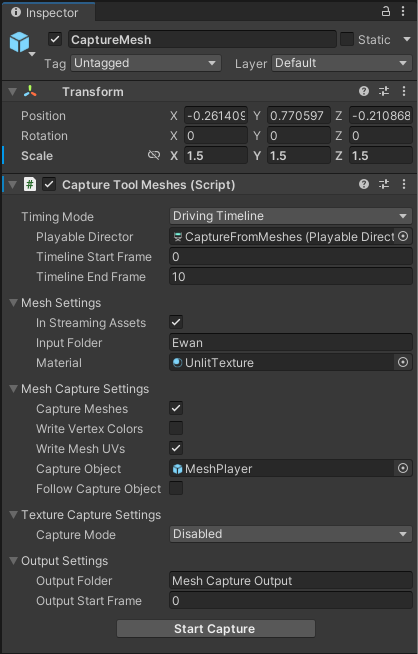
Selecting the CaptureMesh object will expose the Capture Tool Meshes component.
Use the Timeline Start Frame and Timeline End Frame fields to specify the capture frame range. You can capture your entire clip by specifying the first and last frames of the clip, or set a custom start and end point to capture a smaller portion.
The Mesh Settings drawer contains fields that must be filled out to specify your source data for the capture.
Ensure that the In Streaming Assets setting is enabled, then enter the name of your source data sub folder into the Input Folder field.
Note
The “Input Folder” setting is a relative path with respects to the “StreamingAssets” folder. If your data was located in a directory at StreamingAssets/mydata/myclip, you’d enter “mydata/myclip” to specify that folder.
Inside the Mesh Capture Settings category, enable the Capture Meshes and Write Mesh UVs settings to instruct the Mesh Capture Tool to capture geometry.
Set the Texture Capture Mode to disabled as we are just capturing the meshes for the subtraction workflow.
Adding Subtractive Volumes
Now that our capture is all setup, we can start adding subtractive volumes. In this scene there is already subtractive volume setup but if you you need additional subtractive volumes use the following steps to set one up.
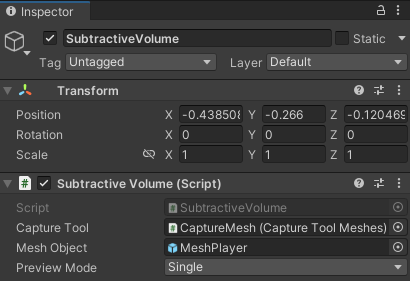
To add a Subtractive volume, create a new GameObject and add a Subtractive Volume component to it. Make sure that the Capture Tool and Mesh Object fields are populated appropriately for your scene.
Place the volume in the screen overlapping any vertices you would like to remove from your mesh.
Subtractive volumes can be animated, using Unity’s keyframing tools. You can create a track in the same timeline that will drive your playback.
These volumes can be previewed using the Preview Mode drop-down in the component. Preview mode provides the following options:
Single: Will preview only the current volume’s impact
Hierarchy: Will display the impact of the current volume and all its children
All: Will display the impact of all subtractive volumes
Note
This preview does not update in realtime. To force the preview to update set the preview mode to disable, then back to your desired preview mode.
Capture
We are now all set up to capture our meshes. Click Start Capture at the bottom of the CaptureMesh object’s inspector window. You will see your sequence start. If the Timeline doesn’t advance, ensure that your Unity layout has both the Scene and Game windows visible.
Output
Once the capture process is initiated in either scene, the Mesh Capture Tool will export your captured clip data. Inside the Mesh Capture Tool directory, the Export folder will begin to be populated with the following:
A new output folder for the capture scene you are using,
A subfolder, timestamped to when you initiated the capture process for easy tracking,
Mesh and/or texture data folders from the designated capture
Processing in HoloEdit
Now that you have exported your meshes you can import them into HoloEdit and start processing them.
Import
Because the X-axis of the mesh was flipped during capture, the winding order of the mesh will be reversed. This can be resolved by checking the Reverse Winding Order option on import.
Stages
If your subtractive volumes only removed mesh that was disconnected from your main actor you can process as normal. However if any of your subtractive volumes removed vertices from your main actor, your mesh now has holes in it and they need to be closed. If that is the case you should apply the following stages to correct this.
Clean Mesh: Using clean mesh with close holes enabled will close the holes making the mesh water tight.
Stabilize Mesh: Because closing the holes changes the topology the mesh will need to be restabilized.
Generate UVs: Now that the topology has changed the UVs need to be re-generated or you may have texture artifacts. While this can be done before stabilize mesh, it uses far less compute time if run after.
Texture Transfer: The mesh now has new UVs so the texture needs to be transferred over.
After that you can process the data normally. This concludes the mesh capture workflow.