Introduction
Unreal Engine version 5.0 is recommended for OMS playback, however we offer plugins for versions 4.26, 4.27 and 5.0.
Note
This is the reference documentation for the Unreal HoloSuite Player Plugin.
For a step by step guide to setting up a HoloSuite Player in Unreal Engine, refer to the Player Configuration example document.
Overview
The Unreal HoloSuite Player can be used to playback compressed Volumetric Video created in HoloEdit. It supports most OMS playback features, including OMS playback and retargeting. The Plugin package contains C++ classes, Blueprint functions, and Material functions.
File Support
With the HoloSuite Player plugin installed, .oms files added to your project are automatically detected as OMS files.
The plugin supports both .mp4 media files and image sequences as texture input for volumetric playback.
OMS Playback uses the OMSMeshActor class, which follows the Media Framework (External Link) for video playback, and regular UE materials using a custom Material Function for rendering.
Build Targets
The Unreal HoloSuite Player can be built for Windows 10 and Android.
Installation
There are some small changes to the install process to facilitate support for Unreal Engine 5.0, so please re-read this section even if you’ve used our plugin for a previous version.
The HoloSuite Player Install Directory contains all Unreal Engine plugins in the appropriate subfolder.
To Install the HoloSuite Player plugin:
Locate the zip file for the desired engine version, this will be found in the plugins folder of your HoloSuite installation, found at ‘C:\Program Files (x86)\HoloSuite\HoloEdit (Version Number)\Plugins’ when following default installation.
Unzip the contents of the zip file into a folder called
HoloSuitePlayerMove the
HoloSuitePlayerfolder into your Unreal EnginePlugins/Marketplacefolder (if the Marketplace subfolder does not already exist, you can create the folder yourself)
To enable the HoloSuite Player plugin once added to the engine:
Create a new project in Unreal
From the main Unreal Engine interface, click on Settings in the top menu, and select Plugins
In the Plugin editor, search for “HoloSuite” - a HoloSuite Player item will be visible
Check ‘Enabled’
For Unreal Engine 5.0, you will also need to search for and enable the “Electra” video player plugin(s)
Once the plugins are enabled, click the “Restart Now” button in the bottom right of the window
When the Editor opens again, you’ll be ready to start configuring the HoloSuite Player.
If you experience any issues, see the Plugins page on the Unreal Engine Documentation (external link) for more information on installing plugins in Unreal Engine.
Upgrading the HoloSuite Player Plugin to a Newer Version
When updating the Unreal HoloSuite Player plugin you should first delete the existing plugin from the Plugins/Marketplace folder, then copy the new plugin into the folder. Overwriting the existing plugin instead of deleting it first can result in the plugin compiling incorrectly.
Upgrading Existing Projects to Unreal Engine 5.0
To update an existing project to use Unreal Engine 5.0 …
Right-click on the project file (.uproject) and select
Switch Unreal Engine Version ...Select 5.0 from the dropdown and click “OK”
After opening the project, you will need to ensure the plugins are correctly enabled (remember that the Electra player will also need to be enabled)
After the plugins are enabled, for each OMS source file you’ll need to right-click and select Reimport to apply import modifications
Getting Started
Note
This is a step by step guide to setting up OMS playback in Unreal.
For the reference documentation for the Unreal HoloSuite Player Plugin, refer to the Player Reference Documentation.
Warning
There are specific HoloSuite player requirements when building Virtual Reality projects or using features such as HoloSuite’s retargeting or Unreal’s Sequencer.
Please refer to the HoloSuite Player Requirements for VR document to learn how to prepare a HoloSuite player for VR-projects, or checkout OMS playback with retargeting and OMS playback using Sequencer for non-standard setups.
With the HoloSuite Player for Unreal successfully installed, you’re ready to create a player to use in your project.
In order for players to work in standalone builds, Unreal requires a subfolder named ‘Movies’ for all .mp4 files. Create a Movies folder in the project window and import your MP4 file(s) into it. Create another folder, this time with any valid name you choose, and import your OMS file(s) into it.
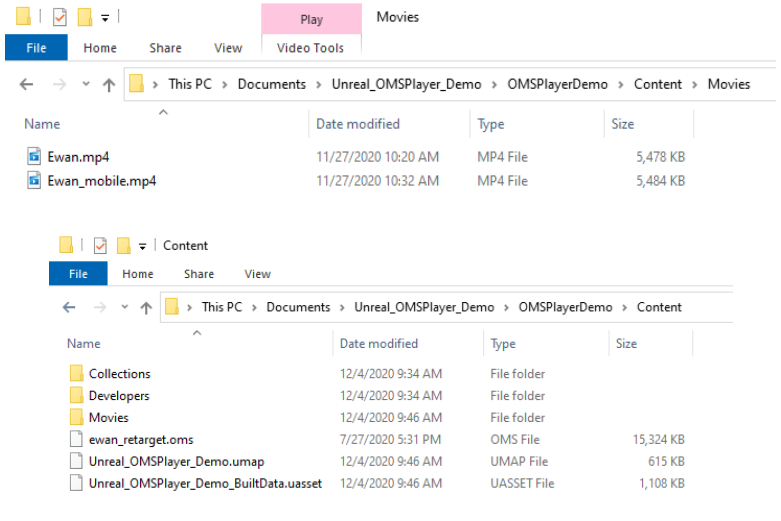
Player Content in Windows Explorer
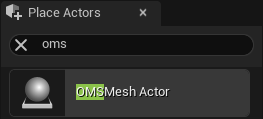
After adding your OMS and MP4 files, you’ll need to create an OMSMeshActor in your scene. Use the search bar in the “Place Actors” tab to locate OMSMeshActor, and click and drag an OMSMeshActor into your scene to create a new OMSMeshActor instance.
After creating your new OMSMeshActor instance, you can select it in the “World Outliner” and configure it in the “Details” tab.

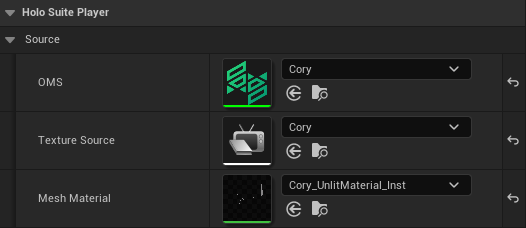
A few steps are required to configure your OMSMeshActor to play your OMS and MP4 files. In the “OMS Settings” category in the “Details” tab, assign your OMS file to the “OMS” field, and assign your MP4 file to the “Texture Source” field.
Your HoloSuite player is almost configured, but it still needs a Mesh Material before it will play. The Mesh Material requires a specific node, ArcturusOMS, to drive the OMS playback and allow any custom shading you need for your project.
You can right click on any of your imported OMS files and choose to create a lit or unlit Mesh Material from it. Now that you’ve created a material, you can assign it to the Mesh Material field.
Save and compile changes to complete your configuration.
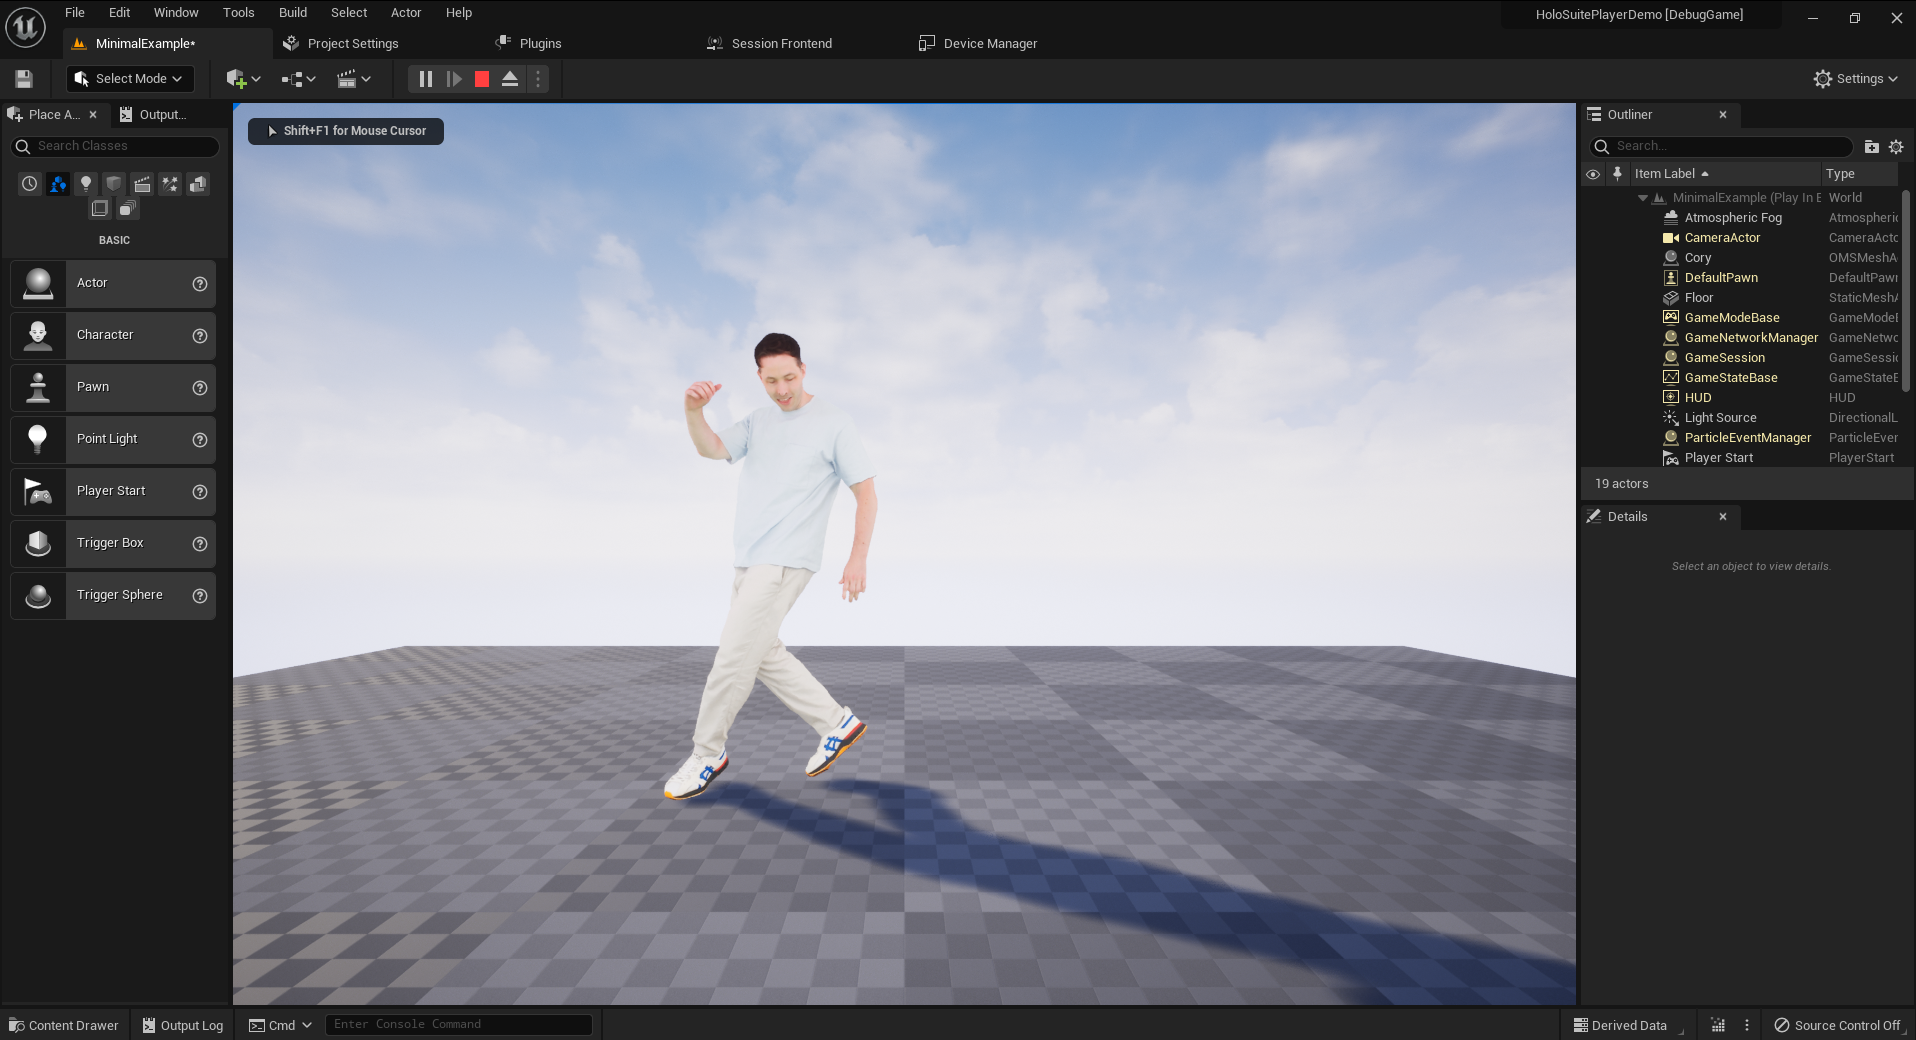
To preview the OMS playback select ‘Play’ from the Viewport toolbar.