Unreal: OMS Player Configuration Example
Note
This is a step by step guide to setting up an OMS Player in Unreal.
For the reference documentation for the Unreal OMS Player Plugin, refer to the Unreal OMS Player Reference Documentation document.
OMS Player Configuration Example
The following is a walkthrough of a typical OMS Player setup in UE4:
With the HoloStream Player for Unreal successfully installed to UE4, you’re ready to create an OMS player to use in your project.
In order for Oms Players to work in standalone builds, Ue4 requires a subfolder named ‘Movies’ for all .mp4 files. Create a Movies folder in the project window and add your MP4 file(s) by clicking and dragging from your computer into the project.
Next, add your OMS file(s) to the Content folder.
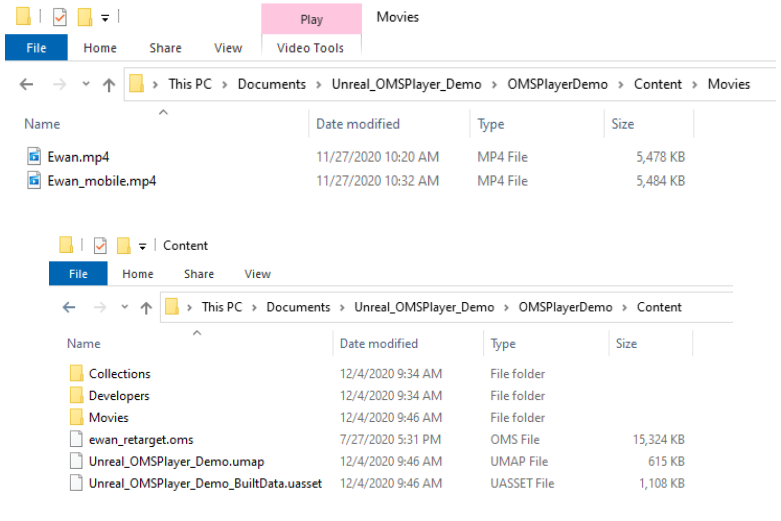
OMS Player Content in Windows Explorer
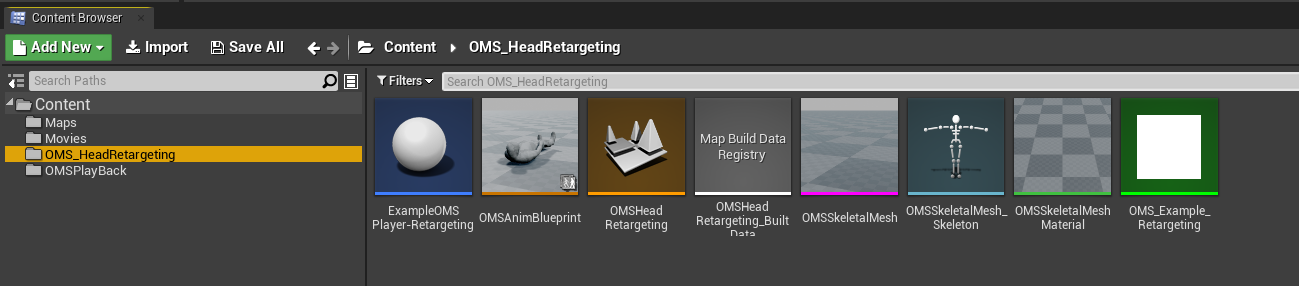
The operations for setting up an OMS Player in Unreal is split amongst numerous actors, blueprints, and objects, so you will want to keep these contained. We recommend creating a new folder for each OMS Player in your project. There are several components required to set up OMS Playback in UE4.
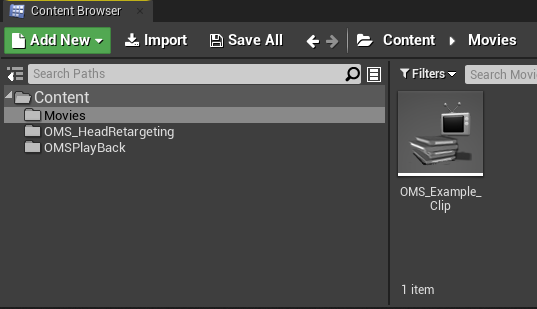
OMS Player Content in the Content Browser
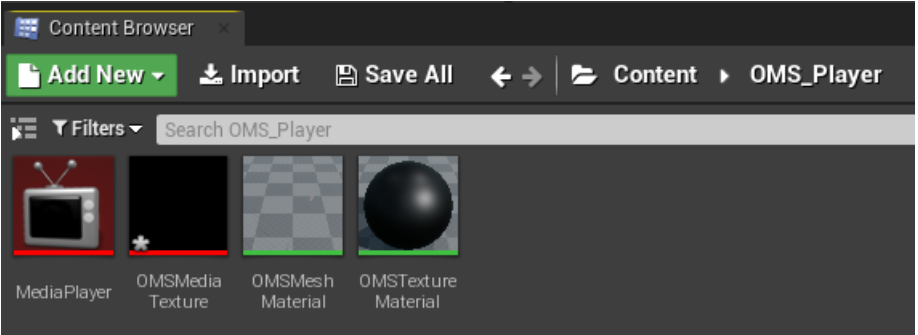
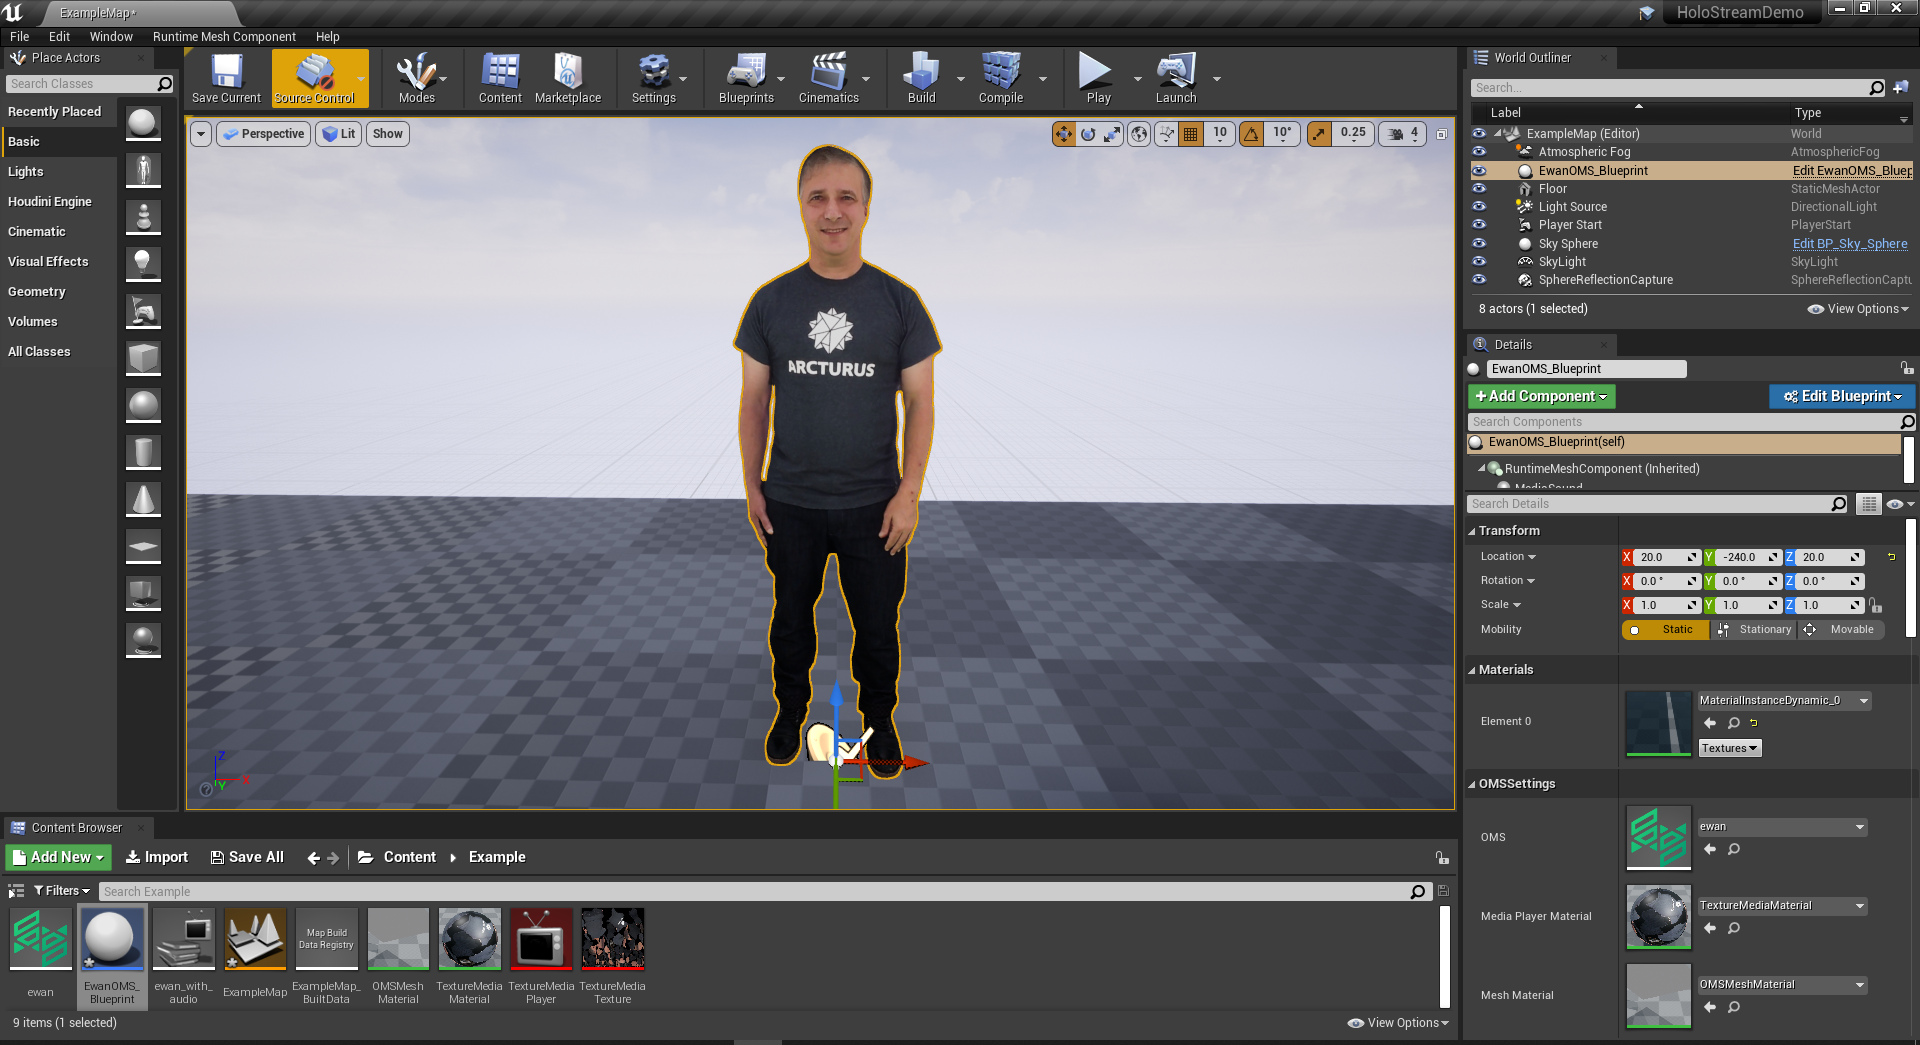
An OMSMeshActor BluePrint: This Blueprint drives the core of the OMS playback. It reads your prepared Materials and Media Player, and serves as the OMS player in your project’s map.
An OMS Mesh Material: You will need to create a material that uses the ‘ArcturusOMS’ node for the material’s texture information and World Position Offset. This is used as the Mesh Material parameter in the OMSMeshActor Blueprint.
An OMS Texture Material: You will need to create a material that uses the ‘Texture Sample’ node to playback the information provided by the Media Player Asset in order to apply the textures to your OMS’s meshes.
A Media Player Asset: This asset takes the provided MP4 textures and allows for playback of the texture and mesh animation.
A Media Texture Asset: This asset provides the Media Player with the mp4 required to provide texture and OMS playback.
To set up an OMS player, create the following:
A Media Player:
Double click on the object and ensure that ‘Play on Open’ and ‘Loop’ are enabled.
A Media Texture:
Double click on the object and set the Media Player to the new MediaPlayer object that you just created.
Two new Materials:
One of these is a Mesh Material, and the other is used with a Media Texture. For the purpose of this example, we’ll assume you’ve named these OMSMeshMaterial and OMSTextureMaterial.
The OMSMeshMaterial must be edited in the Material Editor. Add the ArcturusOMS node. From the new ArcturusOMS node:
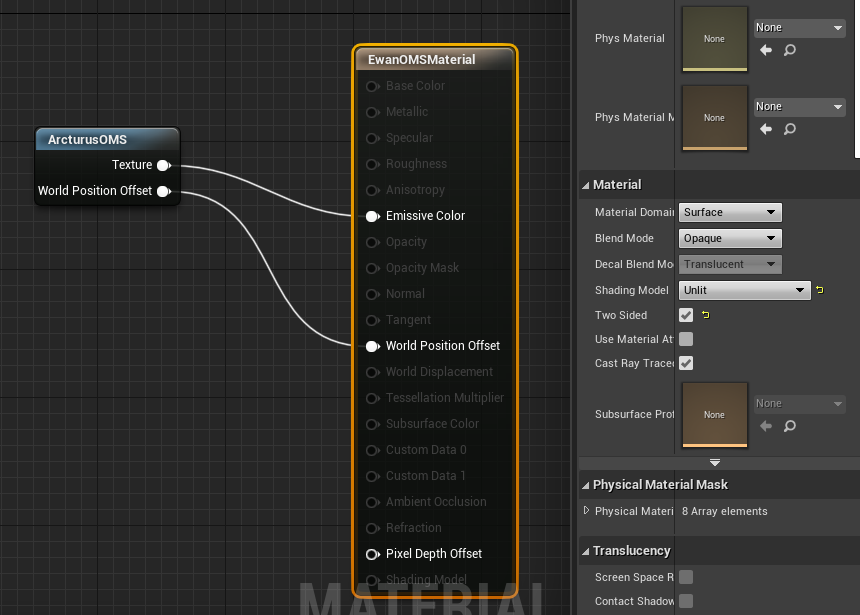
Connect the world position offset to the material node’s World Position Offset input
Connect the Normals output into the material’s normal input.
Next, determine whether your project will have a lit or unlit map.
If you plan on having real time lighting, connect the Texture output to the material node’s Base Color and set the shading model to Default Lit.
If unlit, connect the Texture output to the material node’s Emissive Color and set the Shading Model to Unlit.
The OMSTextureMaterial must be edited in the Material Editor. Add a Texture Sample node. From the Texture Sample node:
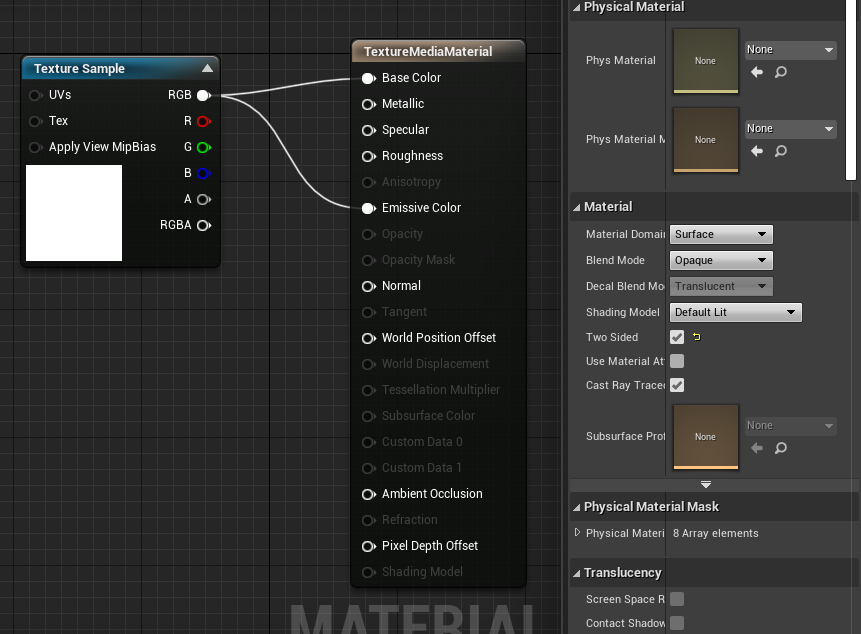
Connect the RGBA output into the Emissive input of the OMSTextureMaterial Result Node.
In the Texture Sample details, this node’s Texture should be set to the Media Texture you created at the start of the process.
To drive playback, you must create an OMSMeshActor Blueprint. Right click to create a Blueprint Class, then choose the OMSMeshActor class from “all classes”.
This is what you will configure to drive your OMS playback. It takes the assorted components required for texture and mesh playback and lets you determine the volumetric clip you intend to play.
To begin configuring your OMSMeshActor, double click on the object in the project view and expand the Event Graph tab.
Three Nodes are necessary for standard OMS playback:
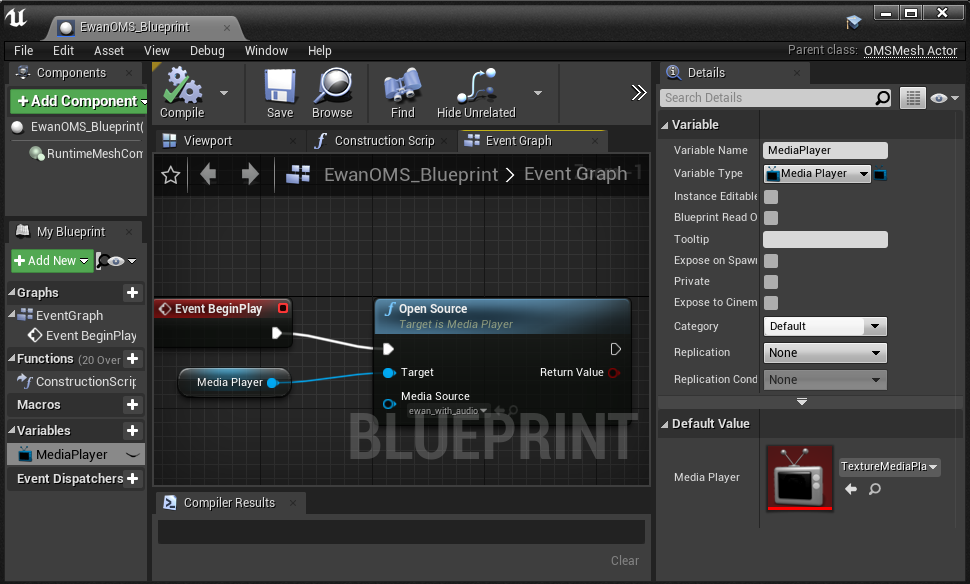
A Media Player Variable:
Create a new variable in the Variables tab of the My BluePrint panel
Change the new variable’s Variable Type to Media Player (Object.) Compile the blueprint.
Update the Media Player parameter (in the Default tab) to the MediaPlayer object you created earlier.
Drag the Media Player Variable into the graph from Variables section of the Blueprint Panel and create a Get node.
An Open Source Node: Click on the output of the Media Player node and drag to an empty spot in the Event Graph. Search for ‘Open Source’ and create the node. In the newly created Open Source node, open the Media Source dropdown menu and select the MP4 file companion of the OMS you will be playing.
An Event Node: The Event BeginPlay node initiates the playback of your OMS on entering play mode or launching an application. The exec pin of the Event BeginPlay node should be connected to the plug into the exec pin of the Open Source node.
After configuring these nodes, we’ll need to configure the blueprint’s general settings. Select the ‘Actor(self)’ entry in the blueprint Components tab and update the Default and OMSSettings parameters (located in the Details panel) as follows:
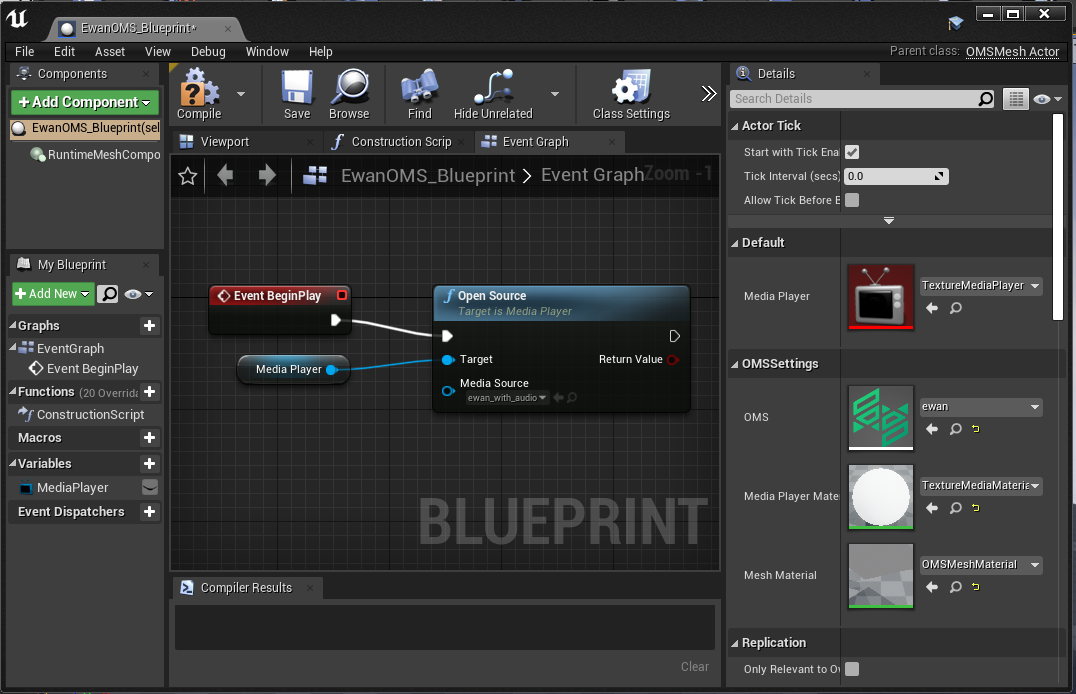
OMSSettings:
OMS: Select the OMS clip you intend for playback
Media Player Material: Select the OMSTextureMaterial you created for your clip to generate the textures for OMS Playback.
Mesh Material: Select the OMSMeshMaterial you created to generate the mesh for your OMS Playback.
Save and compile changes to complete your configuration.
OMS Player in the level editor:
Drag the OMSMeshActor BluePrint from the Content Browser into Unreal’s Level Editor Viewport. Once in the Viewport, the mesh of the first frame of your OMS Clip will be visible without textures. To preview the OMS playback select ‘Play’ from the Viewport toolbar.
Note: the Blueprint can be transformed as necessary using Translate, Rotate and Scale.
Adding Head Retargeting
To add head retargeting data to your OMS Player, first configure a standard OMS Player as described above and ensure it’s playing correctly in the viewport.
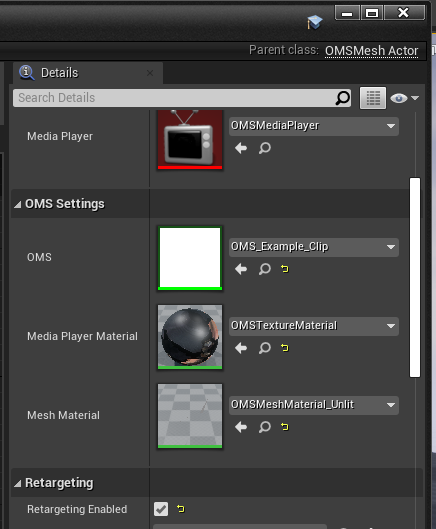
Next, ensure that Retargeting Enable is selected in your OMS_Mesh_Blueprint’s Details panel, then follow the steps below.
Adding skeletal mesh and bones:
OMS playback with head retargeting requires a skinned mesh and skeleton data to control your actor’s motions. These can be generated from an OMS file containing embedded rigging data.
To generate a new SkeletalMesh, right click on your OMS file and select “Create Retarget SkeletalMesh”.
Next, right-click on the newly created SkeletalMesh and under Skeleton, click Create Skeleton.
You should rename these appropriately, as both the mesh and skeleton assets require specific configurations.
Retargeting Blueprint:
Adding an Animation Blueprint is what enables head retargeting to lock onto a target object and control your actor’s head motion during playback.
For example, you can add a Look At blueprint using the following steps:
In your OMS_Player folder, right-click to create a new asset, and select the Animation Blueprint from the Animation dropdown menu. Animation Blueprints must be provided a target skeleton. Select the skeleton you generated in the previous steps and press the “ok” button.
Open your Animation Blueprint to expose the AnimGraph window.
In the AnimGraph, you will see an empty Output Pose node.
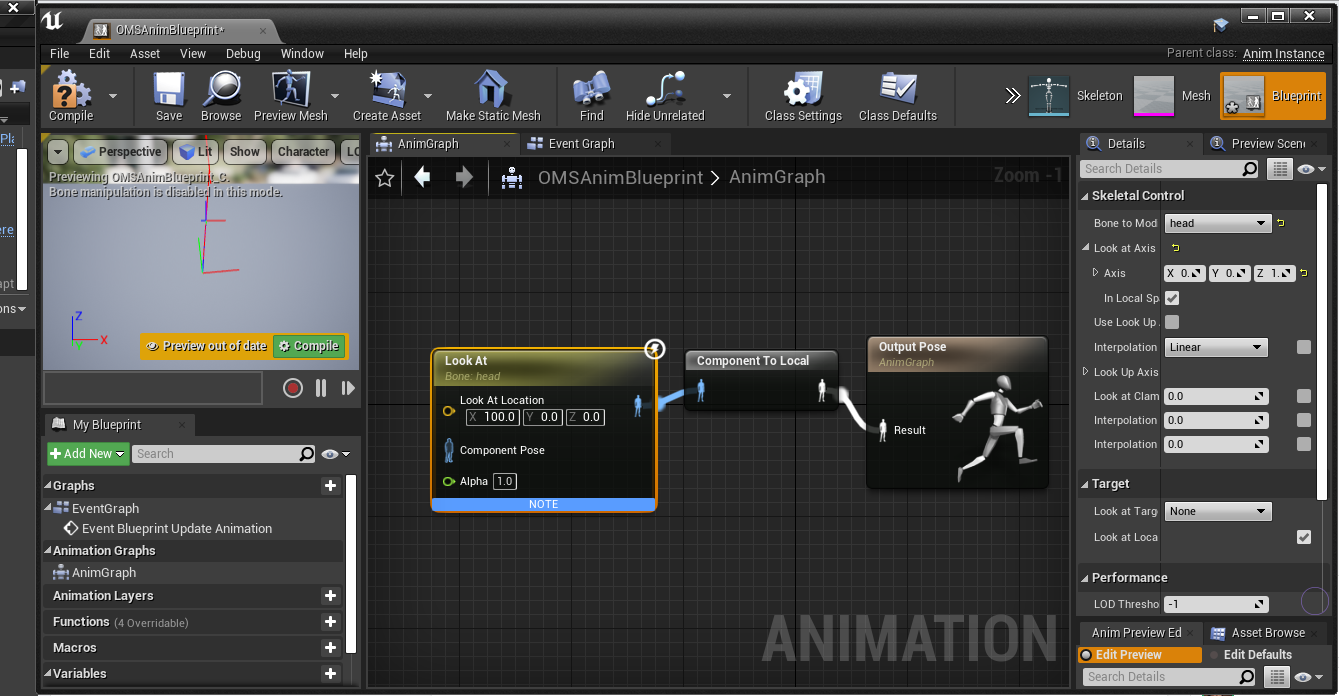
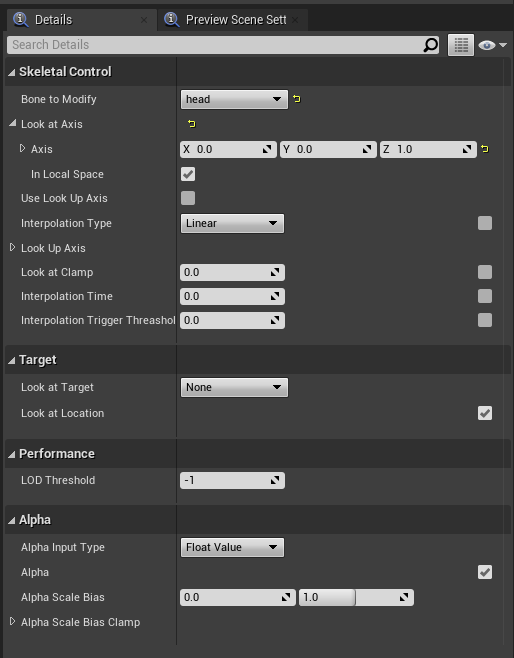
First, Create a Look At node and connect its output to the Result of the Output Pose. With the Look At node selected, update its Details as follows:
Update its Bone to Modify to ‘head’
Expand the Look At Axis category, and set the Look at Axis values to 0.0, 0.0, 1.0
Next, Compile and Save the Animation Blueprint.
After Compiling the Animation Blueprint, you can drag it into a level containing your OmsMeshActor.
If you’ve transformed your OMS Player actor in any way, ensure that your animation blueprint Actor has the exact same rotation, scale, and position as your OMS player Actor.
Adding a look at object
In order to get a useful result, you’ll also need a target for your ‘Look At’ script to point the head towards.
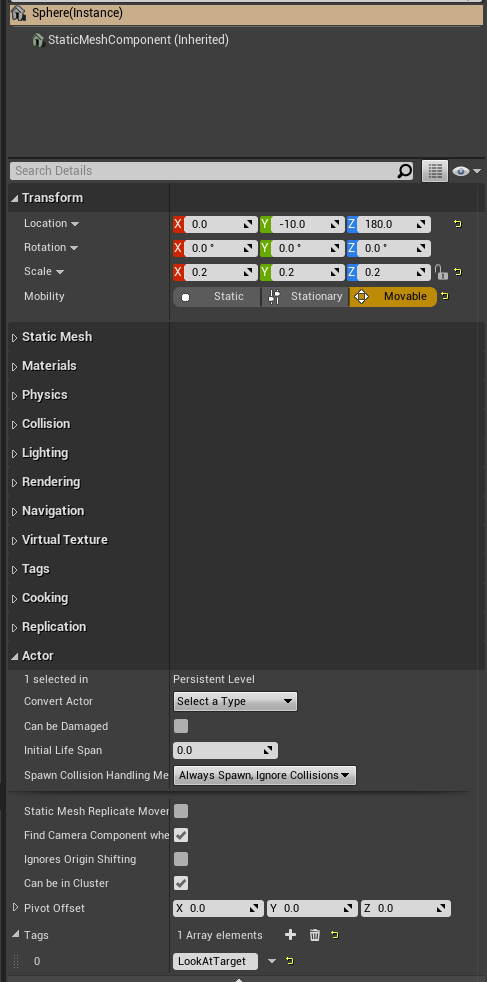
Place a new object in the scene. For example, a primitive such as a sphere.
In the Animation Blueprint, select the Look At node and in its Details panel, check the “Expose” checkbox next to the Look At Location setting in the Target tab.
This will expose the Look At Location pin in the AnimGraph.
Next, add a variable to use as the look at location, and in the Details tab set its variable type to Vector.
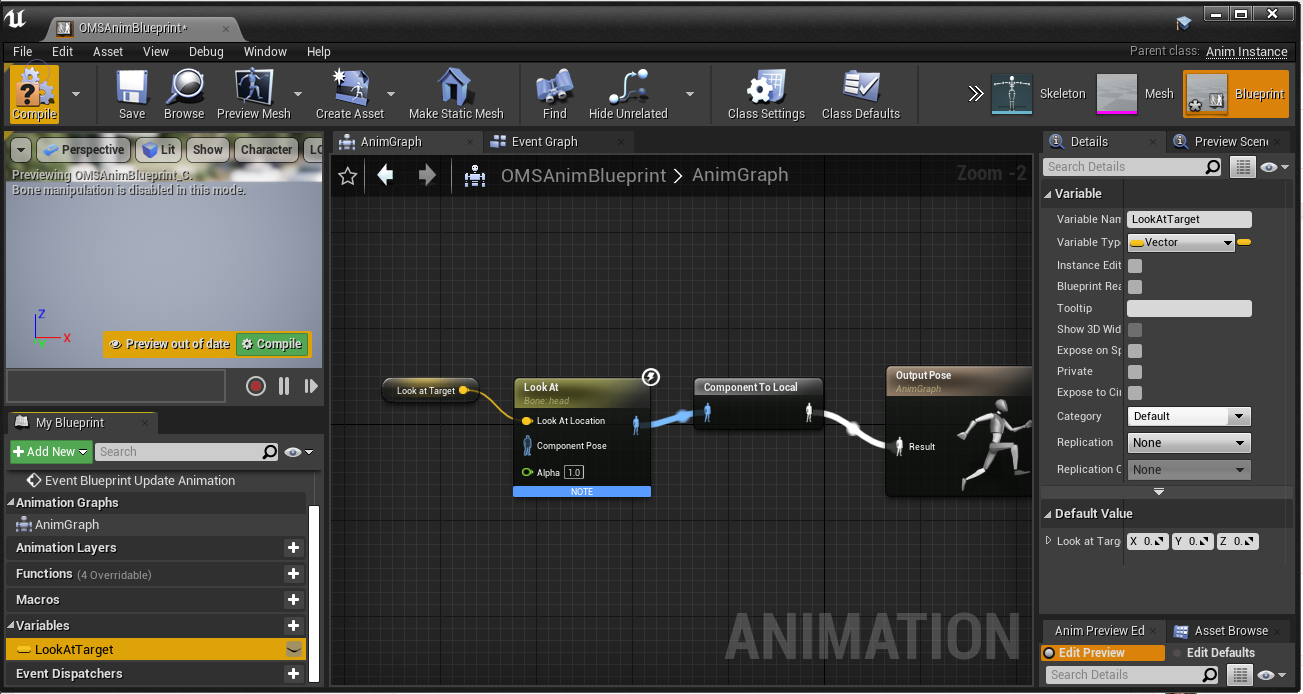
Drag your new Vector variable into the AnimGraph as a Get node and connect it to the Look At Location input of the Look At node.
Next, switch over to the Event Graph of the Animation Blueprint. Add the following assets and connections between the nodes:
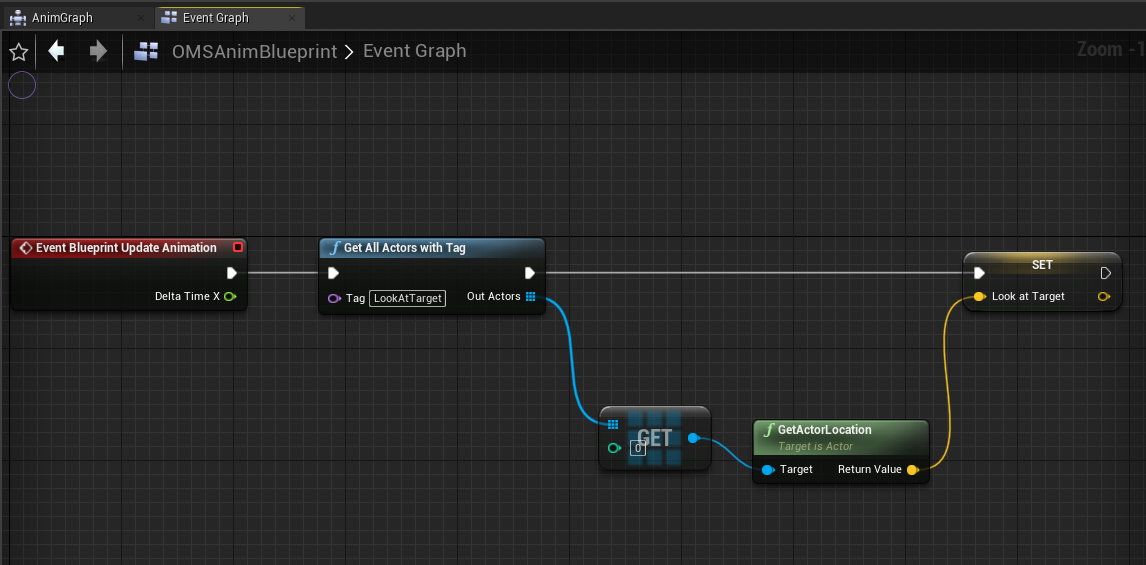
Pull from the “Event Blueprint Update Animation” exec pin and Create a Get All Actors with Tag function; in the node’s Tag field, specify any name for a tag. For this example, use “LookAtTarget”.
Click on the Get All Actors with Tag Out Actors output and create a Get (a ref) node.
Click on the Get node’s output pin and create a GetActorLocation node
Drag out from the GetActorLocation node’s Return pin and create a Set node for your vector variable.
Connect the Get All Actors with Tag node’s Exec output to the Set node’s Exec input.
Compile and Save your Animation Blueprint
In the viewport, select the primitive ‘look at’ object that you added to your scene.
In the object’s Details panel, navigate down to the Actor tab and add a Tag element. In the new field that is created below, add the ‘LookAtTarget’ tag that you entered in the Get All Actors with Tag node.
You can hide your skeletal mesh in the viewport by assigning a custom material to it. In your OMS_Player folder, create a new material. Open the material, set the blending mode in its Details panel to Translucent, create a Constant node in the material editor, and connect it to the material’s Opacity channel. Back in your OMS_Player folder, open your skeletal mesh object and assign the translucent material to the skeletal mesh’s Material Slot.