HoloSuite Maya Tools Skinning Example
Note
This is a step by step guide to editing skinweights in Maya.
For the reference documentation for the HoloSuite Maya Tools, refer to the HoloSuite Maya Tools document.
HoloEdit comes bundled with the HoloSuite Maya shelf, a toolset of scripts for use with Autodesk Maya 2020.
Overview
The following walk through expects that you are working with data that has existing stabilization, or data that has been processed with the Stabilize Mesh and Texture Transfer stages.
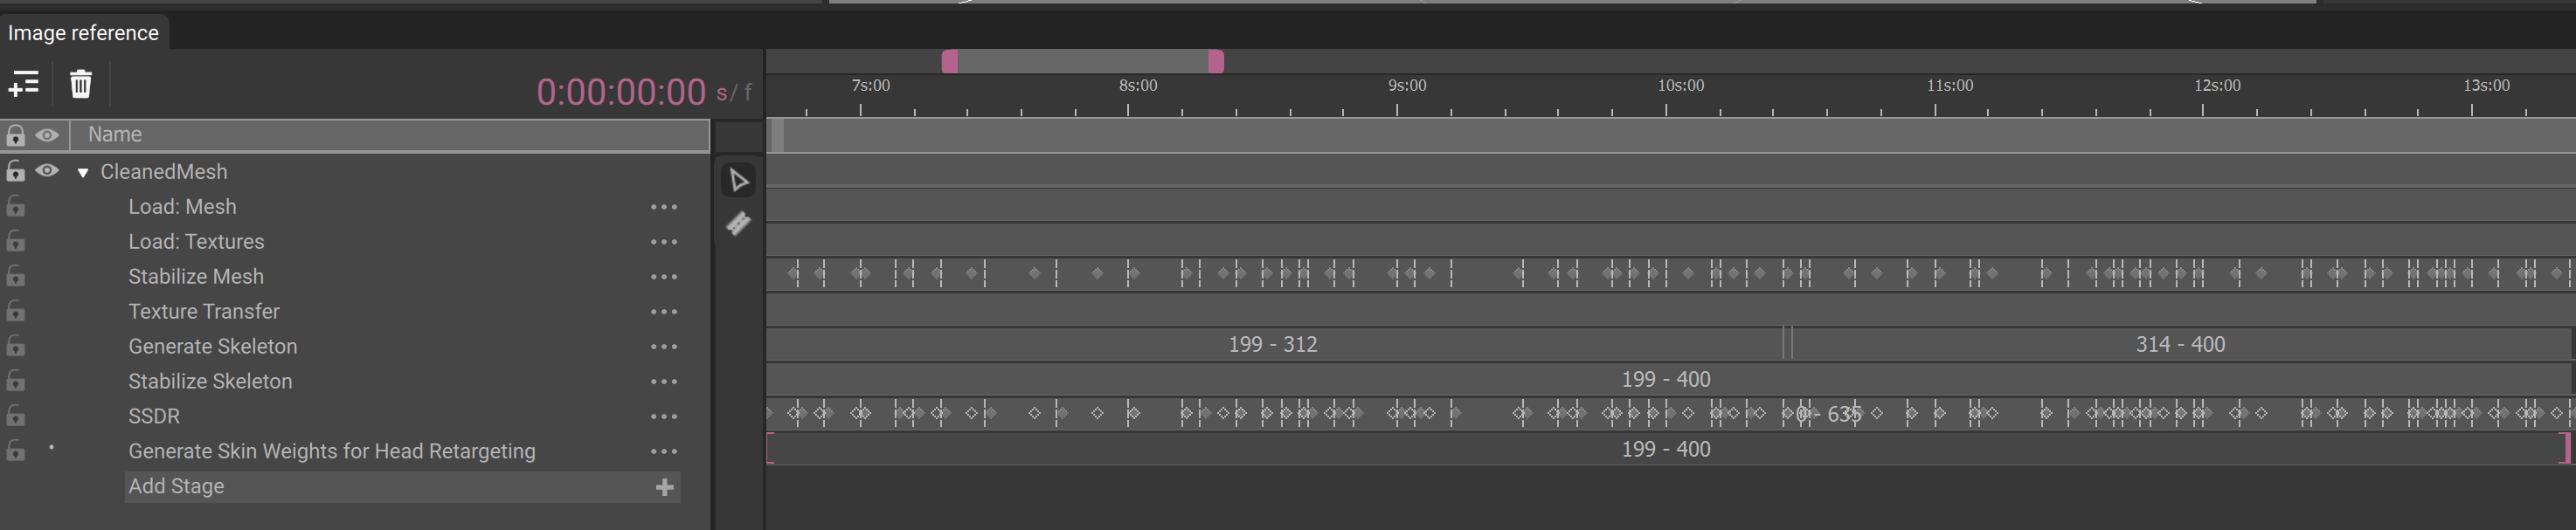
Preparing data in HoloEdit
Add a Generate Skeleton stage and Stabilize Skeleton stage to the track. Create and execute intervals for those stages.

Review and edit the Skeleton stages as necessary.
When you’ve achieved satisfactory results add an SSDR stage to your track. SSDR should follow mesh, texture and skeleton generation stages but should be processed before generating skin weights.

When the SSDR Stage has completed processing add a Generate Skin Weights for Head Retargeting stage to your composition.
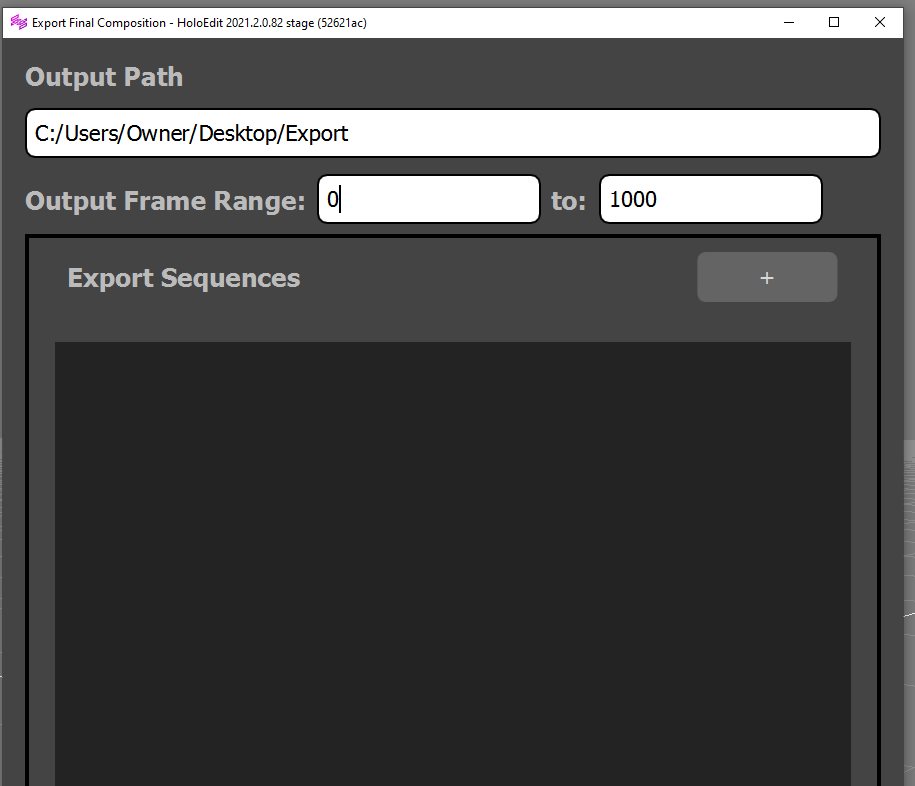
After generating skin weights, select “Export composition” from the file menu.
Choose a file destination and frame range, and press the button with the plus icon to add an export step.
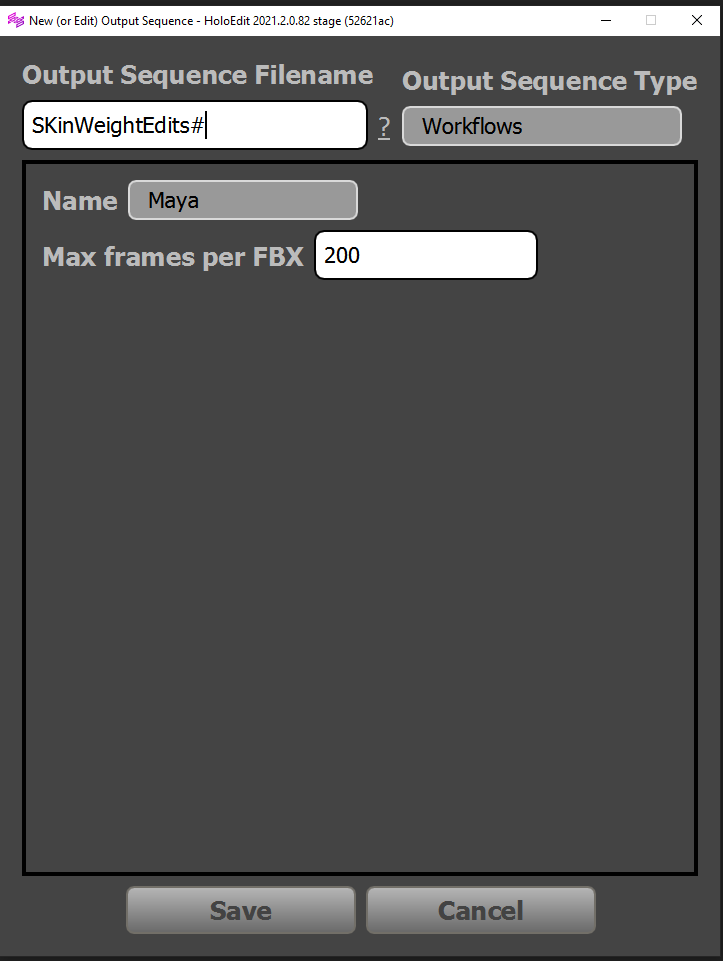
Name your Export in the Output Sequence Filename Field. Select Workflows as the Output sequence type and Select Maya as the Export type.
Large frame ranges can cause poor performance in Maya. “The Max frames per FBX” setting specifies a limit on the number of frames in an individual fbx file. This will break up your data to the nearest SSDR segment. Set this to a number between 100-300.
In the folder containing your Maya workflow exports create a new folder for each individual FBX.
Editing Skin Weights in Maya
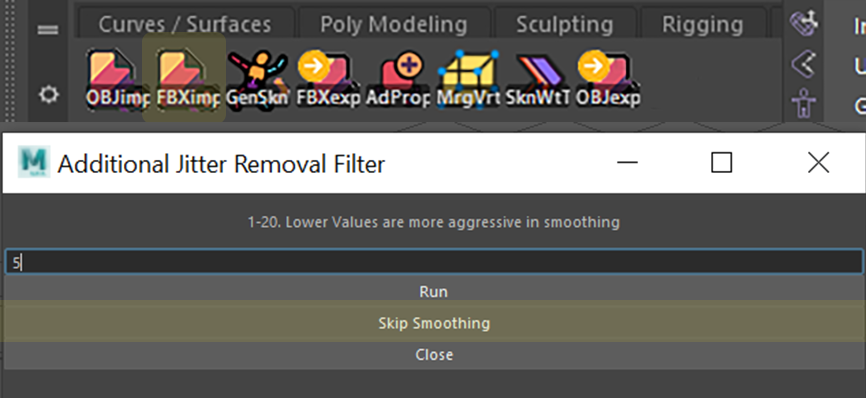
To get started in maya, use the FBX import button in the HoloSuite shelf. Navigate to a folder containing an FBX from your exported sequence and select import.
With the data imported into Maya, you should use the Merge Vert tool from the HoloSuite Shelf. This will merge the islands that make up the mesh per frame and delete non-deformer history. Once your meshes are merged into one surface you’re ready to edit your skin weights.

Move your playhead back to the first frame in your sequence and select the mesh in the outliner or viewport.
To begin painting skin weights, select the Rigging menu mode and choose “Paint Skin weights” from the Skin menu the using the ‘display options’ check box.
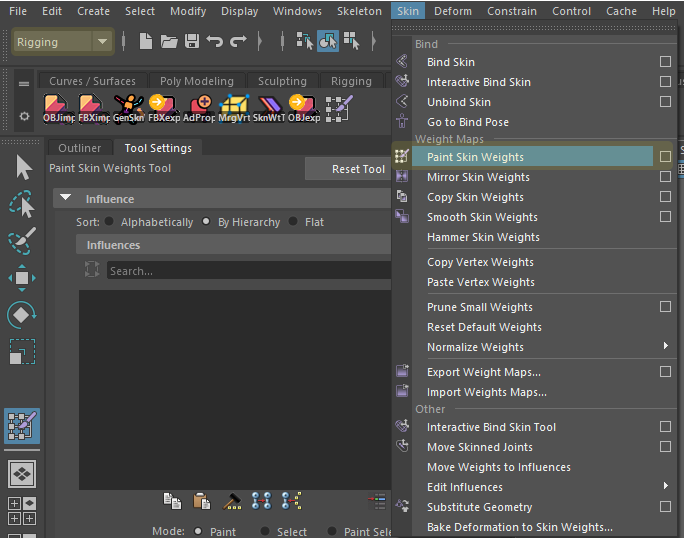
Note
Save some time by holding Ctrl+Shift when you select the paint skin weight tool to add it to your HoloSuite Shelf for quick access!
Use Maya’s Paint Skin Weights tools to make adjustments to your skin weights as necessary on this frame.
Here are some tips for novices:
Start by selecting the shoulder joint in the paint skin weights tool influence hierarchy
With the ‘Add’ Paint Operation enabled set the opacity to 1 and use the ‘Flood’ button
Select the head joint from the paint skin weights tool influence hierarchy
Paint the actors head from the chin and jaw to the back of the head with full skin weights
Reduce the tool Opacity to a value below 0.1 and paint below the jaw and neck of the actor.
Select the shoulder joint in the paint skin weights tool influence hierarchy
Paint around the jaw and lower back of the head
Enable the ‘Smooth’ Paint Operation and set the tool Opacity to 1
Blend the edges between the head and neck weights
Alternate between the Head joint and Neck joint influences to ensure a smooth blend.
Test your results by manually rotating the head joint.
Tip
Remember that rigid areas, like the chin and jaw, should be more strongly weighted to the head joint, and more flexible areas, like the neck, should be more carefully blended. For areas with merged geometry, like hair fused to an outfit’s collar, think about how the textures may look when stretching. Distorted textures on the hair or skin will be less noticeable than distorted hard lines created by clothing hems or patterns in clothing, so make sure the actors clothing is not being influenced by a joint that will be retargeted.
After refining your skin weights, select the Skin Weight Transfer Tool, labeled SKNWtT, from the HoloSuite shelf. This tool transfers skin weights on to subsequent frames. Input the number of the frame that you painted in first field. In the second field enter the final frame of the sequence.
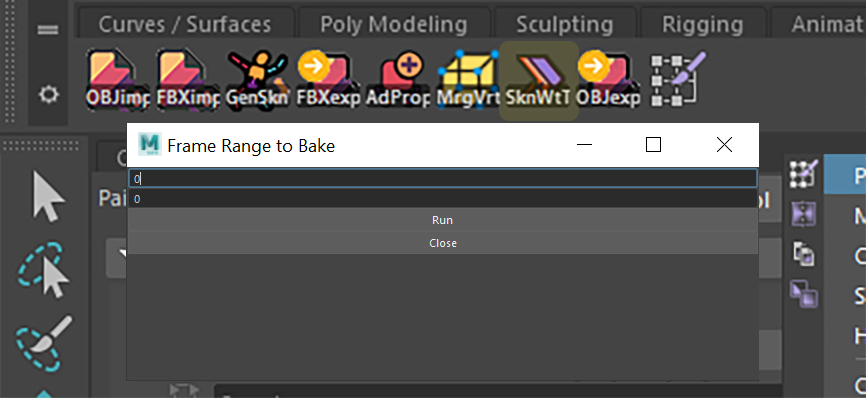
Skin Weight transfer can lose some fidelity of the details when crossing segments boundaries. For high action clips you may have to verify and update the skin weights at multiple points in the sequence.
After you are happy with the skin weights on every frame of your clip, Export your edited skin weights using the Export FBX button on the HoloSuite shelf.

Applying your skin weights to your HoloEdit composition
Add the FBX with altered skin weights into a folder in the original HoloEdit workspace and import the new data as a clip.
In your original composition, add the clip with your edited skin weights as a load asset stage as the final stage in your existing track. Select the stage in the composition window to enable Skin weight preview.
After verifying your skin weights are properly loaded into the composition, select “Export composition” from the file menu.
Choose your file destination and frame range, and press the button with the plus icon to add an export step.
Add an OMS and an MP4 for export, then press the export button.
The OMS and MP4 can now be brought into Unity or Unreal Engine for dynamic retargeting. Next, you can follow a guide to configure OMS playback with retargeting in Unity or Unreal