Head Retargeting
Retargeting allows you to dynamically re-pose your volumetric capture like any other Skinned Mesh in Unity without disrupting playback. Using procedural animation code such as IK look-at scripts, you can re-animate any bones embedded in the OMS via the Generate Skeleton stage.
For reference information on OMS retargeting refer to the Retargeting Overview from the Unity HoloSuite Player reference documentation.
Your OMS will need a skeleton and skin weights generated as part of your processing in HoloEdit. If your OMS does not have this data included, you will need to add them to your processing stages in HoloEdit before exporting the OMS. For more information on this process, take a look at the Generate Skeleton and Generate Skin Weights for Head Retargeting pages in our HoloEdit docs.
If your OMS contains the necessary retargeting data (a skeleton, skin binding, and skin weights for one or more bones) you can perform the following steps to configure Retargeting playback:
Navigate to your OMS that contains retargeting info in the project directory.
Right click on the OMS file and select Create > Arcturus > Create Retarget Skeleton.

Select the new skeleton prefab and add it to your scene Hierarchy.
Enable the Retarget option in the HoloSuite Player Component.
Select the HoloSuite Player object, from the Hierarchy click and drag the skeleton prefab into the Skeleton Root field.
After following these steps, your HoloSuite Player will be configured for retargeting. If you play your Unity scene now it will look like it did before you started configuring for retargeting. This is because you have not setup a retargeting script to drive the animation.
Now that retargeting has been configured you can use any runtime unity scripts of your choice to animate the skeleton during playback. Changes made to the skeleton transformations will be applied to your clip during playback. If you want an example of how to do this, follow the head retargeting setup below.
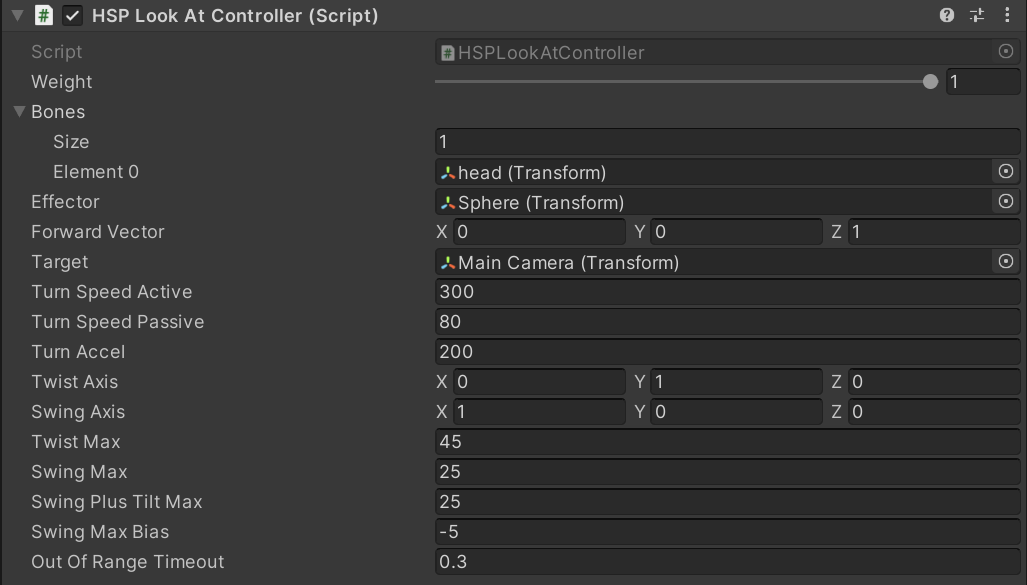
HSP Look At Controller
To set up head retargeting, we provide the HSP Look At Controller extension in the HoloSuite Player package. You can configure it according to the following steps:
Add a HSP Look At Controller component to your HoloSuite Player. This can be found in the Arcturus section of the Add Components menu.
Assign your head bone to the Element 0 field. This field is located in the “Bones” dropdown of the HSP Look At Controller. To do this, click and drag the “head” bone (a child of the skeleton prefab: > hips > back > shoulders) onto the element 0 field. This will specify the head bone transform as the GameObject for the script to act on.
Assign your head bone in the “Effector” field. Optionally, you can create a new child object for the head (such an empty GameObject, or a sphere) and supply that object as the effector. The effector will be used to determine the relative rotation of the selected bone to the look at target. Supplying a different object than the head lets you rotate that object to provide a rotational offset, which can be useful if the head is in an extreme pose, or the performer’s eyes are not looking straight forward.
Provide a Target object. Drag any object from your scene into the “Target” field. This is the object your head bone will be oriented to look at. This object is often the Main Camera in a scene, so that the volumetric actor can look directly at the viewer in a VR or AR app.
Configure the look at settings according to your needs. The default settings track the target object within a narrow range in front of the actor. Several settings are provided for in depth configuration, with tooltips available on mouse over. For more details, see the HSP Look At Controller extension reference.