Configuration Example
Note
This is a step by step guide to setting up a HoloSuite Player in Unity.
For the reference documentation of the Unity HoloSuite Player plugin, refer to the Unity HoloSuite Player Reference Documentation.
The HoloSuite Player supports playing back your OMS in Unity’s Built-in render pipeline, URP and HDRP.
HoloSuite Player Unity Configuration Example
The following is a walkthrough of a typical HoloSuite Player configuration:
To begin, ensure all necessary packages are included in your project. For instructions on how to import the HoloSuite Player Package please refer to the HoloSuite Player Unity Installation documentation.
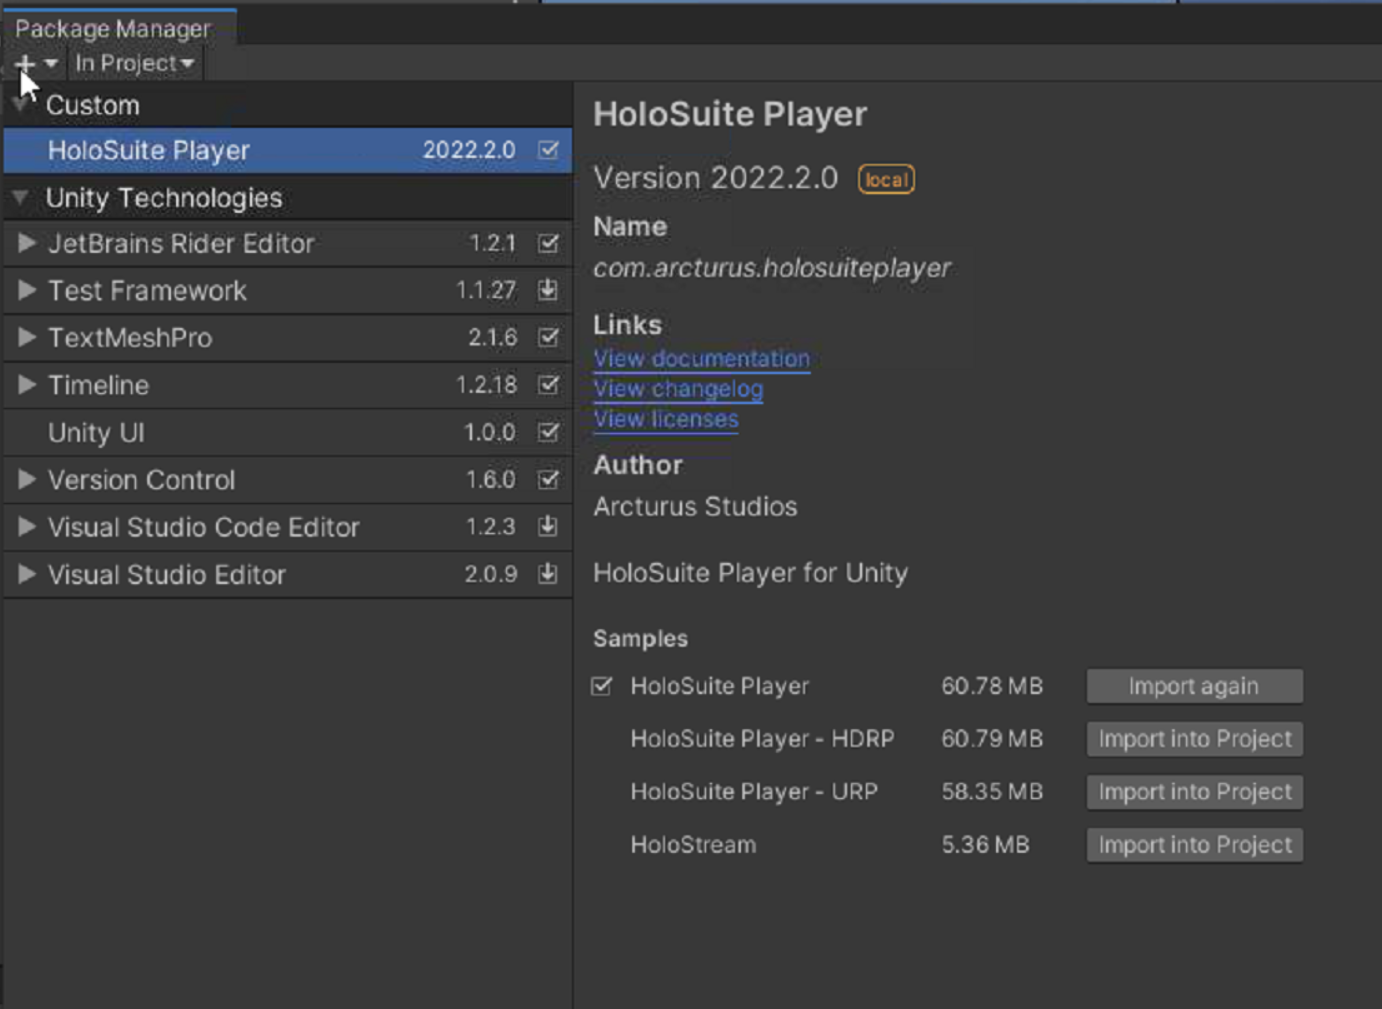
Samples
The HoloSuite Player package includes samples for each render pipeline that serve as a good starting point to build scenes from, and are a good way to see a correctly configured HoloSuite Player. You can import these samples from the Package Manager. Once imported you can load these example scenes from Assets > Samples > HoloSuite Player > 2022.2.x > HoloSuite Player - (imported render pipeline) > Scenes. The second HoloSuite Player category will be named to reflect which sample project you imported into your project.
Sample volumetric data will also be provided in the sample assets.
Because these examples are already pre-configured, they are the quickest way to get your OMS playing in Unity. If you are just looking to quickly get an OMS playing, simply load up the scene for your active render pipeline and change out the OMS and MP4 of the HoloSuite Player GameObject with the OMS and MP4 files you exported from HoloEdit.
For more information on the HoloSuite Player sample content review HoloSuite Player Unity Sample Content.
If you are looking to configure a HoloSuite Player from scratch, follow the steps below.
Load your OMS Files
The Unity HoloSuite Player supports importing OMS and MP4 as though they are native assets as long as frame encoding is present in the MP4 file. If you are unsure if your clip has frame encoding, take a look at the bottom right corner of your MP4 texture file. You will see a series of white moving dots, these represent the binary for the current frame. This is the frame encoding. If they are present you can drag and drop your OMS and MP4 files into any folder in your Unity project.
OMS and MP4 data that does not include frame encoding must be placed inside of the StreamingAssets directory, located in the Assets project folder. (Assets/StreamingAssets). If you do not have a StreamingAssets folder, create one under ‘Assets’.
The location you imported your OMS file into will determine your source type. For more information on source types take a look at the source types section of our docs.
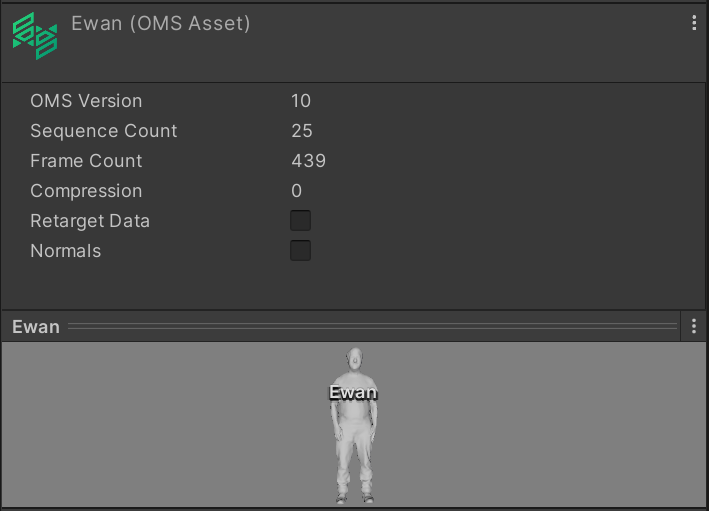
OMS inspector: Once the OMS files have been loaded into the Unity Project you can inspect them by clicking on the OMS file. This will show you some statistics for the file, and a preview of its mesh in the inspector. This is useful for checking to see if your OMS includes retargeting data, or normals.
Create HoloSuite Material
You will want to create a material to match your active render pipeline. Right click in the project panel at the location you would like to place the material, and select Create > Arcturus > (active render pipeline) > (material type). For each render pipeline there are two material types, Lit and Unlit. Lit allows the lighting in your scene to cast lighting on the texture based on the contours and normals of the mesh. The Unlit material uses an emissive lighting to evenly light the OMS clip. To learn more about the materials that are generated for each render type, take a look at the HoloSuite Player Materials and Shaders section of our docs. This material will be used once we create our HoloSuite Player GameObject.
Create the HoloSuite Player GameObject
In this step we will create the main HoloSuite Player GameObject that will play your OMS clip. Right click in the Hierarchy panel and select Create Empty. Name this GameObject HoloSuite Player. Alternatively if you are planning on having multiple HoloSuite Players in your scene, name this the same name as the clip you intend to have playing in it. For the purpose of this guide, it will be assumed it is named ‘HoloSuite Player’. In the inspector panel for this GameObject, click the Add Component option and either search for and select the HoloSuite Player, or select it at Arcturus > HoloSuite Player
Configure the HoloSuite Player
Now that we have a HoloSuite Player in our scene, we just need to configure it.
Source Type: Set the Source Type dropdown to the asset type you are using. Depending on your source type the next two fields will be different.
Assets
OMS Source: Drag your OMS file into this field, or select it by clicking on the field’s target button.
Video Clip: Drag your MP4 file into this field, or select it by clicking on the field’s target button.
Streaming Assets:
OMS Filename: Enter the path, file name, and file extension for you OMS file here. This path is relative to the StreamingAssets folder. So if you have your OMS in the root of the StreamingAssets folder, just enter its file name and file extension.
Video Clip: As with your OMS file, you must enter the path, file name, and file extension here.
Material: Place the material you created in the previous step into this field, or select it using the target button.
Playback Settings(Optional):
Play On Awake If you do not want for your clip to start playing when the scene starts disable this option.
Loop If you do not want your clip to loop when the end is reached, disable this option.
Those are all of the required settings. You can now play your Unity scene, and the HoloSuite Player will begin playback of your OMS clip.
Note
By default the HoloSuite player is facing in the +Z direction, which will be facing away from your camera. You can either set the Y rotation in the HoloSuite Player Transform to 180, or reposition your camera to solve for this.