Player Reference
Note
This is the reference documentation for the HoloSuite Player Unity Package.
For a step by step guide to setting up a HoloSuite Player in Unity, refer to the Unity: HoloSuite Player Configuration Example document.
Overview
HoloSuite Player is a Unity package that plays compressed volumetric video clips created using HoloEdit. This package contains the scripts and supporting assets necessary to play embedded OMS and AVV clips, as well as streaming OMS clips VIA HoloStream in your Unity project. With further customization users can integrate the HoloSuite Player with their Unity scene logic, configure dynamic content, create new VFX shaders, and more.
This page describes the contents of the HoloSuite Player Package, including an in depth description of the HoloSuite Player, its functionality, and properties. If you need to quickly get up and running, refer to the Unity: HoloSuite Player Configuration Example for a step-by-step guide.
Installing the HoloSuite Player
The HoloSuite Player Package officially supports Unity version 2020.3(LTS). To create a new project using the HoloSuite Player Unity package, first create a new Unity project. If you will be working with Unity’s Universal Render Pipeline or HDR Pipeline, create a new project using the appropriate template.
The HoloSuite Player Unity package is included in the HoloSuite installer, and by default will be included in your installation. You can find the plugin in your HoloSuite installation directory, under the Plugins/Unity folder.
After creating your new project, open the Package Manager window. Click the + button and select Add package from tarball. Navigate to the Plugins/Unity folder and select the HoloSuite Player Unity Plugin.tgz file, then import the package.
Upgrading the HoloSuite Player Plugin to a Newer Version
From the Unity Package Manger window, follow the same instructions to install the plugin in a new project: Navigate to the new HoloSuite Player Unity Plugin.tgz file and click import. When successful, you will see the plugin version number update in the plugin list.
If you need to update any of the sample content, delete the samples that were already imported and then import them again.
Upgrading Existing OMS Player Projects
The OMS Player is our legacy player for playing OMS files in Unity. This has been replaced by the HoloSuite Player. If you are using this legacy player in a existing project, it is not necessary to update this project to the new package. While the new package offers numerous advantages, there is not a seamless migration process to quickly update your project: any custom scripts will need to be updated to reference new package assets, and all OMS players will need to be re-configured with the HoloSuite Player script.
If you want to upgrade a project, first make sure there are no assets you rely upon saved anywhere in the Assets/Arcturus/ subfolders. If there are any assets there, you’ll want to move them into another folder. Next you can import the HoloSuite Player package per the instructions above. Once the package has been imported you’ll need to delete the Arcturus folder within Assets. It’s likely Unity won’t like doing this while it’s open, so we recommend closing the program and deleting the folder via File Explorer instead. Once you have deleted the folder, reopen your project. For each saved scene you’ll need to add a HoloSuite Player component to all former OMS players, and then configure it to match the OMS Player script. Finally, delete or disable the OMS Player script and Playback Speed components on the game object.
If you’re also planning on using one of Unity’s advanced render pipelines (URP or HDRP) you’ll need to refer to Unity’s documentation on updating an existing project.
HoloSuite Player Unity Sample Content
After the HoloSuite Player Unity package has been added to a project, you can select it in the Package Manager to find a number of sample asset packs:
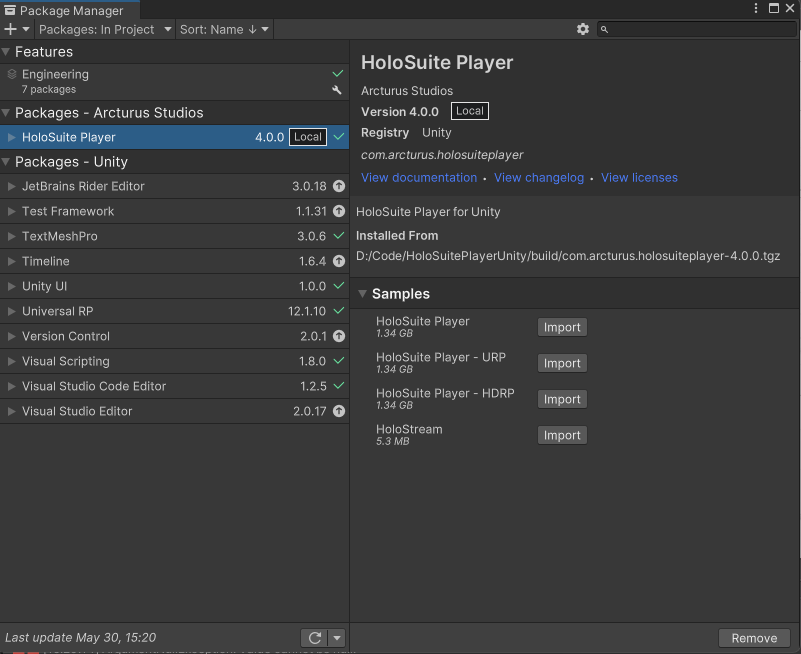
None of these packs are necessary for using the HoloSuite Player, but each does provide a helpful starting place to build your project from. To add a sample to your project simply click the Import button beside it. Here’s what you can expect from these sample packs:
HoloSuite Player: Includes four example scenes. Two use OMS samples - one standard, and one with dynamic retargeting. The other two use AVV samples - one standard, and one showing performant crowd playback.
HoloSuite Player URP: Includes four demo scenes that make use of Unity’s Universal Render Pipeline and Shader Graph. Two use OMS samples - one standard, and one with dynamic retargeting. The other two use AVV samples - one standard, and one showing performant crowd playback.
This sample will require you to have also imported the Universal RP package and configured your project accordingly. Please see Unity’s URP Pipeline documentation for more information.
HoloSuite Player HDRP: Includes four demo scenes that make use of Unity’s High Definition Render Pipeline and Shader Graph. Two use OMS samples - one standard, and one with dynamic retargeting. The other two use AVV samples - one standard, and one showing performant crowd playback.
This sample will require you to have also imported the HDRP package and configured your project accordingly. Please see Unity’s HDR Pipeline documentation for more information.
HoloStream: Includes two example scenes that will demonstrate streaming playback. The minimal scene has no playback controls while the standard streaming scene includes a UI, a clip library to change between a number of clips on the fly, and a debug menu.
Getting Started
Using the HoloSuite Player requires that at least one volumetric asset is imported into your project. You will also need a GameObject that is configured using the HoloSuite Player script. To quickly get started with playback, simply drag your clip from the project panel into your the viewport. This will automatically generate a HoloSuite Player configured to play this source type.
If you are using an OMS file the accompanying MP4 texture file must have the same name, and be stored in the same folder. If they are not you will have to manualy assign it as the video source. This can be done in the inspector of the HoloSuite Player GameObject that is created when you dragged and droped the OMS file into the viewport.
Below you’ll find additional details about the contents of the package and general use of the HoloSuite Player script.
For a more in depth walkthrough of setting up the HoloSuite Player, refer to our Unity: HoloSuite Player Configuration Example page.
Note
The Unity HoloSuite Player offers playback using StreamingAssets (Local File) and native asset paths, but MP4 files must be exported with frame encoding to be used as native assets. A telltale sign that an MP4 requires frame encoding is that the texture will update on the mesh, but the mesh does not animate. Refer to the MP4 export documentation for more information.
Build Targets
HoloSuite Player can be built for Android, IOS, Windows 10/11, and Mac OS X.
The HoloSuite Player Script
The HoloSuite Player Script can be applied to any GameObject to enable it to play OMS, AVV, or HoloStream assets.
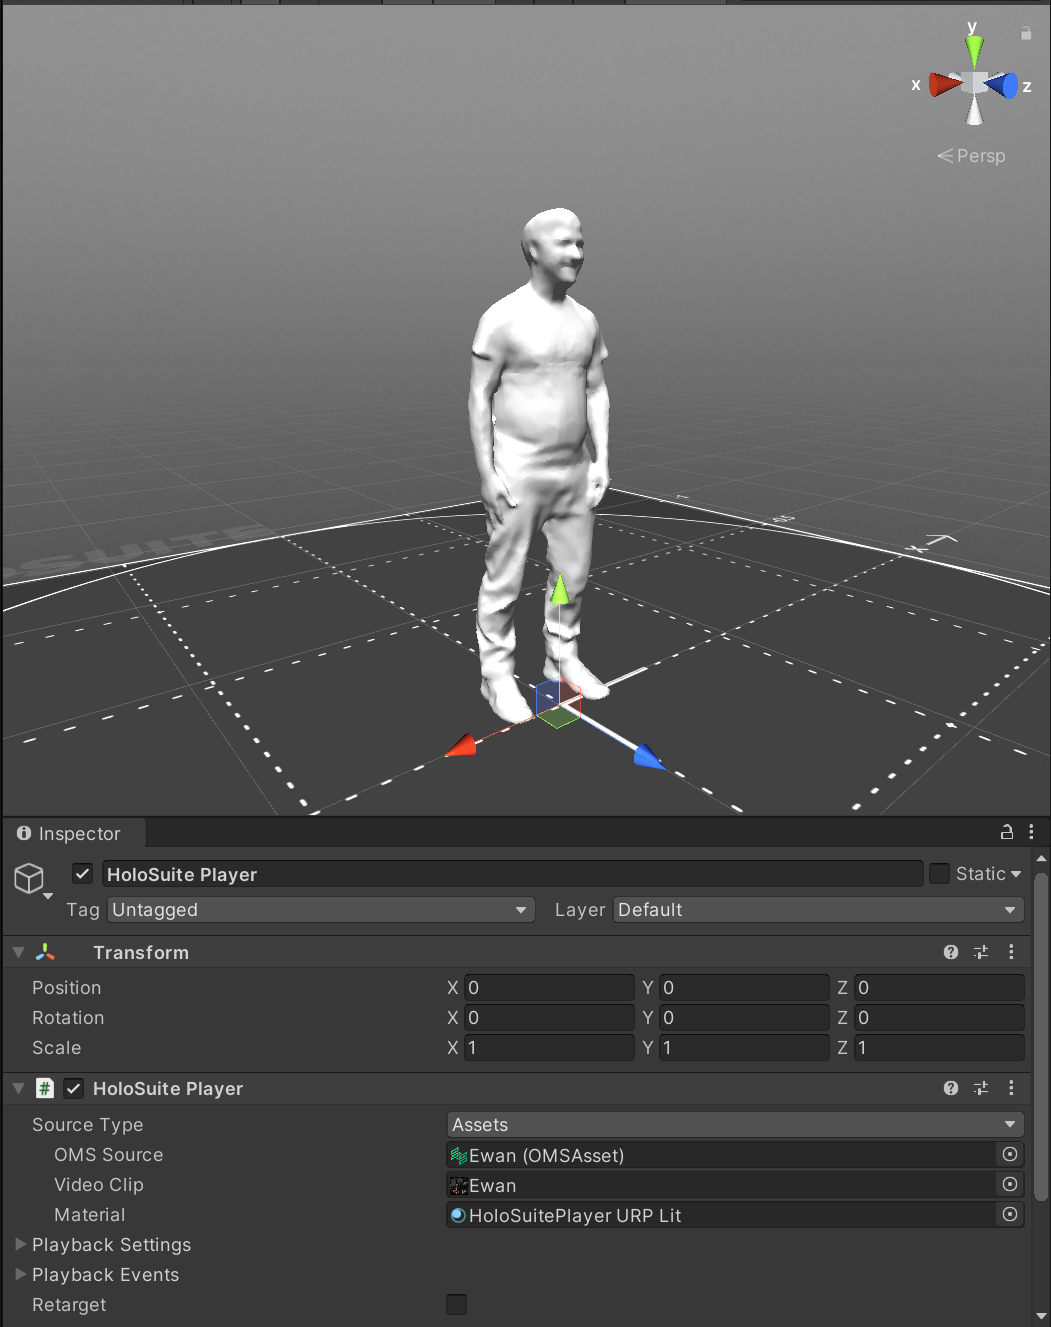
The HoloSuite Player script contains the following inspector settings:
Source Type
The Source Type dropdown enables you to select the volumetric asset type to be used in this HoloSuite Player.
Assets should be used when your clips have been imported as native Unity assets. They can be populated using click-and-drag or the target button. This is the default source type, and should be used whenever possible.
Local File (Streaming Assets)(Legacy) should be used when your clips have been imported into the
StreamingAssetssub-folder. This is only needed when it is required to make files avaliable to the normal filesystem on the device you will be deploying to. For more information refer to Unity’s Streaming Asset documentation.HoloStream URL lets you dynamically stream a clip from our HoloStream service directly into Unity at runtime. For more information on HoloStreams, check out our HoloStream documentation
Warning
As a reminder, if you are using MP4 files that have not been exported using frame encoding, you must use the Streaming Assets import type. Failure to do so will result in clips that do not play correctly. Please re-export your MP4 file(s) with frame encoding enabled if you want to import your files as native assets.
Once you have selected your Source Type, you will need to provide your clip information for the following fields:
OMS Source/Filename/HoloStream URL: The OMS asset to be played. When using Streaming Assets, include the relative file path from the StreamingAssets folder and the .oms extension (Eg: MySubfolder/MyClip.oms). If you are using a HoloStream URL source type, this can be populated with either the .mpd URL for your HoloStream, or the preview URL.
Video Clip/Video Filename: The MP4 asset to be used. As above, when using Streaming Assets you must include the relative file path and the .mp4 extension.
Material: Specify the material to be used by the renderer.
Playback Settings
These settings can be used to modify the playback behavior of your clip.
External Timing: Indicates if the HoloSuite Player is being driven by an external script.
Play On Awake: Toggles whether or not the clip plays automatically when the scene is run.
Loop: Toggles whether or not the clip loops when it reaches the end of playback. When looping is disabled, the clip will hold on the final frame once it has reached the end.
Frame Rate: (AVV Source type only) Forces the framerate of the AVV clip to playback at the selected frame rate.
Reverse: (AVV Source type only) Cause the clip to start at its end frame and play in reverse. This can be used together with Loop and/or Ping Pong if desired.
Ping-pong: (AVV Source type only) Allows the clip to play through, and then cause the clip to play in reverse once reaching the last frame. This can be used together with Loop and/or Reverse if desired.
Playback Events
These events are emitted by HoloSuite Player as various internal events happen. Create Listeners to update custom components.
On Load: The clip with the given index has been loaded.
On State Change: Player state has changed to the given state.
On Playtime Changed: The current playback time has changed to the given time (seconds).
On Buffertime Changed: The amount of buffered-ahead content has changed to the given time (seconds). Streaming mode only.
On Error: Playback has failed with the given error message.
Functions
The HoloSuite Player component has the following public functions.
bool - Open(HoloSuitePlayerAsset newSource, VideoClip newVideoClip = null): This function lets you switch the clip that is being played in the HoloSuite Player at runtime. You will need to specify a volumetric asset to load (HoloSuitePlayerAsset). If the asset is an OMS file, you will also need to specify a MP4 asset to use as the texture. Returns true once the new HoloSuite asset has been loaded into the HoloSuite Player.
void - Close(): This function allows you to stop, and dispose of a HoloStream player.
Retarget
Enable this checkbox for an OMS which is intending to use dynamic retargeting. See the Retargeting Overview for more information on preparing a clip for retargeting.
When Retarget is enabled, additional configuration options become available:
Skeleton Root: Select the skeleton generated using the clip’s OMS file after adding it to the scene hierarchy.
Retarget Events
On IK Update: HoloSuite Player fires this event when it is time for IK solvers to modify the pose of the retargeting skeleton.
HoloSuite Player Materials and Shaders
For the HoloSuite Player to correctly play a volumetric asset file it must use one of HoloSuite Player materials. These materials use the Arcturus custom shaders to decode and play the mesh and textures of the assets.
HoloSuite Player Materials
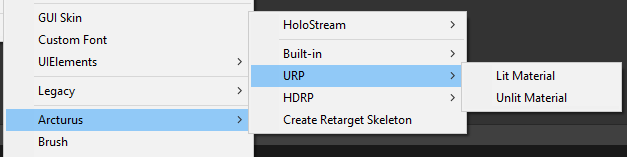
Generate a new HoloSuite Player material by right-clicking in the project window and selecting Create > Arcturus > Materials > (Current Render engine) > (Material Type). There are two material types: Lit and Unlit. Both of these types are avaliable in the built-in, URP, and HDRP render pipelines. In the built-in pipeline these material’s shaders are written in HLSL. In the URP and HDRP pipelines, these materials use Shader Graph. Lit materials will respond to the lighting in the scene, whereas unlit materials will have consistent lighting and color hue regardless of the lighting in the scene. These materials auto-detect the asset type, and because of this they are asset type agnostic.
Built-in
Lit Material The HoloSuite Lit Material uses a SkinnedSurface surface shader that exposes the albedo texture (driven by the HoloSuite Player), smoothness, and metallic values, in addition to a color tint (driven by the HoloSuite Player per-track).
Unlit Material The HoloSuite Unlit Material is an unlit SkinnedMesh shader that exposes the albedo texture (driven by the HoloSuite player) in addition to a color tint (driven by the HoloSuite player per-track).
URP + HDRP
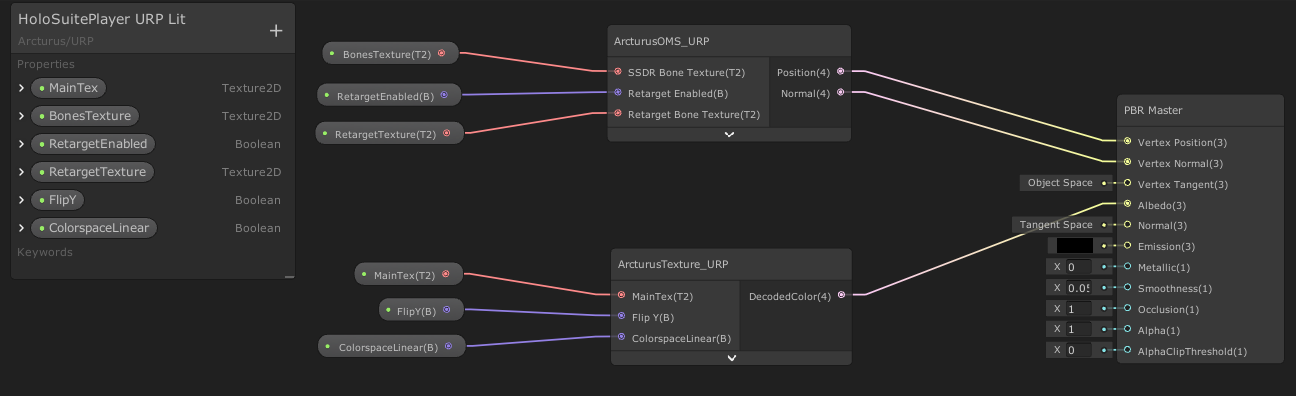
All URP + HDRP HoloSuite Player shaders are Shader Graph materials. The URP + HDRP HoloSuite Player Shader Graph materials are driven by the ArcturusOMS, ArcturusAVV, and ArcturusTexture nodes. These materials auto-detect both the asset type and custom render pipeline. Due to this, they are asset type and custom render pipeline agnostic.
Lit Material The HoloSuite Lit URP + HDRP Material is a prebuilt Shader Graph material for playback within the Universal Render Pipeline or High Definition Render Pipeline. To further tune these materials you can adjust the smoothness and metallic values within the Shader Graph.
Unlit Material The HoloSuite Unlit URP + HDRP Material is a prebuilt Shader Graph material for playback within the Universal Render Pipeline.
Editing HoloSuite Shader Graph Materials
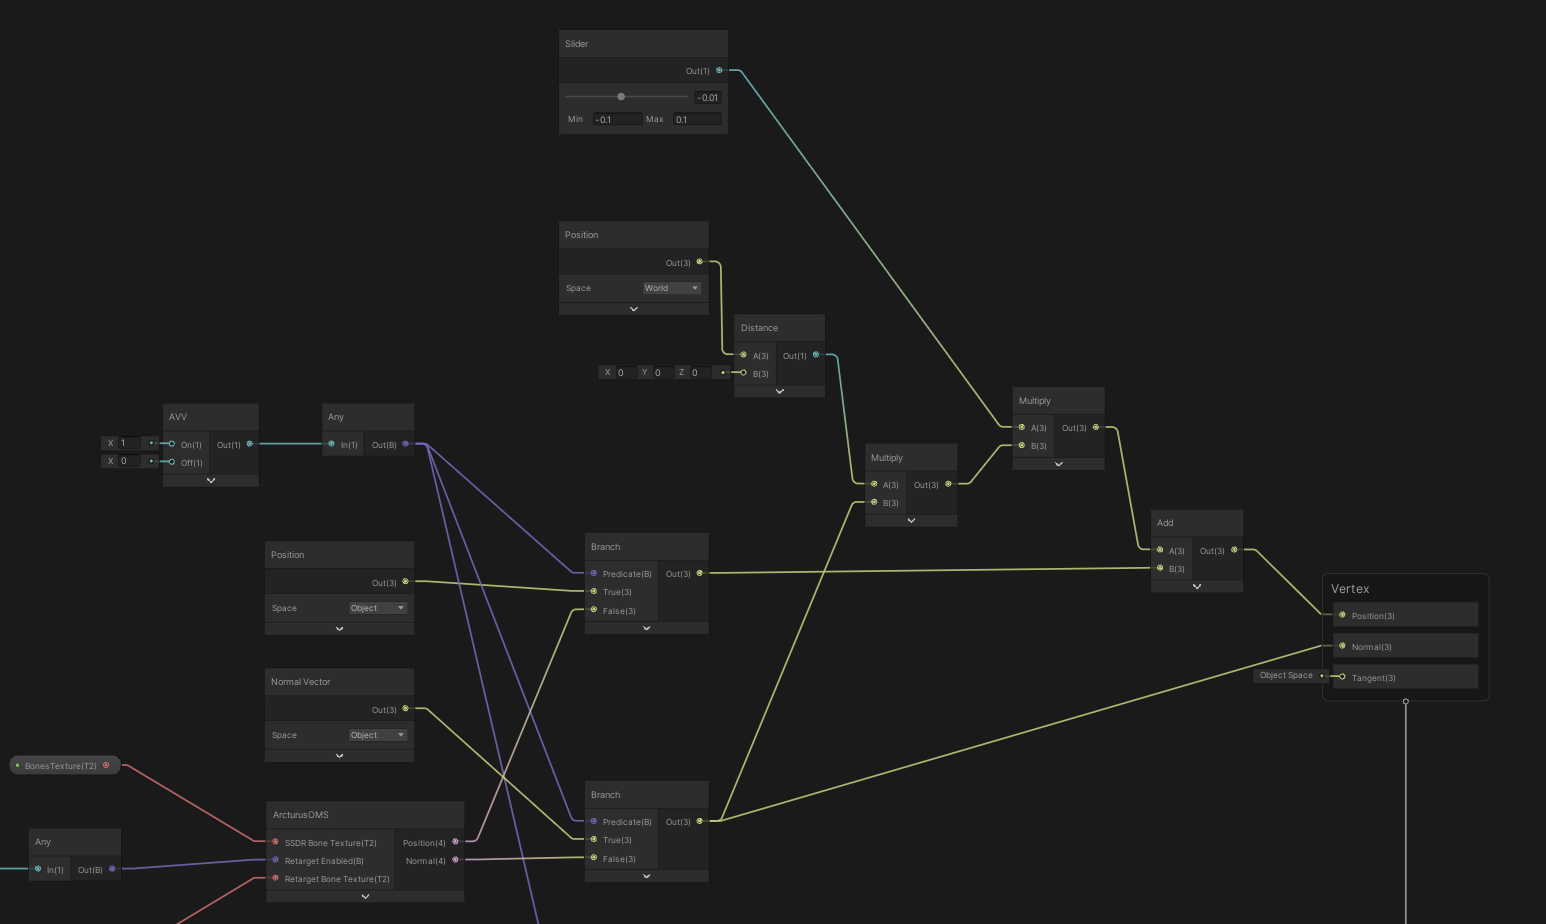
HoloSuite Shader Graph materials can be edited to fine tune the look of your OMS clip. To do this, you will need to input your changes in-between the Arcturus custom nodes and the output node.
Take a look at the two examples below to get an idea of how to do this. Any time you would use a Position or Normal node in a standard Shader Graph, just take the Position, or Normal outputs from the Branch nodes just prior to the output you are looking to adjust. Just be sure that there is a path for the Position and Normal data from the Arcturus node to reach the output node. If that path is broken the Mesh will stop animating correctly, or the texture will not display correctly.
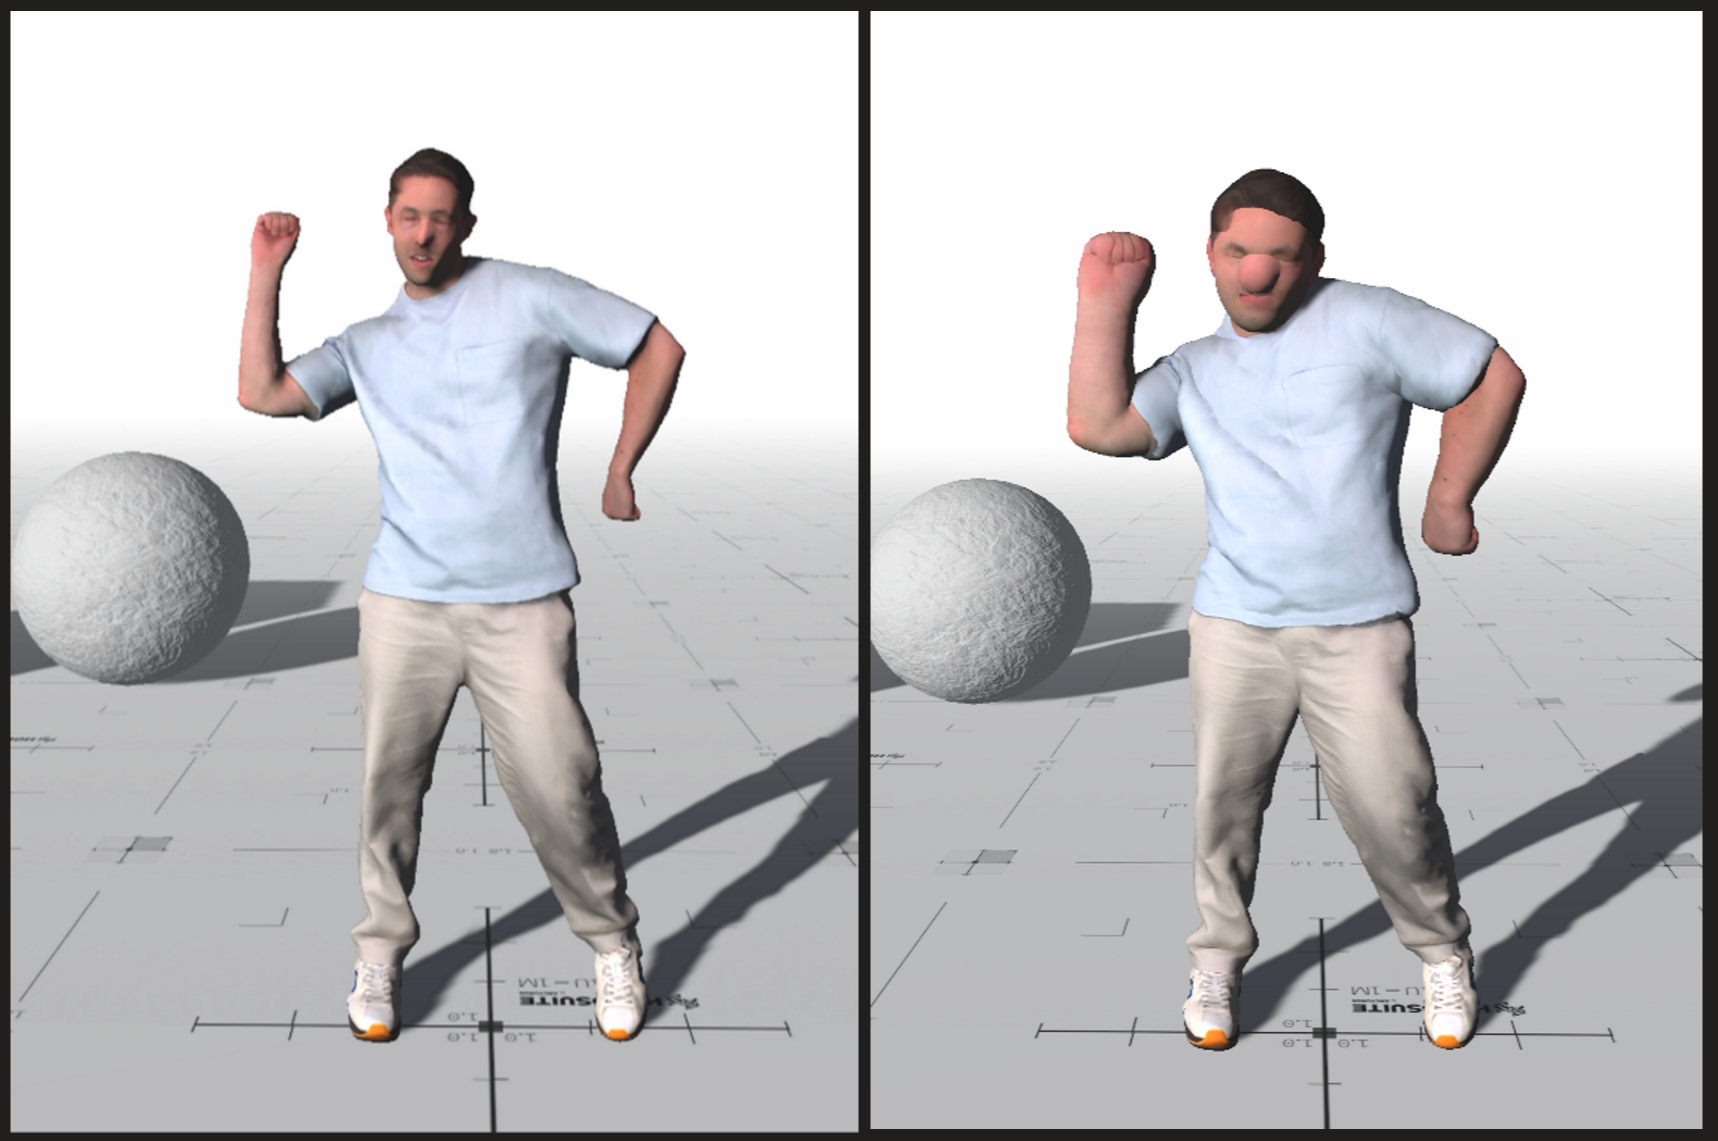
Inflate
In this example the vertex positions are being offset in the direction of their normals, by their distance from a vector position. This causes the OMS to inflate.
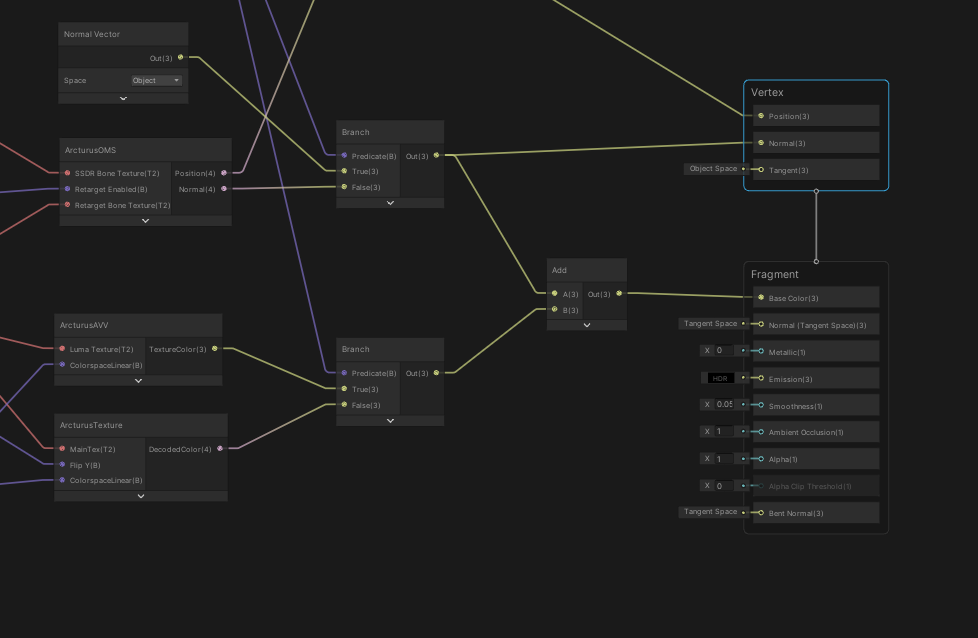
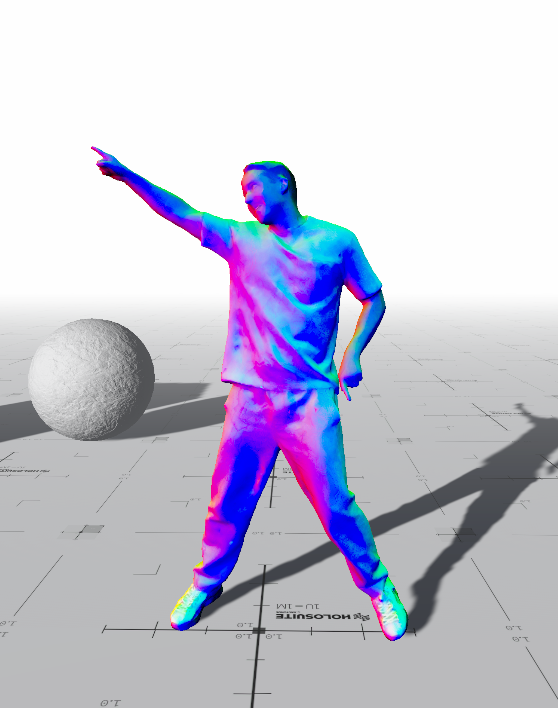
Display Normals
This example shows adding the normal value to the texture color. This displays the normals, and can be useful for troubleshooting.
Extensions
Extensions are additional components that can be added to the HoloSuite player to extend its functionality. For more information on the HoloSuite Player extensions, take a look at the Unity: HoloSuite Player Extensions page of our docs.
Retargeting Overview
One key feature of OMS playback is Retargeting. Retargeting allows you to dynamically re-pose your volumetric capture like any other Skinned Mesh in Unity without disrupting playback. Using procedural animation code such as IK look-at scripts, you may re-animate any bones embedded in the OMS via the Generate Skeleton stage.
If Skin Weights have been provided, either manually or via the Generate Head Skin Weights stage in HoloEdit, the weighted vertices will be transformed accordingly.
One common usage of Retargeting is “Head Retargeting,” using the head bone to make the volumetric actor look at an animated object or camera in the scene during playback. Clips can be prepared for Head Retargeting in HoloEdit using the Generate Skeleton and Generate Skin Weights For Head Retargeting stages without any manual editing.
See the Retargeting Setup guide for a step by step walkthrough for setting up head retargeting in Unity.
The HSP Look At Controller
The HSP Look At Controller extension is provided with the HoloSuite Player package and can be used to orient a transform to track another at runtime. Typically this script is used for the Head Retargeting workflow, to enable a volumetric actor to track the scene camera by turning their head. For more information on the HSP Look At Controller, please refer to the HSP Look At Controller portion of the HoloSuite Player Extensions document.
Generating OMS Skeleton Assets
You can quickly generate the skeleton asset required for retargeting by right-clicking on an OMS asset and selecting Create > Arcturus > Create Retarget Skeleton option.
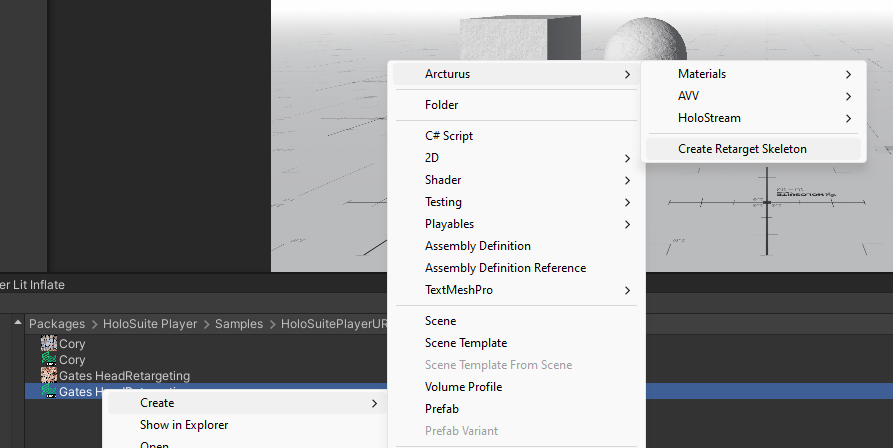
When selected, an <OMS filename> Skeleton prefab will be created adjacent to the target OMS file. A console error will be thrown if you try using the function on a non-OMS asset, or if the targeted OMS file does not contain retargeting data.
Note
.oms files will not be recognized as OMS-type assets while they are imported into the StreamingAssets folder. You can move a .oms file from StreamingAssets into the main asset tree to use this operation and generate a skeleton prefab, then move it back into the StreamingAssets folder afterwards.
When working with your own custom retargeting scripts, you will need to trigger it using the DoUpdate() function. To configure this, just add your retargeting scripts retarget function to the HSPLookAtController.DoUpdate() event. You will find this under the Retargeting Events drop down on the HoloSuite Player component.
Appendix: Unity Package Contents
Importing the HoloSuite Player Package will add its contents to the Unity Packages folder tree. Contents of the Packages folder are both read and write enabled. This means that all assets are visible to you, even if you have not imported the sample packages they belong to, and you are free to edit any of the contents. When you import a sample using the Unity Package Manager it will create a local copy of the assets within your project folder.
HoloSuite Player
The following content is included when you import the HoloSuite Player Package:
Editor: Scripts and assets used for example UI.
Plugins: Plugin dependencies.
Runtime: Holds most HoloSuite Player core assets.
Materials: Materials used in examples or for OMS Playback.
Prefabs: OMS Player Prefabs for use in user created scenes. See example scenes for examples of prefab usage.
Scripts: Various scripts related to OMS Playback and OMS Player configuration.
Rigging: Skeletons used for retargeting.
Render Pipeline: Pipeline dependent config files.
Shaders: Shaders used for OMS Playback.
Shader Graphs: Shader Graphs used for OMS Playback.
Textures: Data textures used for some OMS Playback features.
VolumetricContent: OMS and MP4 sample files.
Samples: Contains all sample contents.