Sequencer Driven Playback

Note
This is a step by step guide for setting up OMS and AVV playback in Unreal using the Level Sequencer.
For the reference documentation on the Unreal HoloSuite Player Plugin, refer to the [Player Reference Documentation](#unreal-reference).
The Level Sequencer is Unreal Engine’s multi-track editor, used for creating and previewing cinematic sequences in real-time.
By creating Level Sequences and adding Tracks, users can define the makeup of each Track, which will determine the content for the scene. Tracks can consist of things like Animations (for animating a character), Transformations (moving things around in the scene), Audio (for including music or sound effects), several other Track types and volumetric videos exported from HoloEdit.
OMS Sequencer Playback Configuration
Media Source
The image sequencer can take either an MP4, or an image sequence as its media source. In either case you will need to create a folder named Movies in UE’s main Content folder. Depending on your media source, your next few steps will be different.
MP4: If you are using an MP4 as your media source, you can just drag and drop this file into the content browser, placing it into the Movies folder you just created. This is all that is required, so you can move on to the Mesh, Texture, and Material setup.
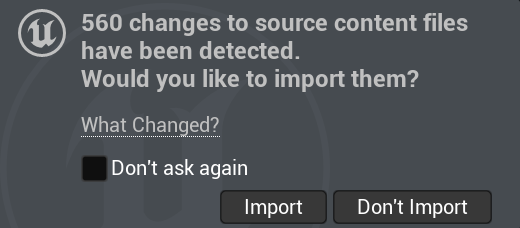
Image Sequence: If you are using an image sequence you will need avoid UE indexing the files. First create a Frames folder within the Movies folder you just created. Right-click on that folder, and select Show in Explorer. This will open that folder in an explorer window. Move your PNG or JPG image sequence into that folder using the explorer. It’s important you do not move them into that folder using the Content Browser in UE, as this will cause the files to be indexed. When you click back to Unreal you will see a popup in the bottom right asking you if you want to import the files. It’s important that you click Don’t Import.
Note
You will not see the files in the Frames folder in the UE Content Browser because the files have not been indexed.
Now that you have your Image Sequence loaded into your project, you will need to make an image media source to specify them. In the Movies folder right-click and select Media > Img Media Source. If you will be using more then one clip in your scene, be sure to rename this Img Media Source to denote the clip it will be used with. Double-click on this Img Media Source and set its Sequence Path to the first image of the sequence you just placed in the Frames folder. Set the Frame Rate Override to match the framerate of this image sequence. Click save and close this window.
Note
For your Image Sequence to drive the OMS playback, the files need to have frame encoding.
Mesh, Texture, and Material Setup
You will need to import an OMS file, create a set of textures, and a set of materials to playback your clip. Before you start, create a new folder in the Contents folder named for the clip you are configuring.
You will also need to add or create the following files:
OMS: Open the new folder you just created and drop your OMS file here.
Mesh Material: Right-click the OMS file and select either Create Lit Material, or Create Unlit Material. If you plan to light your clip, you will want to select the lit variant, if not select Unlit.
Media Player: Right-click in the Content Browser and select Media/Media Player. When this is added you will see a popup asking if you want to create a Video output MediaTexture asset. Check this box and click ok.
MediaTexture: This is the Video output MediaTexture you just created with your Media Player.
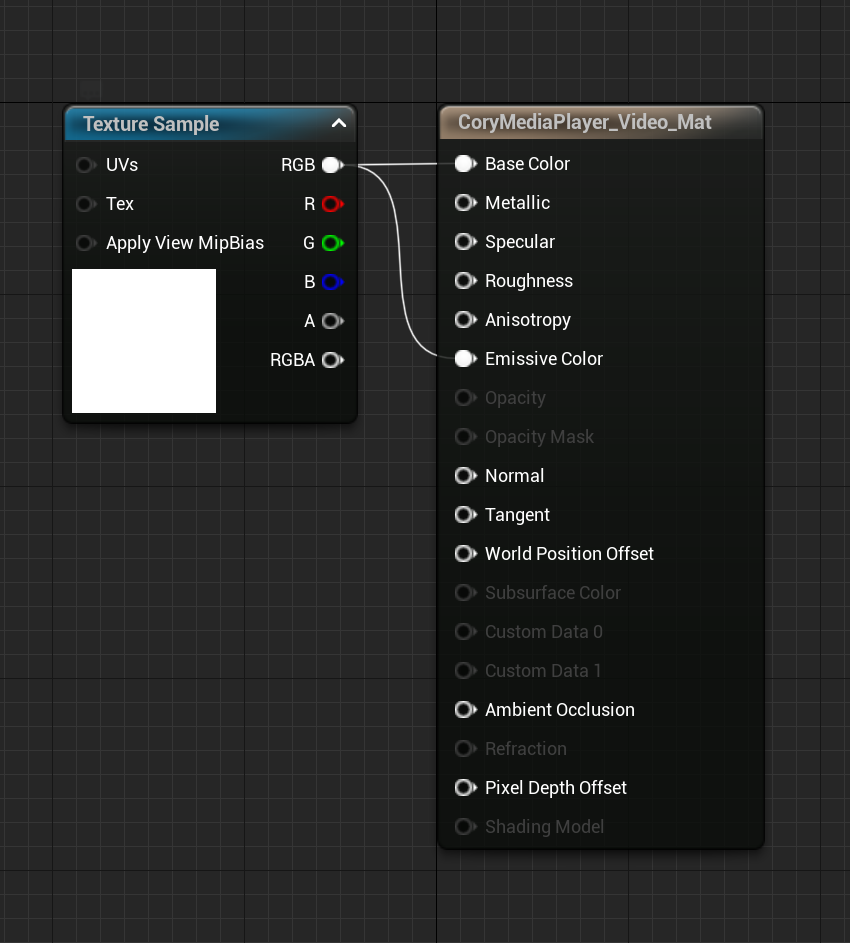
MediaPlayer Video Material: Right-click the MediaTexture and select Create Material. Open this material and connect the RGB output of the Texture Sample node into the Emissive Color input of the MediaPlayer_Video_Mat node. Click save and close this screen.
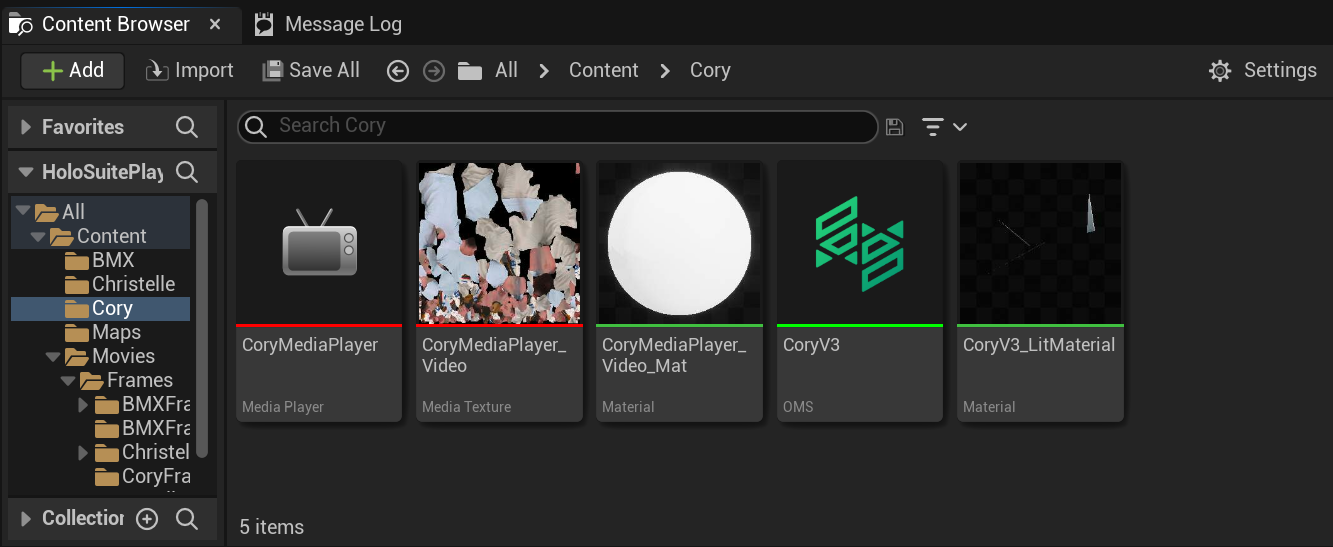
This folder should look like the image below.
Level Sequencer
You are now ready to create our Level Sequence. In the Content folder right-click and select Animation > Level Sequence. This Level Sequence will allow us to load our media source as a track, and drive the OMS playback.
Open this Level Sequence, click the + Track button, and select Media Track. Click the + button on the new Media Track you created, and select the the Media Source created earlier.
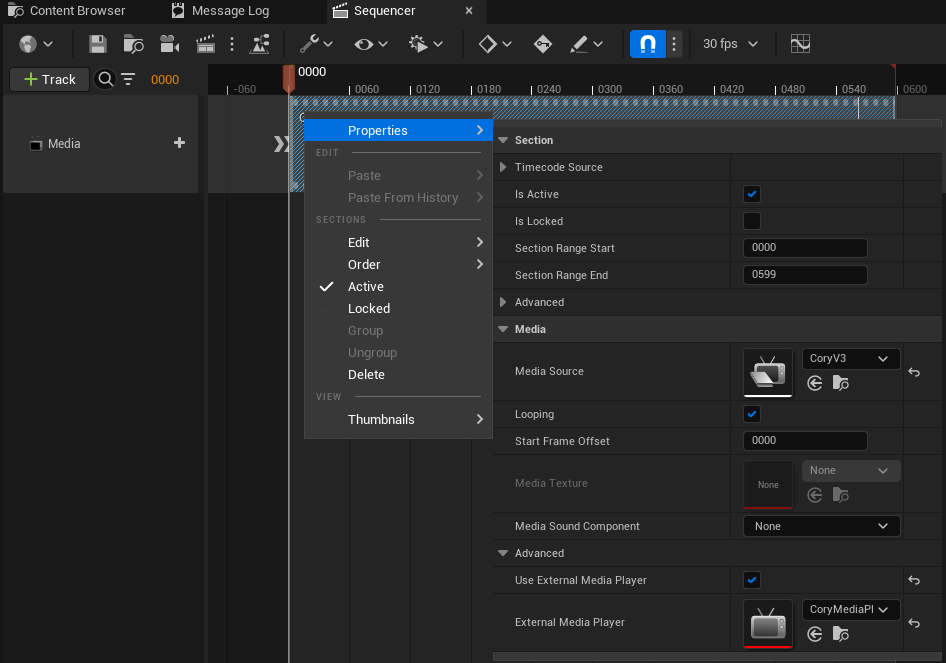
Right-click the Media Source on the timeline, and under the properties menu, set the Section Range End to the number of frames in your sequence -1. Scroll further down the properties menu and enable Use External Media Player. Lastly in the properties menu, set the External Media Player to the one you created in step 3 of the Mesh, Texture, and Material setup section.
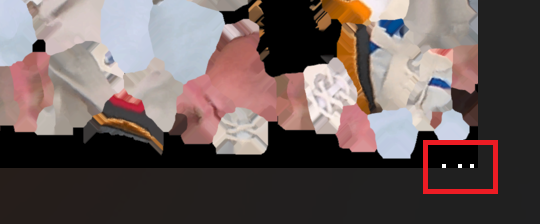
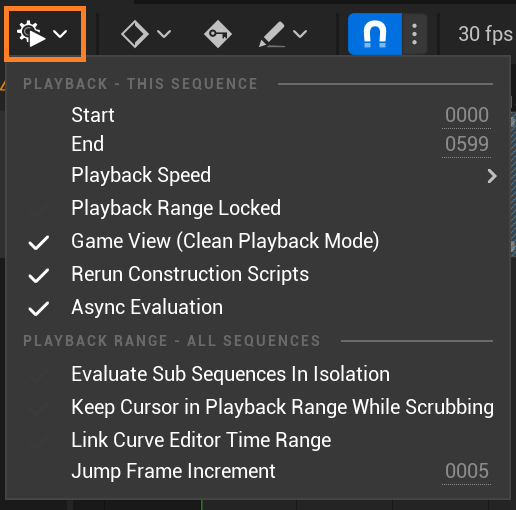
You need to ensure the Level Sequence matches the playback properties of you clip by setting the fps drop down at the top of the Level Sequencer to match the framerate of your clip. You also need to open the Playback Options menu (see image below) and set the End field to match the frame length of your clip. Click save and close the Level Sequencer.
Now that the Level Sequence has been configured, you can add it to the scene. Drag your Level Sequence from the Content Browser into your scene. In the details panel check the Auto Play option. If you want the clip to loop, this is also where you would set that.
HoloSuitePlayer Actor
You are ready to add the HoloSuitePlayer actor to the scene. In the “Place Actors” panel, type HoloSuite, and drag the HoloSuitePlayer actor class into your scene to create an instance.
Ensure the actor instance is selected and set the following settings in the details panel.
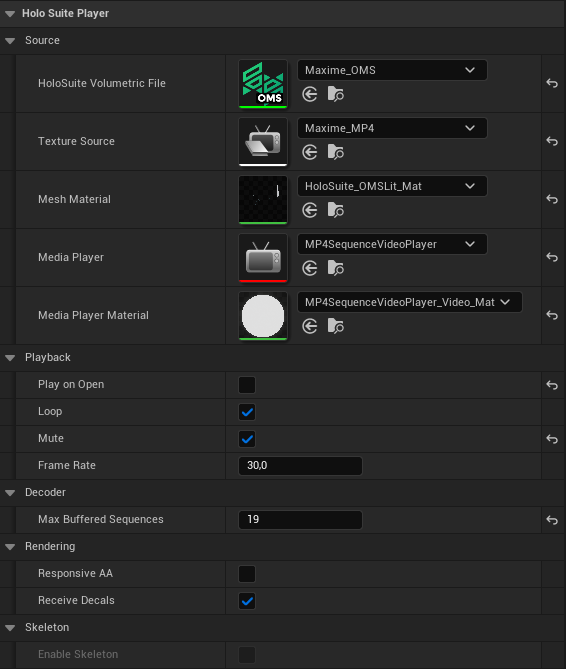
Source
HoloSuite Volumetric File: Select the OMS file for your clip. This contains the meshes for your clip.
Texture Source: Set this to the Media Source. This would be your MP4 file, or the Image Media Source you created earlier.
Mesh Material: Select the lit or unlit material you created on step 2 of the Mesh, Texture, and Material setup section.
Media Player: Select the Media Player created on step 3 of the Mesh, Texture, and Material setup section.
Media Player Material: Select the Media Player Video Material you created on step 5 of the Mesh, Texture, and Material setup section.
Playback
Play on Open: Ensure this is disabled, as it will be the Level Sequence that drives playback.
Mute: Due to a limitation of Unreal Engine’s MediaPlayer, audio support is not yet available in the HoloSuite Player when using the Sequencer. Please enable Mute in order for playback to work.
Frame Rate: Ensure this matches the frame rate of your Media Source.
The HoloSuitePlayer is fully configured. All that is left to do is click File/Save All to ensure all of the files and changes you made are saved, and either scroll through the timeline or click play to experience OMS playback using the Sequencer.
AVV Sequencer Playback Configuration
HoloSuitePlayer Actor
In order to control playback of an AVV volumetric clip through UE’s Sequencer, you need to import the source file into your project and setup an instance of a HoloSuitePlayer actor in your scene. The initial configuration of the actor is similar to the one presented in the Player Configuration Example.
The only extra step required is ensuring the External Timing parameter is enabled, as that will inform the player that an external entity (in this case, the Level Sequence) will be controlling playback and not the actor itself.
Volumetric Video Track
Once you create a Level Sequence and place it in the desired scene, open it in the Sequencer. Then, click the + Track button, and select Volumetric Video Track. Right-click on the track you just created and choose Add Section. An AVV section will be created for you, which you can configure by right-clicking on the track again, choosing Edit Section and assigning the HoloSuitePlayer instance created earlier as the AVV > Player parameter.
The HoloSuitePlayer is fully configured. All that is left to do is click File/Save All to ensure all of the files and changes you made are saved, and either scroll through the timeline or click play to experience AVV playback using the Sequencer.